
Power Wagon Rebuild (Update: 11/5/08)


Thread Starter
1.0 BAR
Joined: Feb 2003
Posts: 461
From: Wisconsin
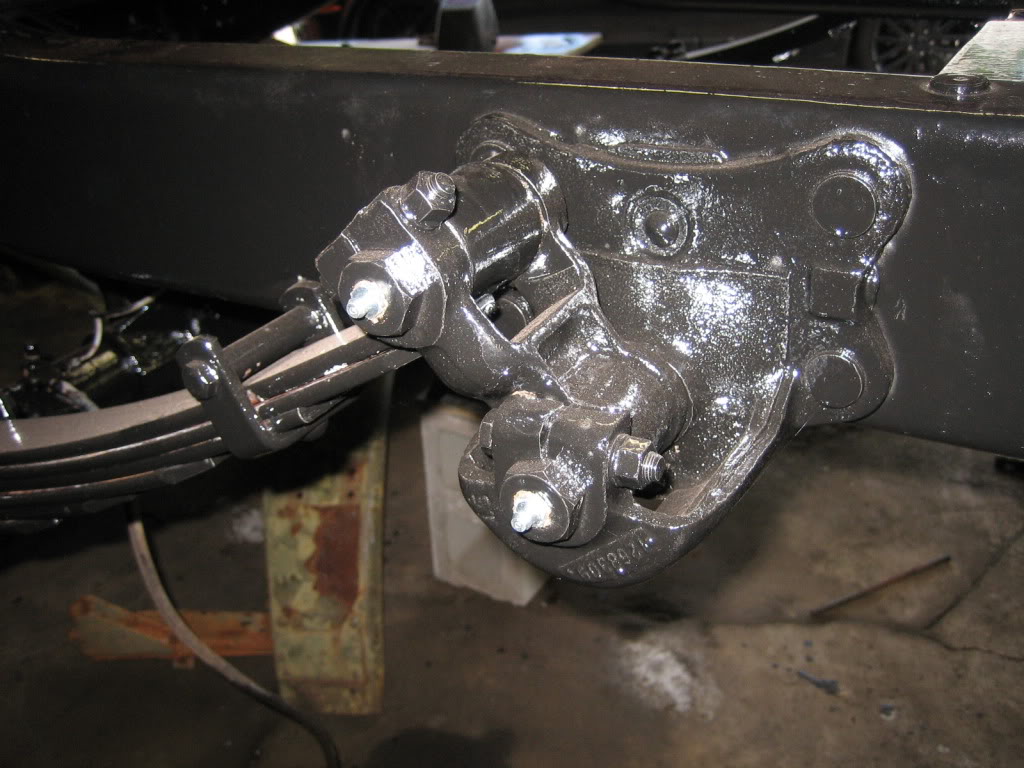
well, finally got around to another update. Sorry they are few and far between, the other half still is unemployed, so disposable cash for the truck has gotten scarce. I did get the "new" body down here, and, took a few pictures of the typical rust spots to show how solid it is. I also got the skid plate in, as well as the hydraulic tank, and the air tank. I also rebuilt the front hubs with new bearings, brakes, and seals, and, am going to convert the rear to disc, after adding up the cost of rebuilding the rear drums and figuring out that a disc conversion is only about $40 more. Lastly, I installed new grease zerks, and my new master cylinder:
rear hubs torn down:
A few of the new grease zerks:
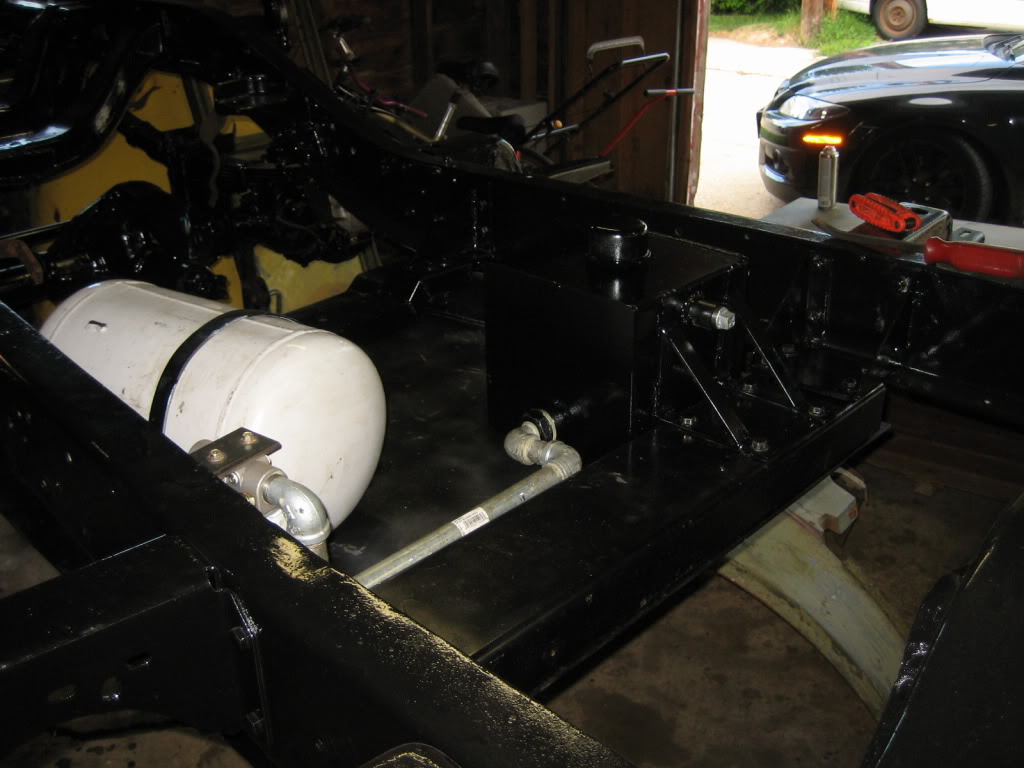
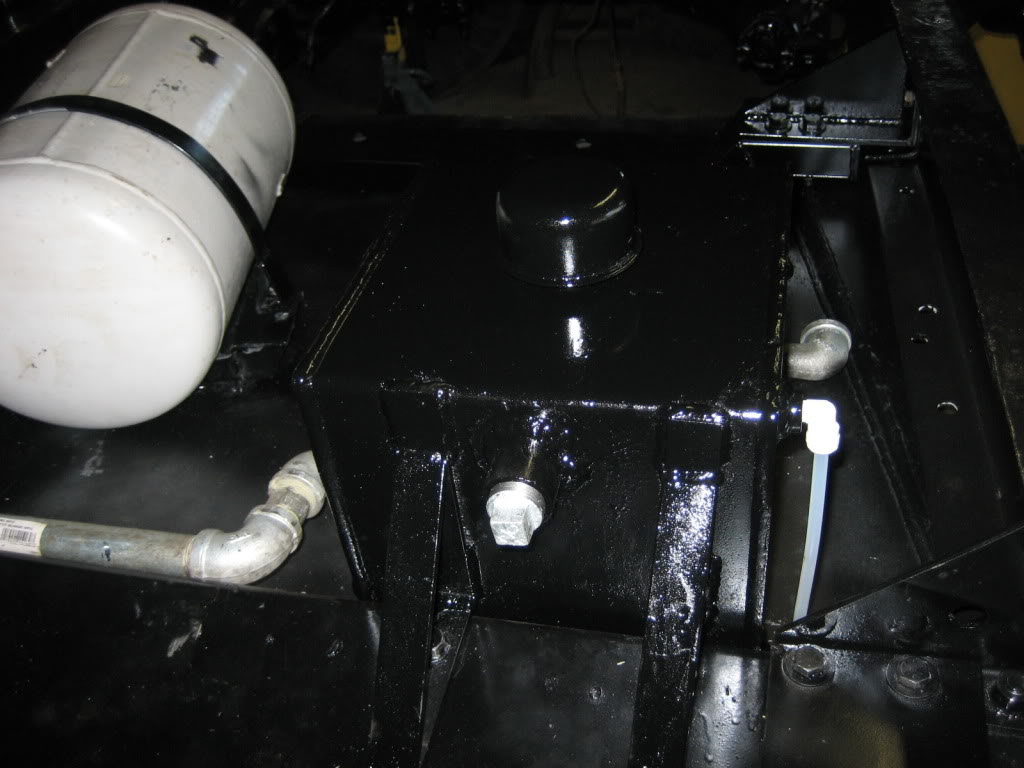
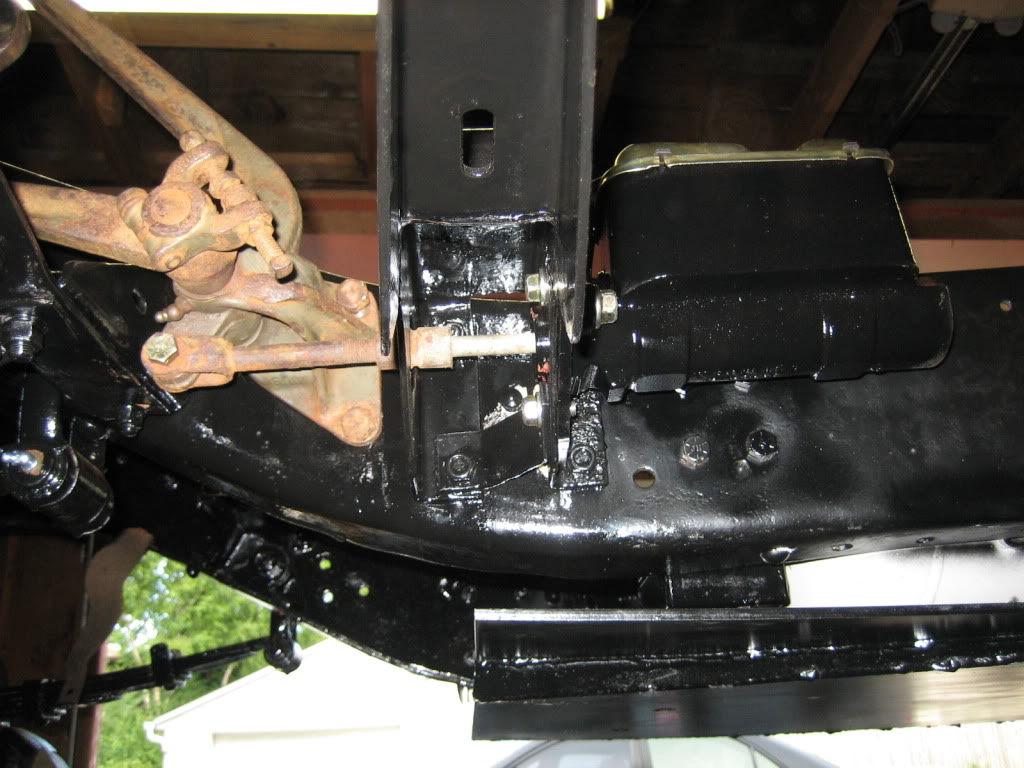
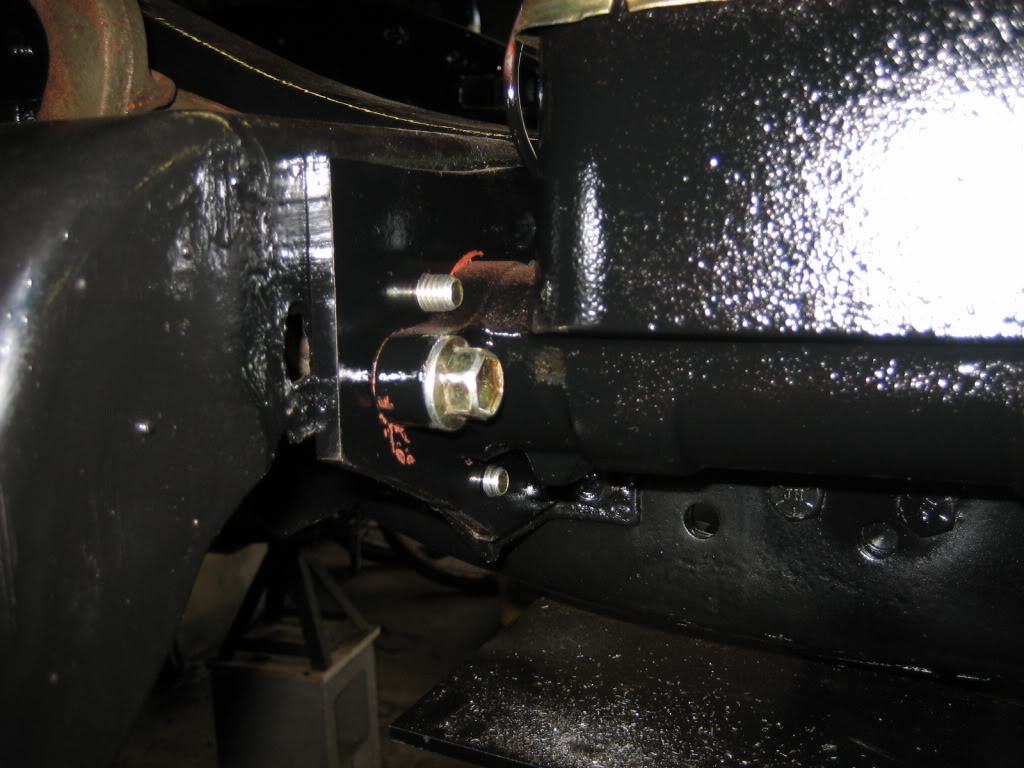
Hydro and air tanks in, as well as the skid plate. Note the rear fill plug for the hydro tank, as well as the sight tube for oil level on the passenger's side. Both things I added to make maintenance in the future easier:
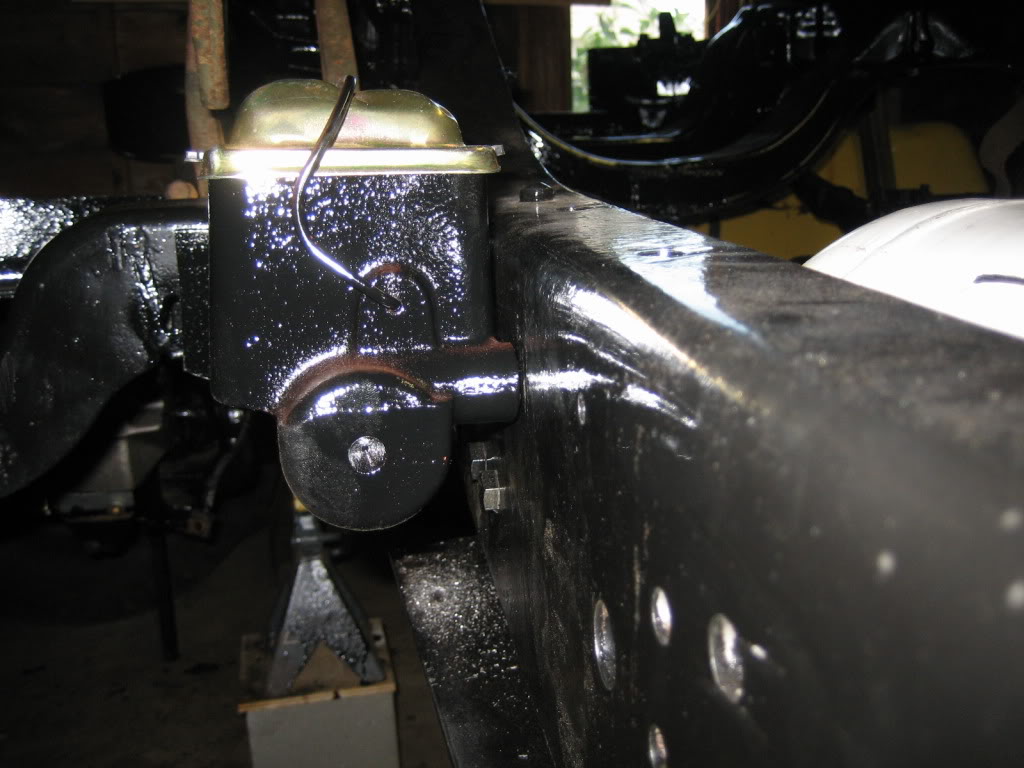
Master cylinder in... I made the 1/4" plate that bolts to the 3 original mounting holes, and then the new cylinder (from a 1980 Chevy C30) bolts to that. All holes are drilled and tapped, so that I didnt have to swiss cheese the running board mount any further than it already is:
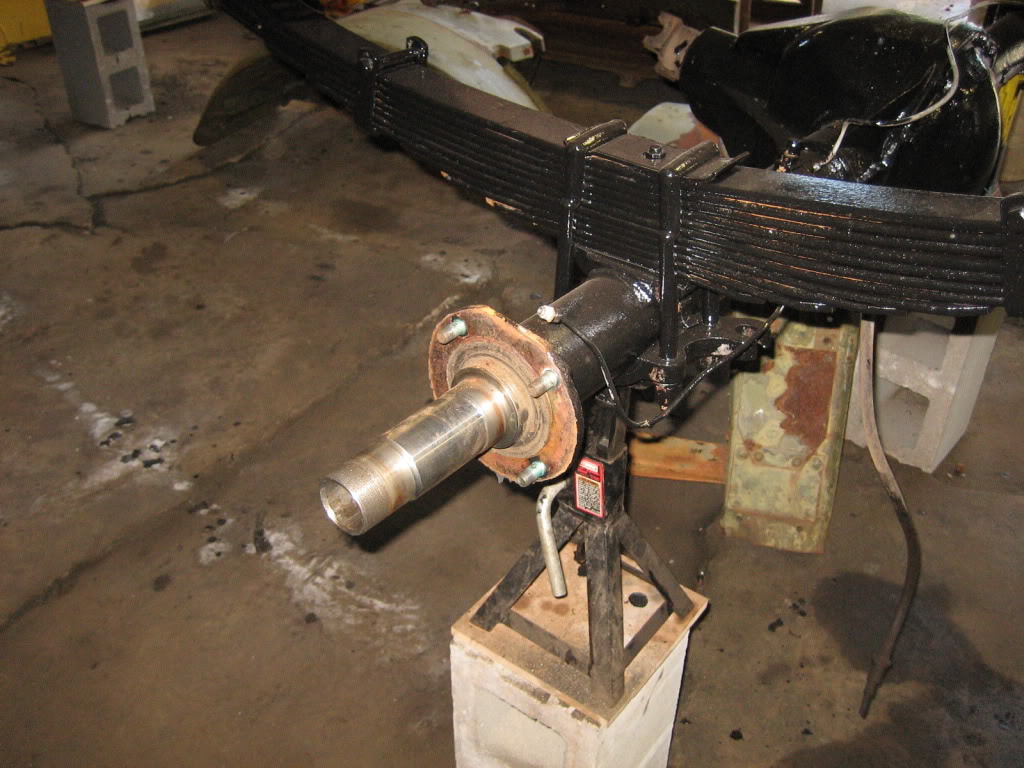
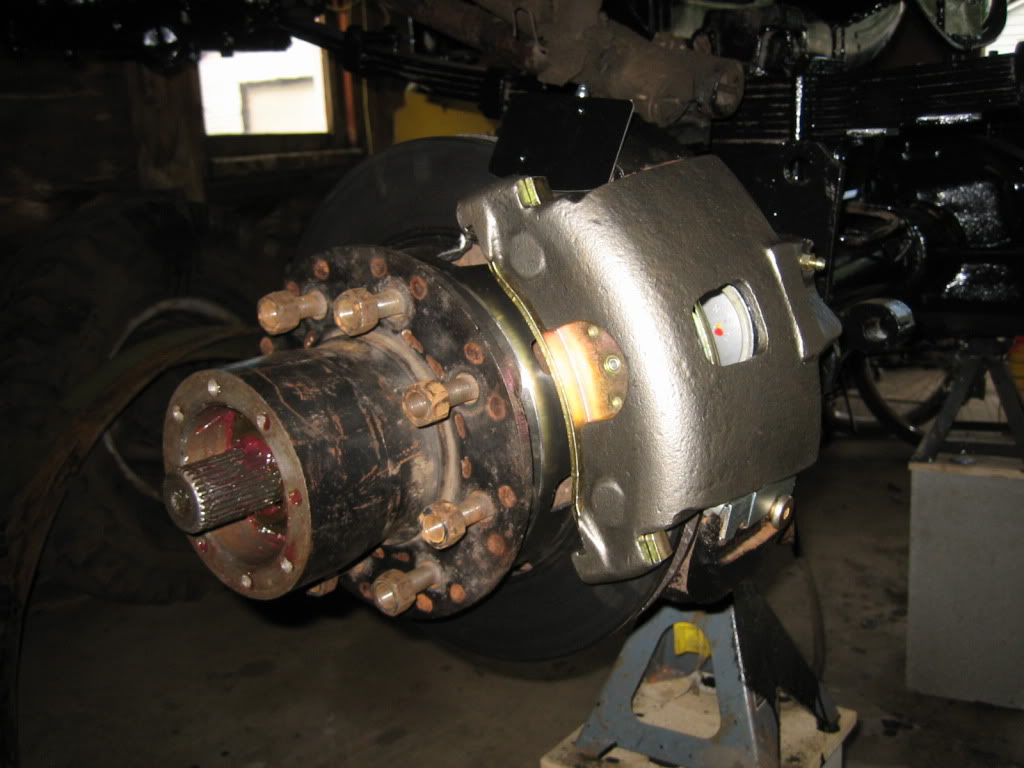
Rebuilt front hubs... I need a set of Dana 60 front drive flanges for a dodge D60, if anyone happens to have a set layin around...
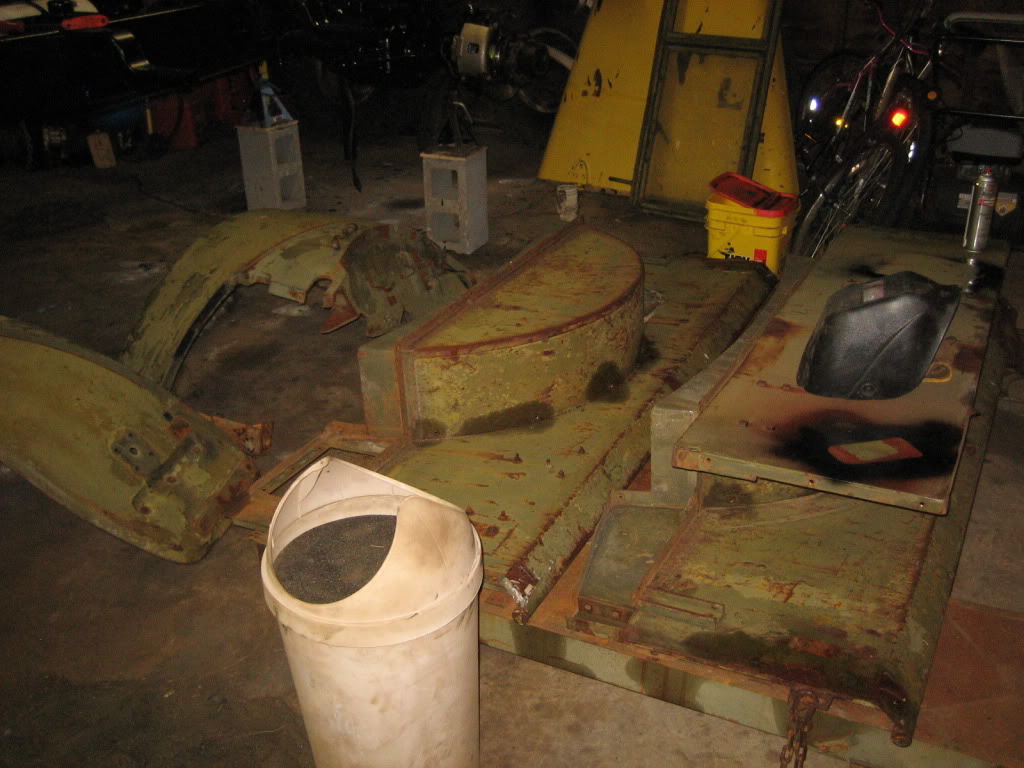
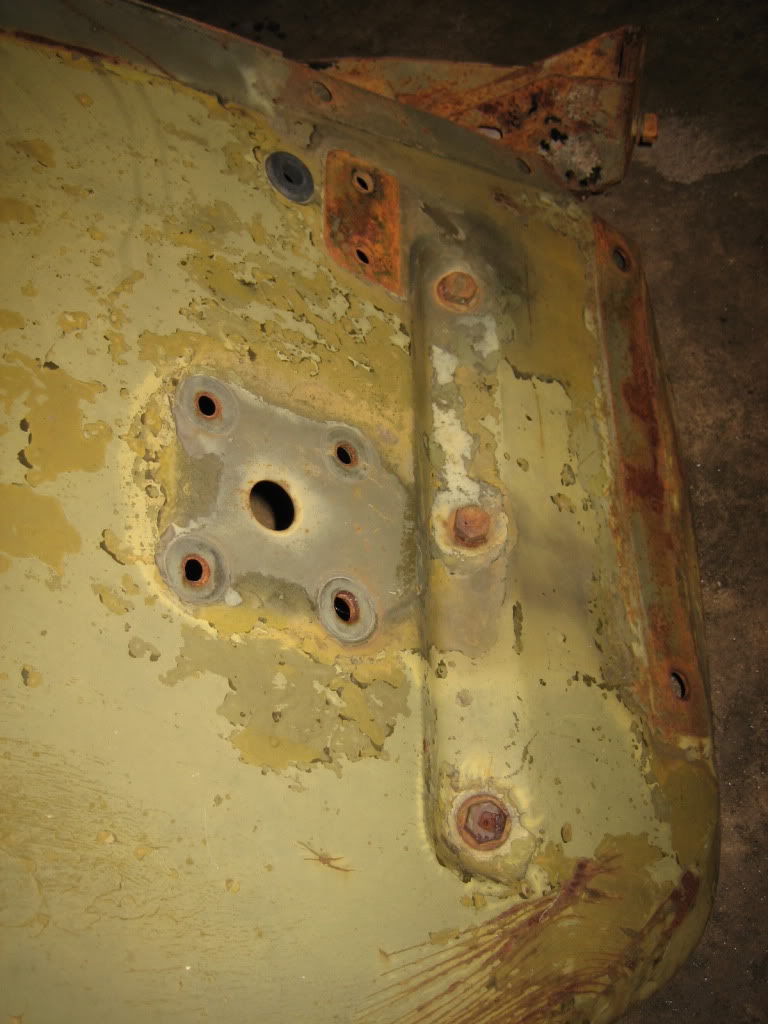
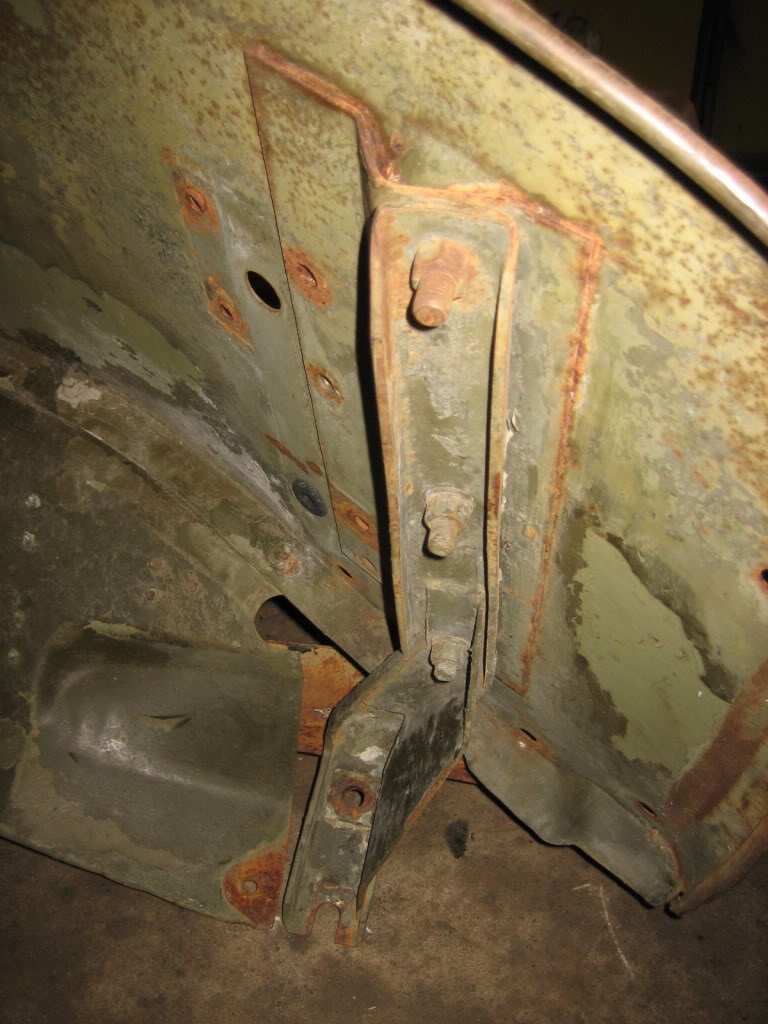
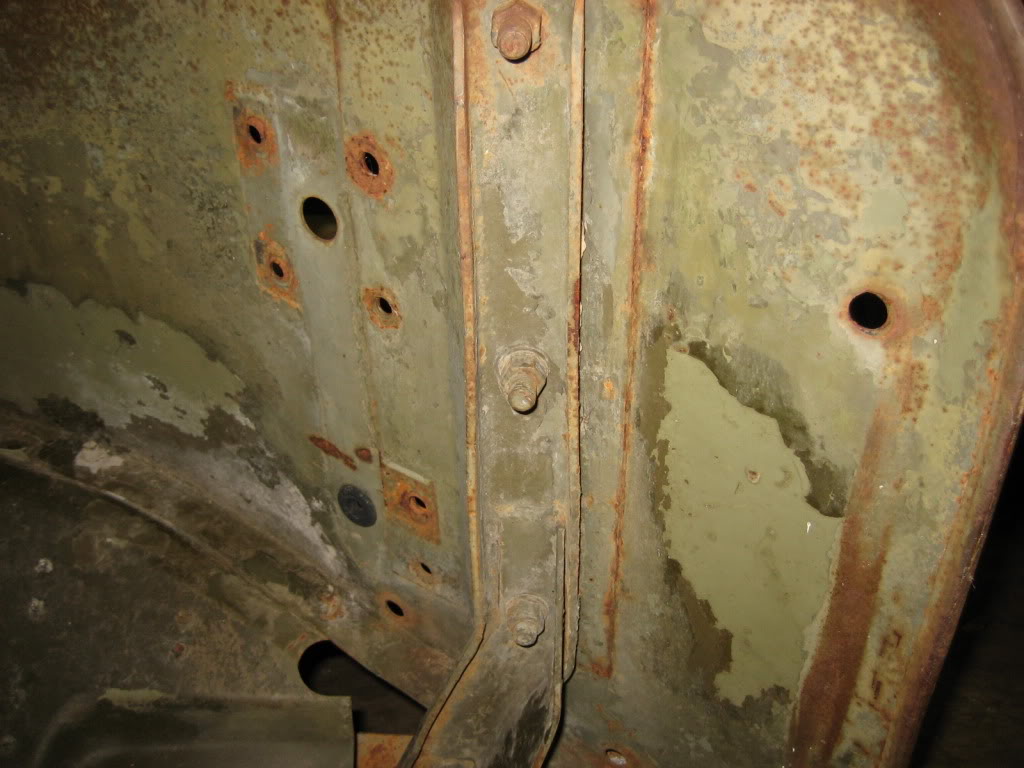
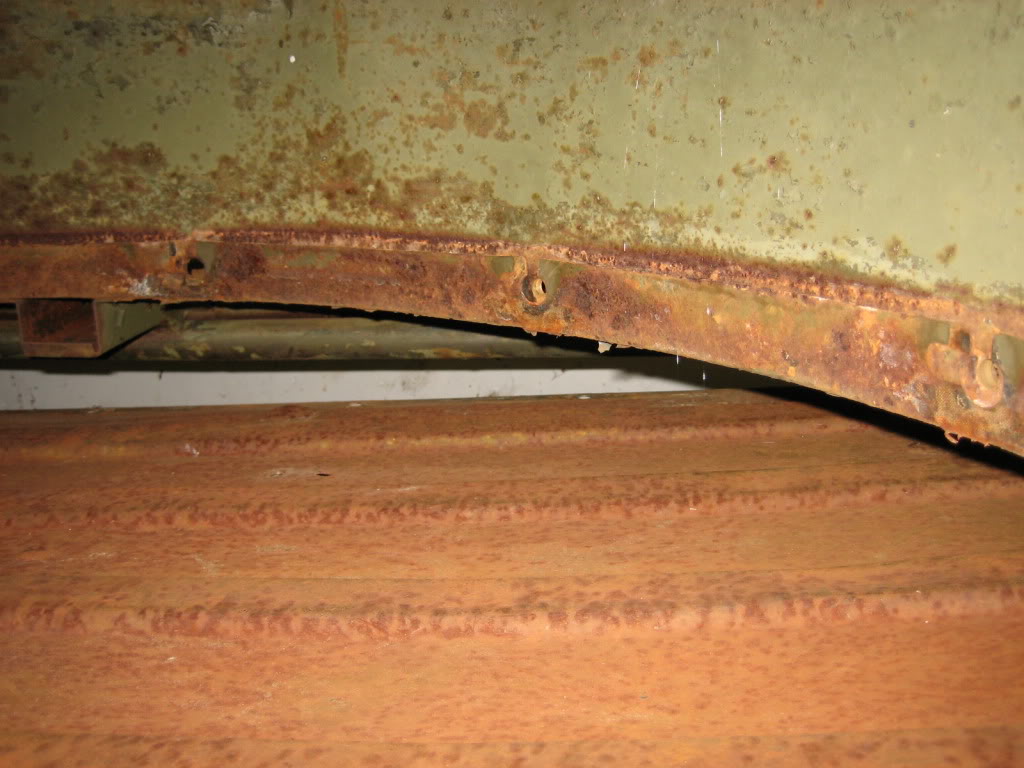
And, last but not least, a few shots of the "new" almost rust free AZ body. The ony places I've found that need new metal are the passengers side of the window frame, and the battery box. I cut the old battery box out of my cab, as, ironically, it was the only solid place left. The pictures below show a few of the typical bad rust spots, and how good a shape this body is. I tore the bed down, and, between the new bed floor, and old, I should be able to make one nice one:
rear hubs torn down:
A few of the new grease zerks:
Hydro and air tanks in, as well as the skid plate. Note the rear fill plug for the hydro tank, as well as the sight tube for oil level on the passenger's side. Both things I added to make maintenance in the future easier:
Master cylinder in... I made the 1/4" plate that bolts to the 3 original mounting holes, and then the new cylinder (from a 1980 Chevy C30) bolts to that. All holes are drilled and tapped, so that I didnt have to swiss cheese the running board mount any further than it already is:
Rebuilt front hubs... I need a set of Dana 60 front drive flanges for a dodge D60, if anyone happens to have a set layin around...
And, last but not least, a few shots of the "new" almost rust free AZ body. The ony places I've found that need new metal are the passengers side of the window frame, and the battery box. I cut the old battery box out of my cab, as, ironically, it was the only solid place left. The pictures below show a few of the typical bad rust spots, and how good a shape this body is. I tore the bed down, and, between the new bed floor, and old, I should be able to make one nice one:


Thread Starter
1.0 BAR
Joined: Feb 2003
Posts: 461
From: Wisconsin
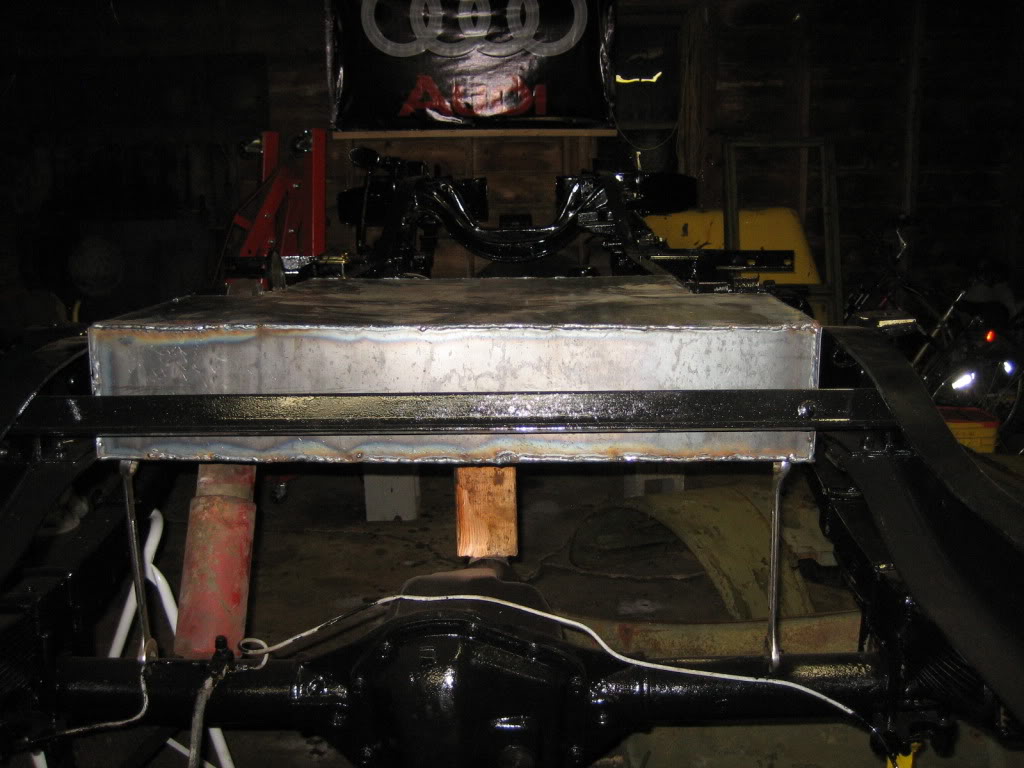
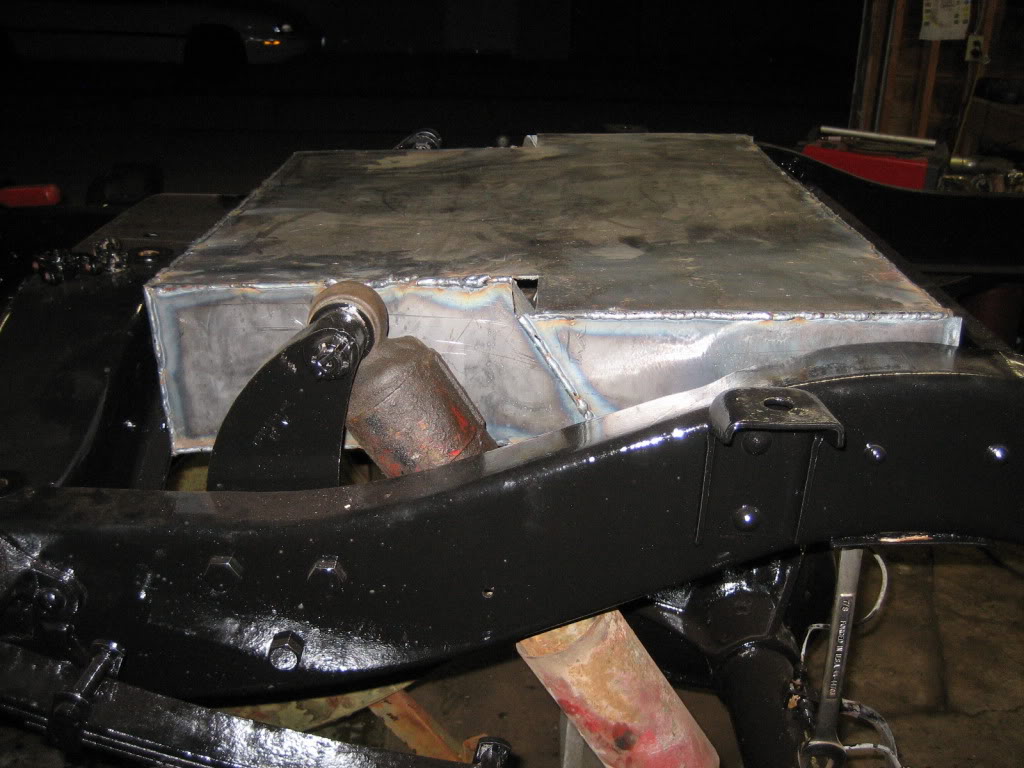
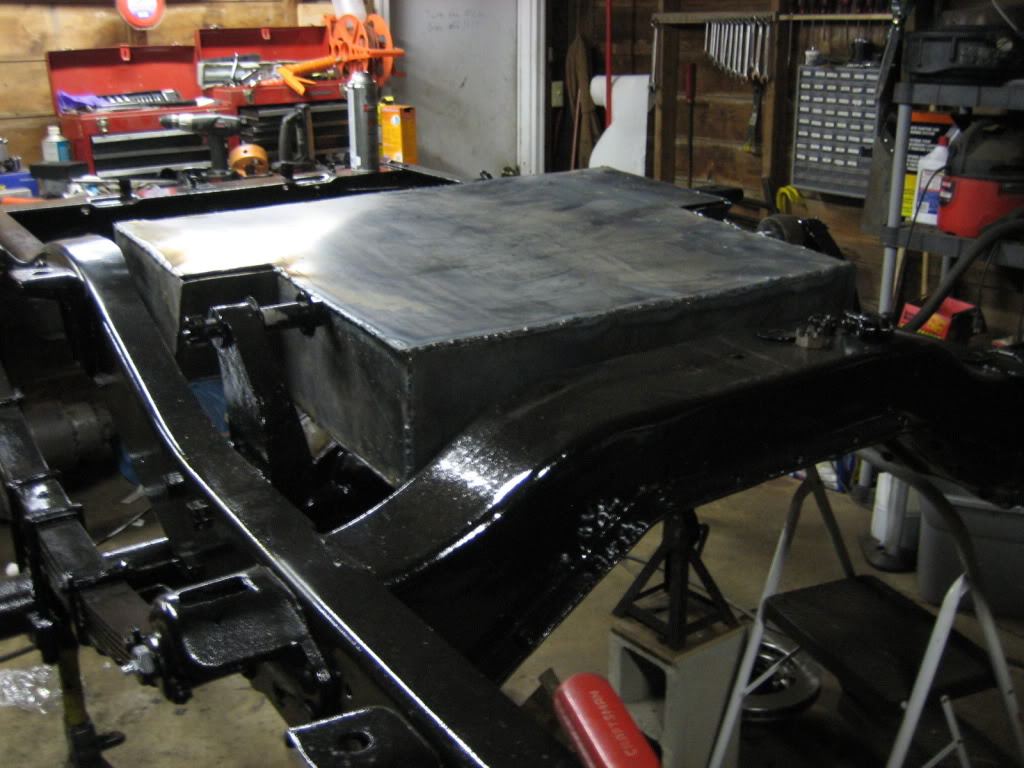
I was showing a friend the rig, and he pointed out something to me I hadn't really thought about before... He goes "So, how big is the tank on this thing?" I said 25 gallons, and he pointed out that, on a good day, keeping my foot out of the twin turbo beast, it will have a dismal range of 250 miles... So, I designed and built the item below... Adds 20 gallons to the capacity, and, I'm going to cook up a shallow, U shaped connector tube with a flanged disconnect surface between the tanks to allow me to have a single fill neck, single tank level sender, and take my feed line off that U shaped low point to creat a slick, gravity feed system to the electric fuel pump, so there is no no more fighting with the thing, trying to get it to prime when I run her dry... I'll also put a drain in at that point, as well as a dirt trap to allow me ot drain off dirt from time to time.
I've got to finish welding in th U pipe, and test fitting it with the original tank, and then I'm going to seal the inside with epoxy gas tank sealer to both prevent rust, as well as seal any pinholes in my less than stellar sheet metal welding (I also have to go back and clean up those ugly welds... they're not meant to be prety, they're meant to seal and be strong first... the be pretty second... lol!).
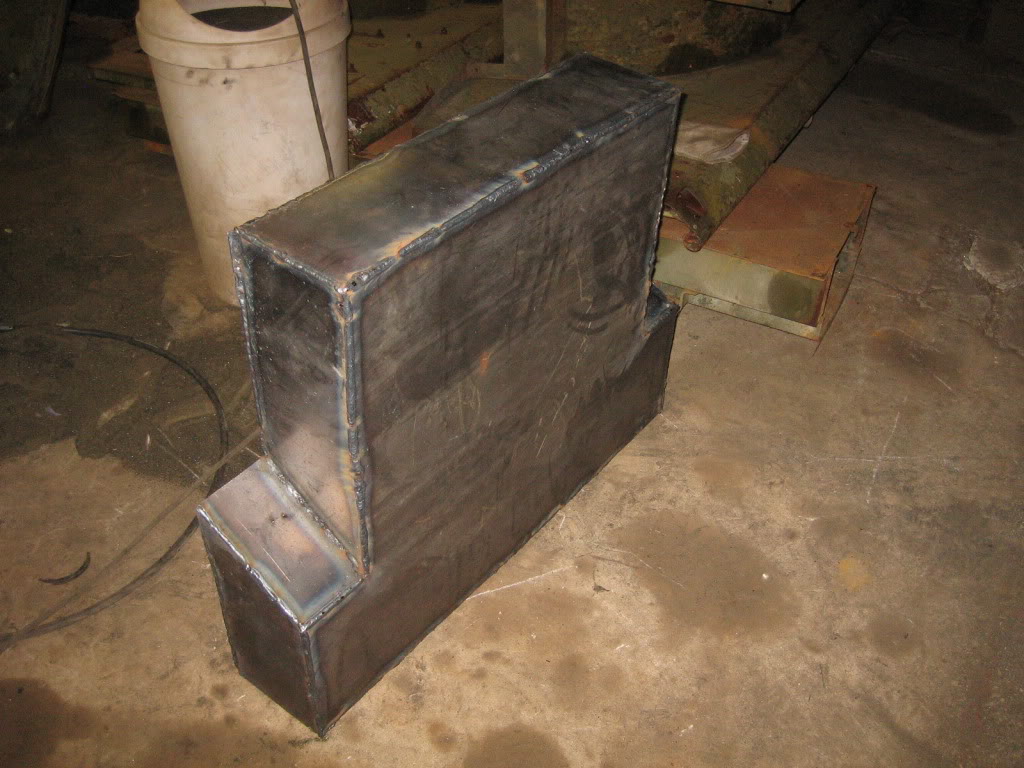
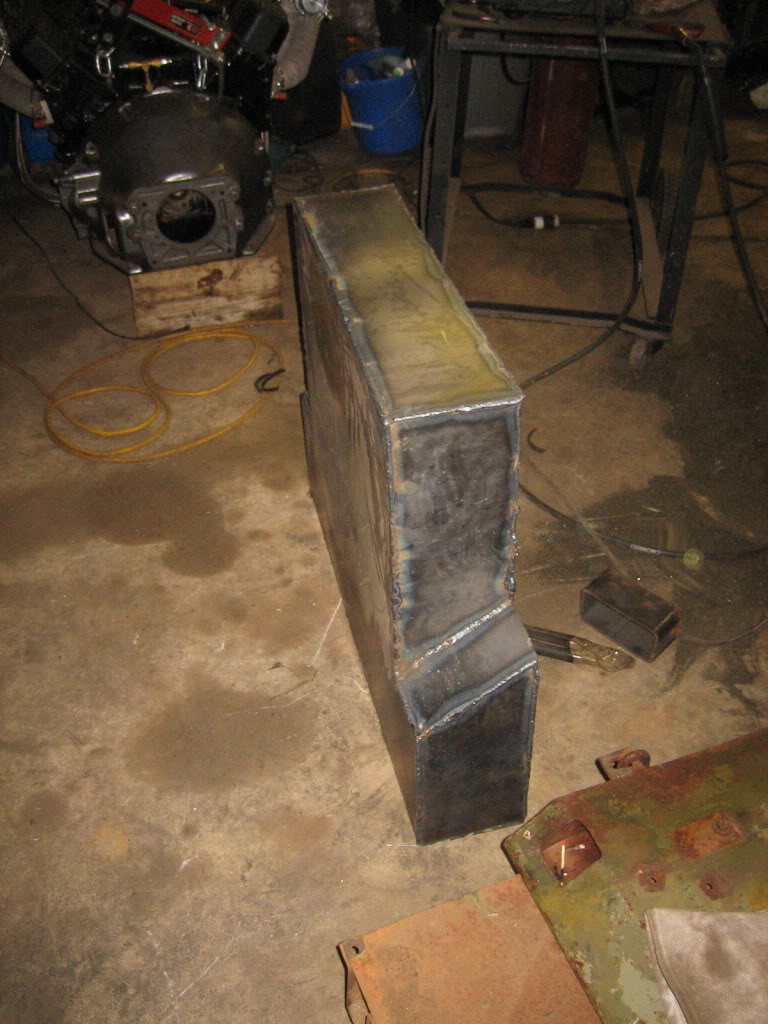
It's sitting a bit high... he wood block was too tall. It will sit about 2" lower, parallel and even with the factory tank in the frame.


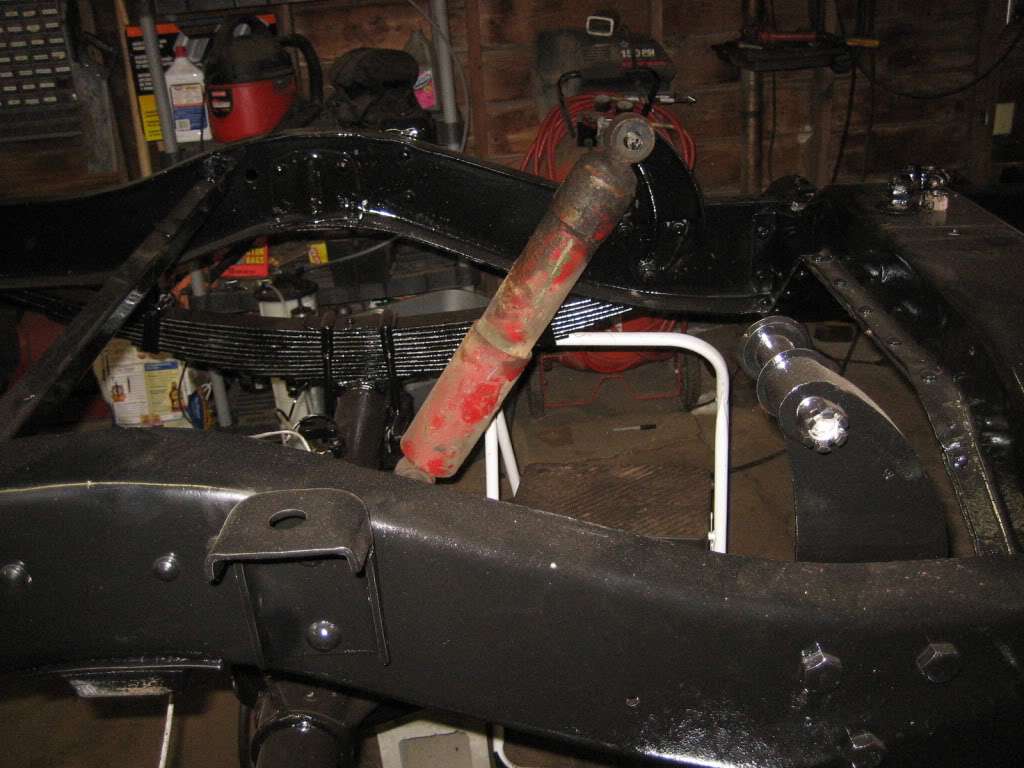
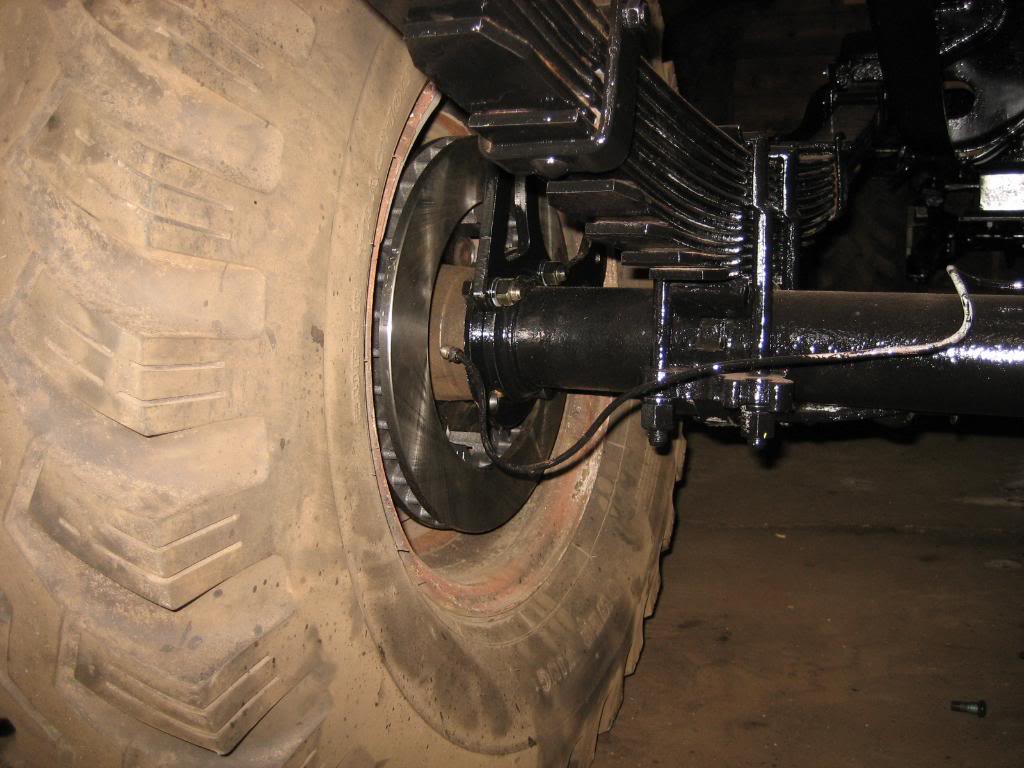
I also decided to convert the rear end to disc, as it was only $40 more than rebuilding the stock drums, and, I ordered my clutch. I went with a Spec Stage 3+, which is a 12" full contact area, sintered carbon metalic disc, with a diaphragm type plate, and the bet part is that its rated to 800 ft-lb, so, it should have enough holding power without having to go to a twin disc setup.
I've got to finish welding in th U pipe, and test fitting it with the original tank, and then I'm going to seal the inside with epoxy gas tank sealer to both prevent rust, as well as seal any pinholes in my less than stellar sheet metal welding (I also have to go back and clean up those ugly welds... they're not meant to be prety, they're meant to seal and be strong first... the be pretty second... lol!).
It's sitting a bit high... he wood block was too tall. It will sit about 2" lower, parallel and even with the factory tank in the frame.
I also decided to convert the rear end to disc, as it was only $40 more than rebuilding the stock drums, and, I ordered my clutch. I went with a Spec Stage 3+, which is a 12" full contact area, sintered carbon metalic disc, with a diaphragm type plate, and the bet part is that its rated to 800 ft-lb, so, it should have enough holding power without having to go to a twin disc setup.
Thread Starter
1.0 BAR
Joined: Feb 2003
Posts: 461
From: Wisconsin
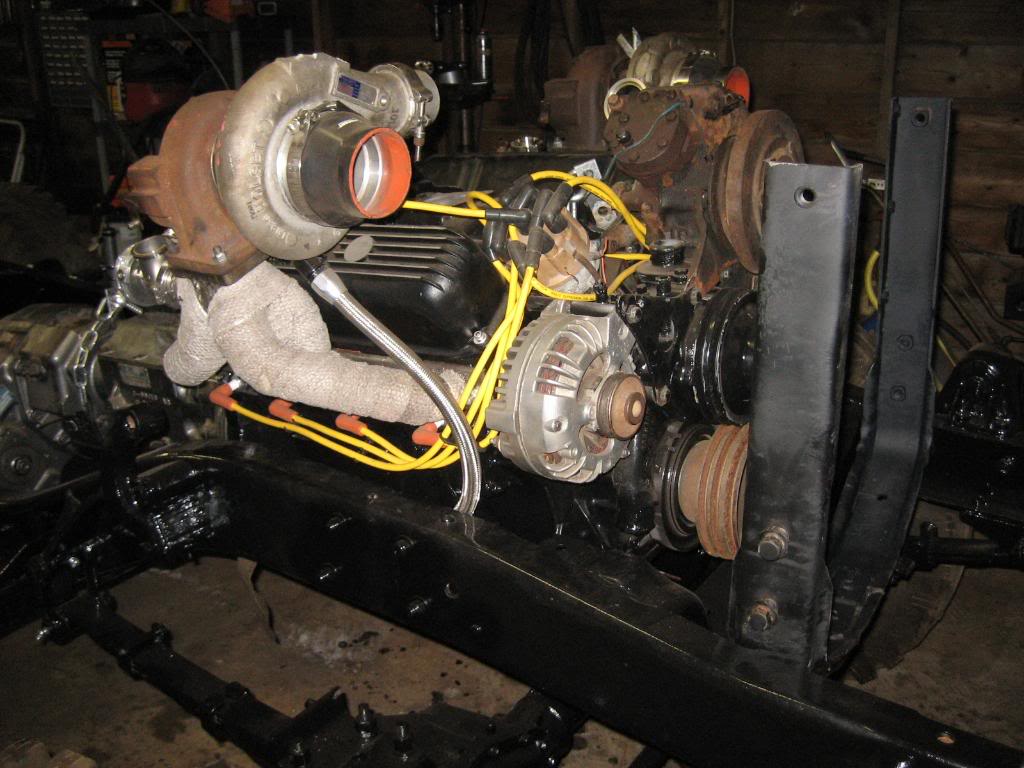
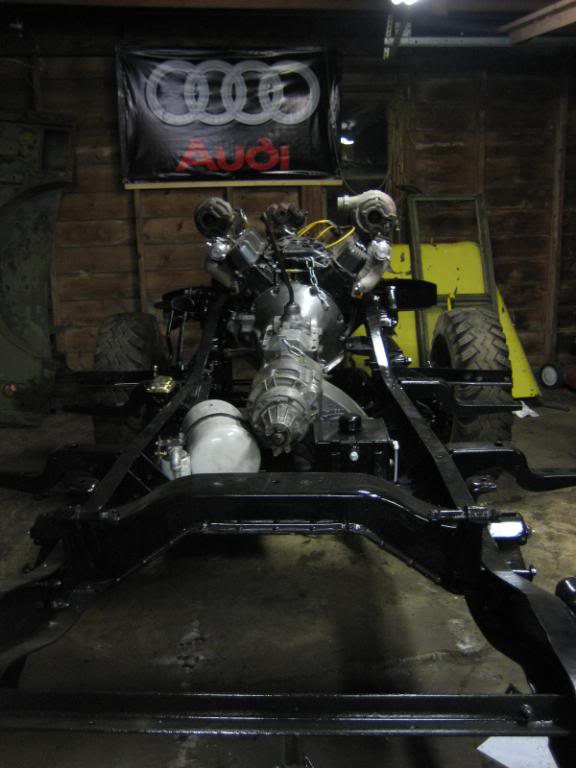
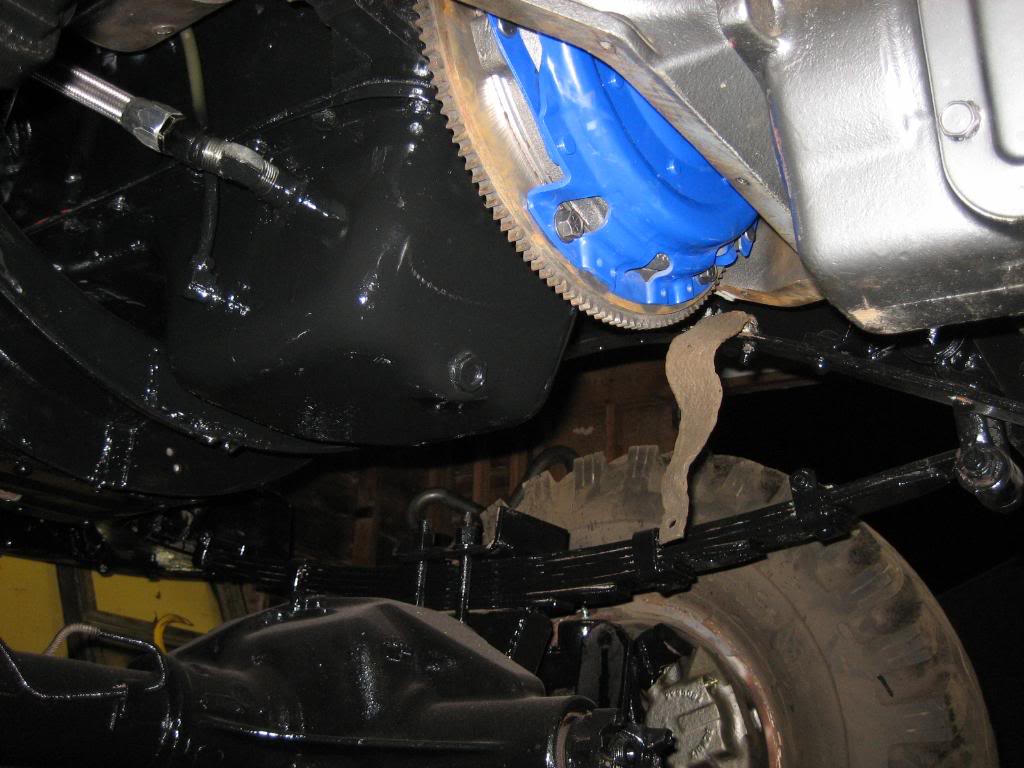
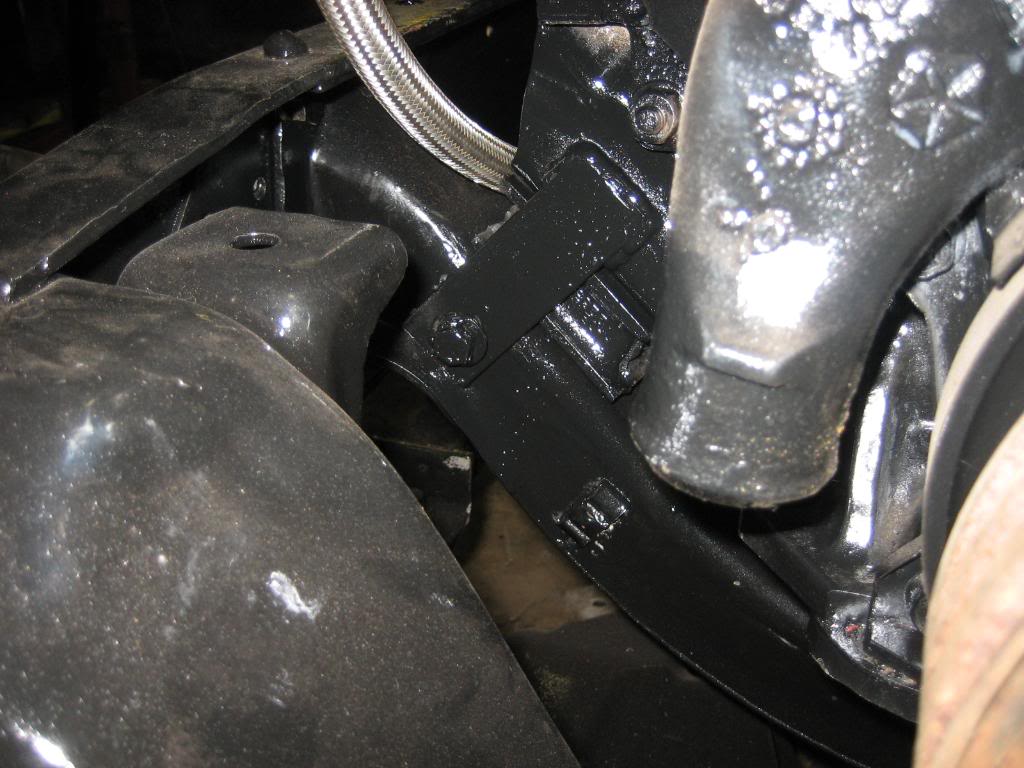
well, we reached a milestone last night:
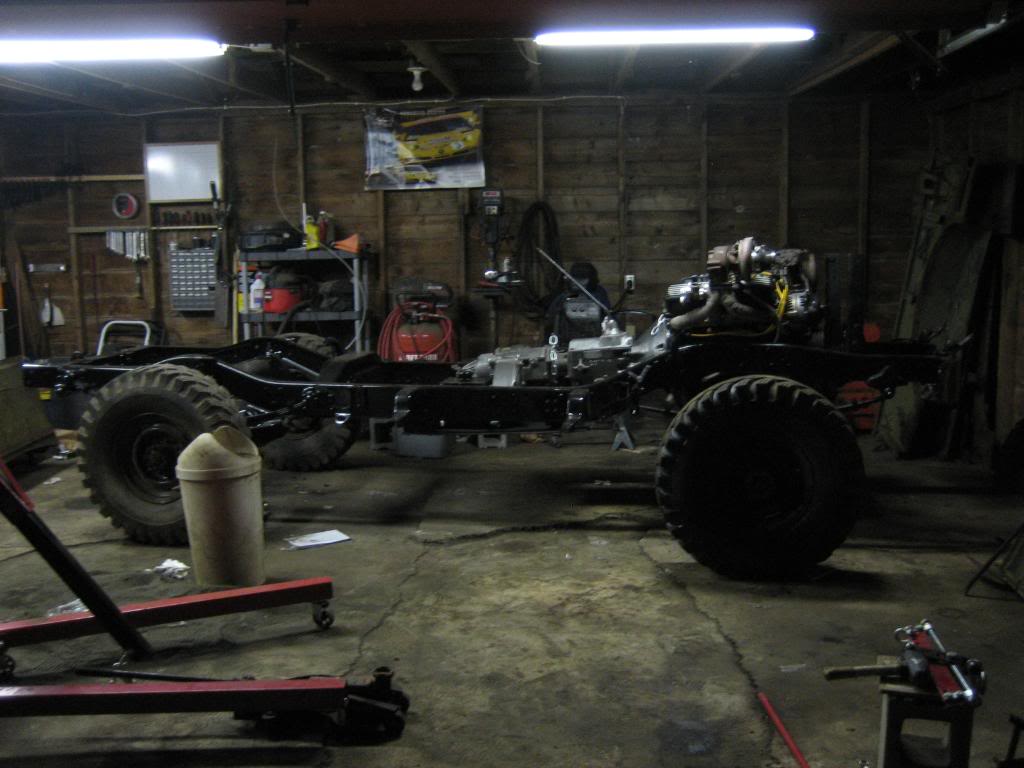
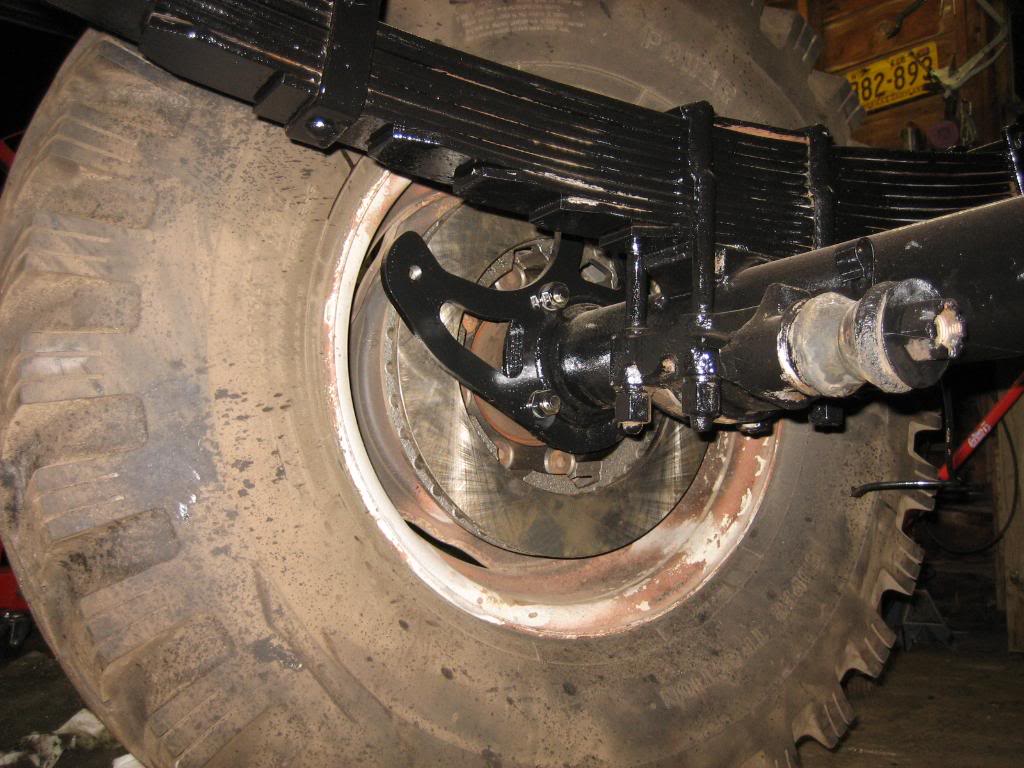
4 wheel discs... No calipers yet, waiting till I need them, so, I can spend the cash on stuff I need now:
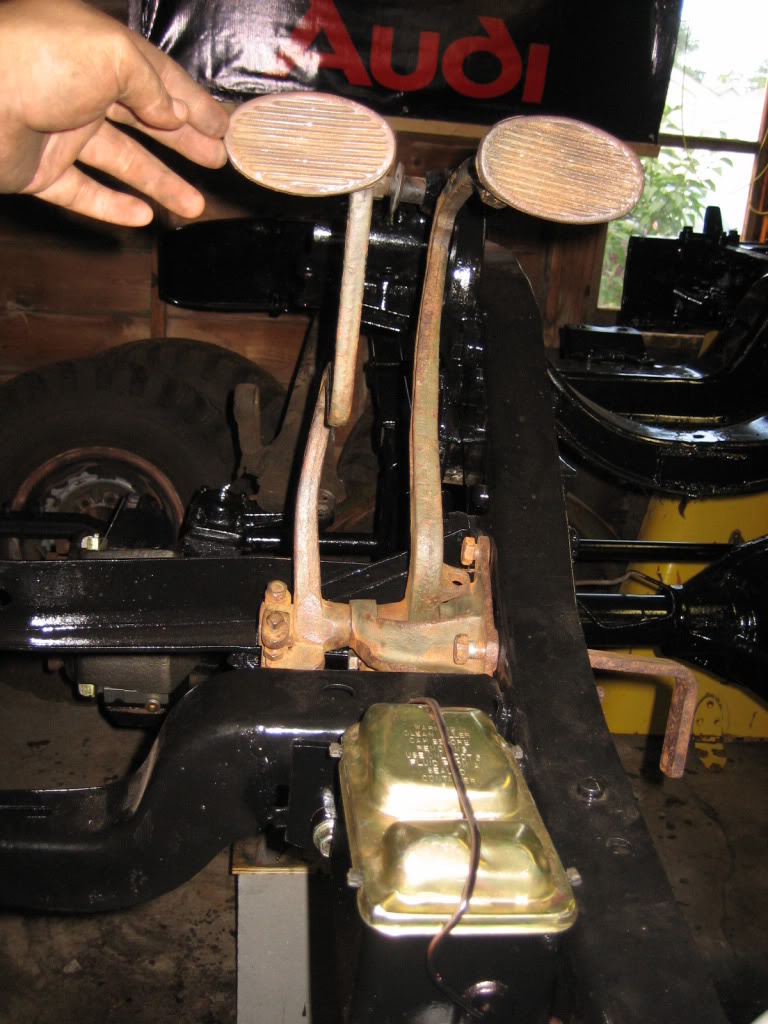
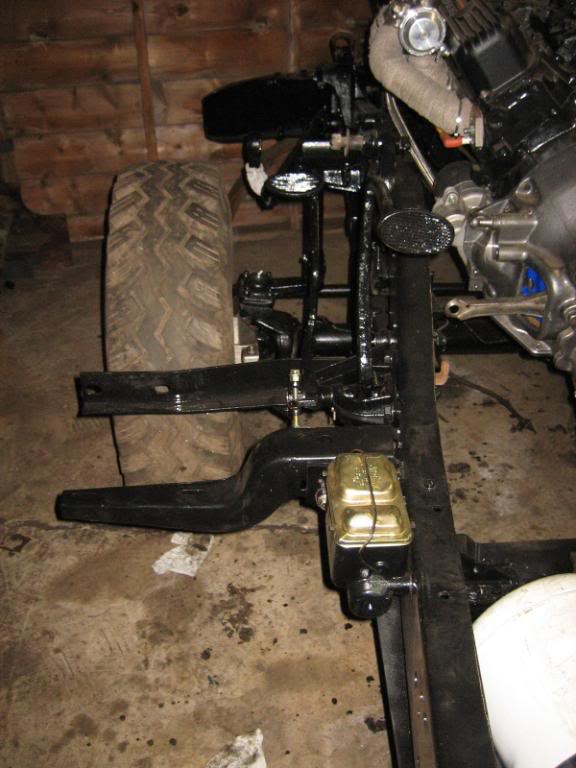
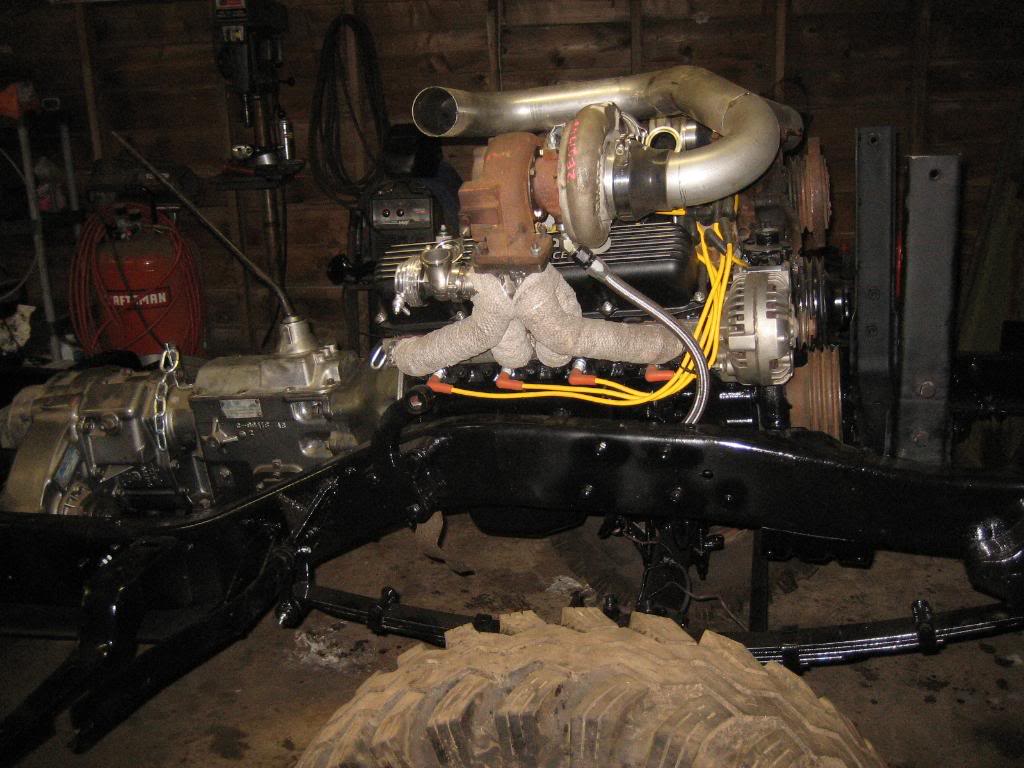
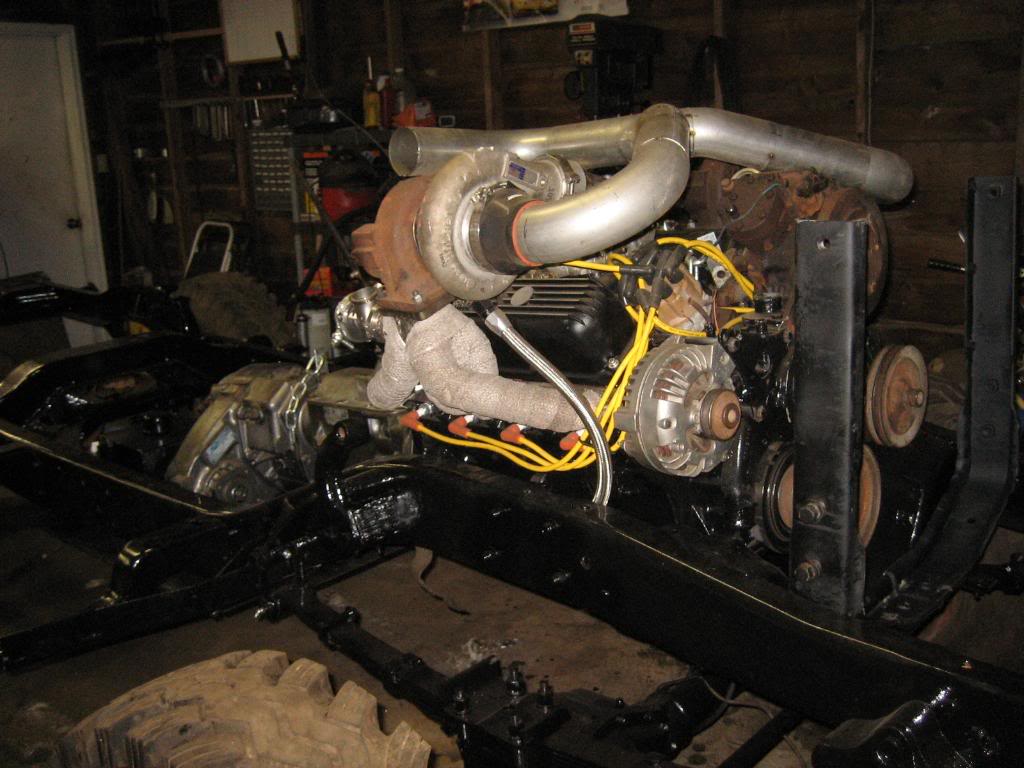
got the brake and clutch pedals done:
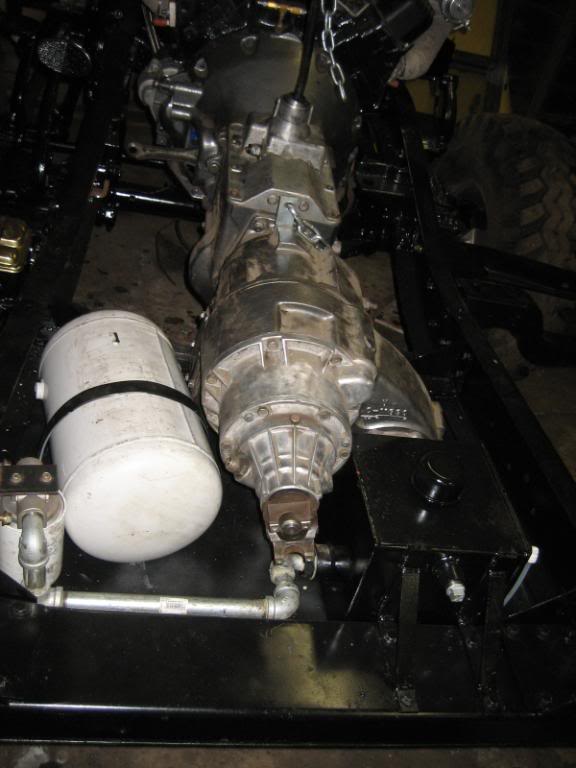
plenty of space for the clutch and starter:
speaking of clutches... this one is rated to 800 ft-lb...
fits just like I mocked it up:

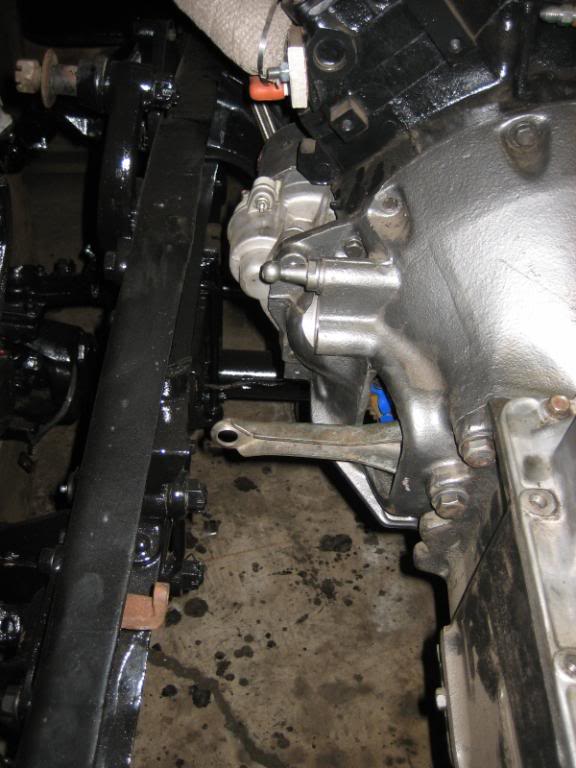
even the tourque limiter lined back up:
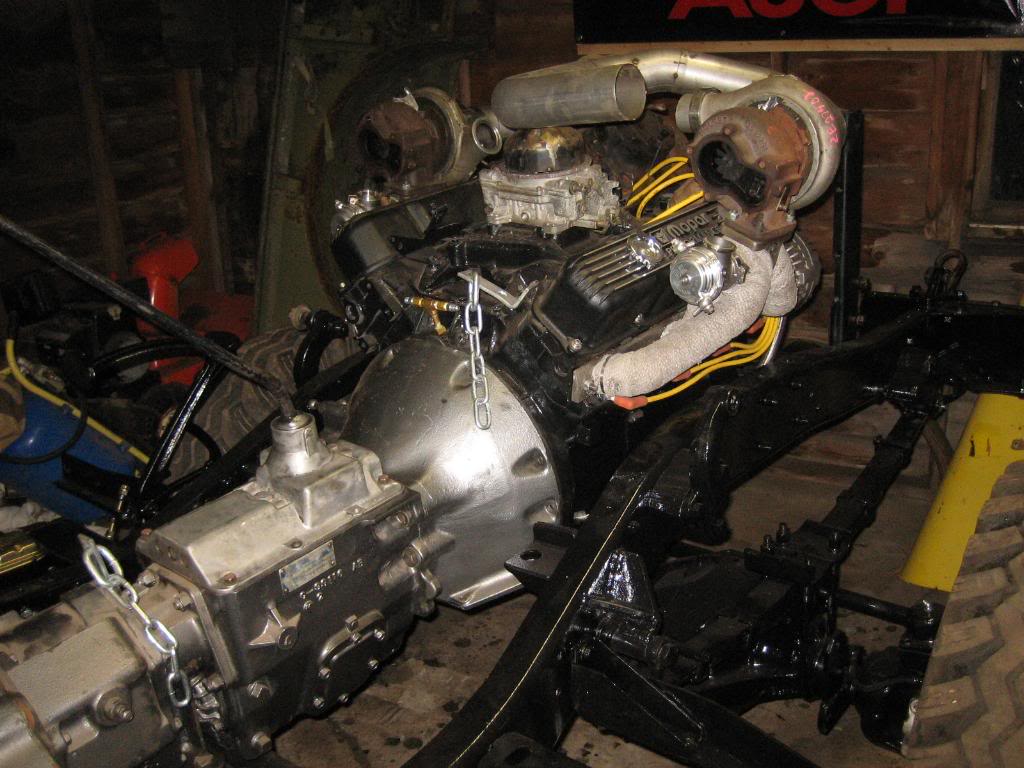
thats a mean lookin big block:

4 wheel discs... No calipers yet, waiting till I need them, so, I can spend the cash on stuff I need now:
got the brake and clutch pedals done:
plenty of space for the clutch and starter:
speaking of clutches... this one is rated to 800 ft-lb...
fits just like I mocked it up:
even the tourque limiter lined back up:
thats a mean lookin big block:


