
Power Wagon Rebuild (Update: 11/5/08)


Thread Starter
1.0 BAR
Joined: Feb 2003
Posts: 461
From: Wisconsin
Update:
picked up the air storage tank for the on board air system. I got a little 5 gallon tank from Menards, and, am working on making mounts for it. I also did something I said I wouldnt do, and that is add up the cost... so far, I'm $3700 in... Which, isn't that bad, considering almost 1400 of that is tools, my welder, grinder, and other odds and ends.
The 1.5" pipe will be in tomorrow, so, hopefully I can at least get started on the headers before leaving for my next business trip...
Thread Starter
1.0 BAR
Joined: Feb 2003
Posts: 461
From: Wisconsin
another update:
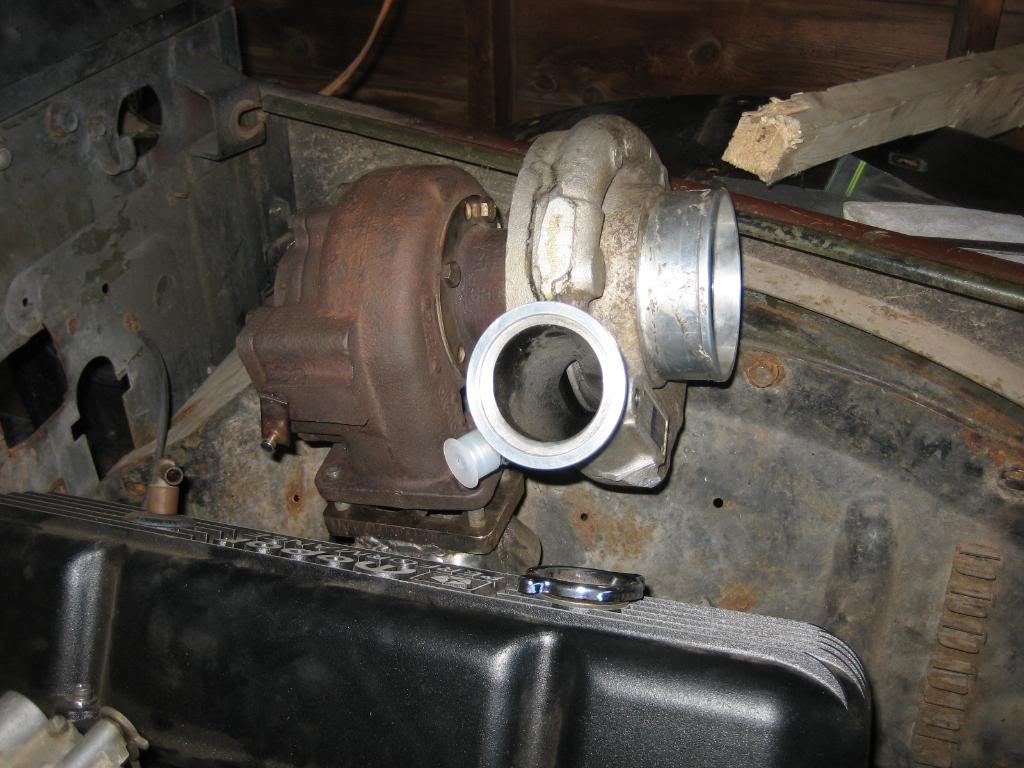
Picked up a York model 210 A/C compressor off an old ford for $25. I'll work good for my on board air system. Need to clean it up and build brackets for it, and I'll be good to go.
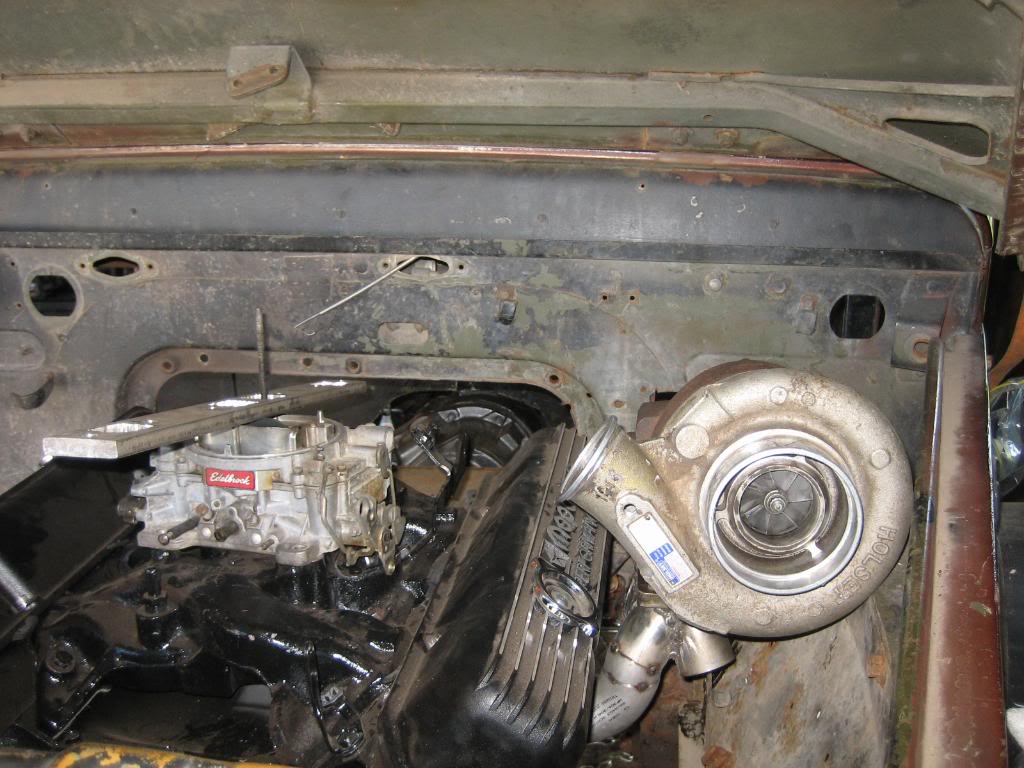
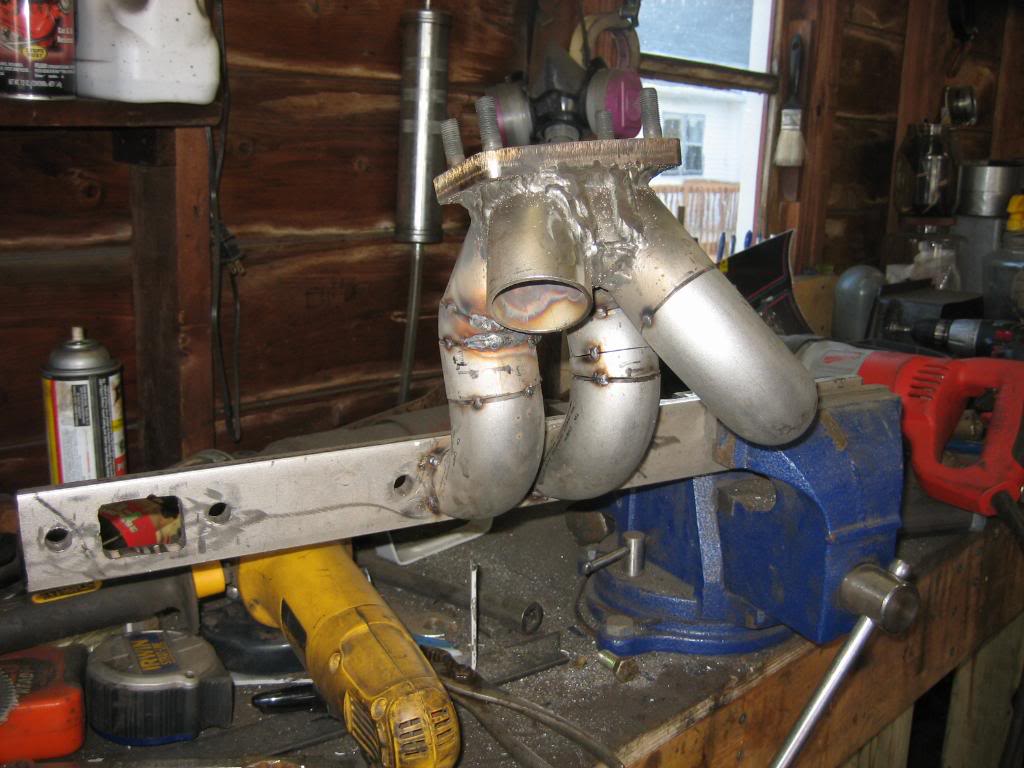
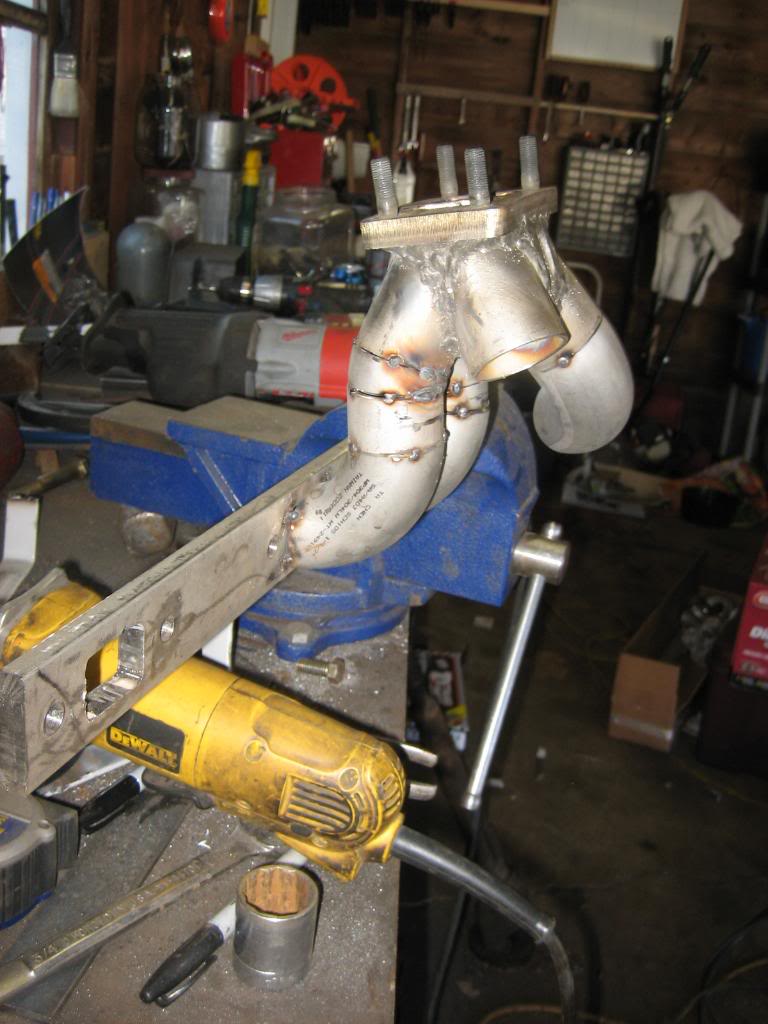
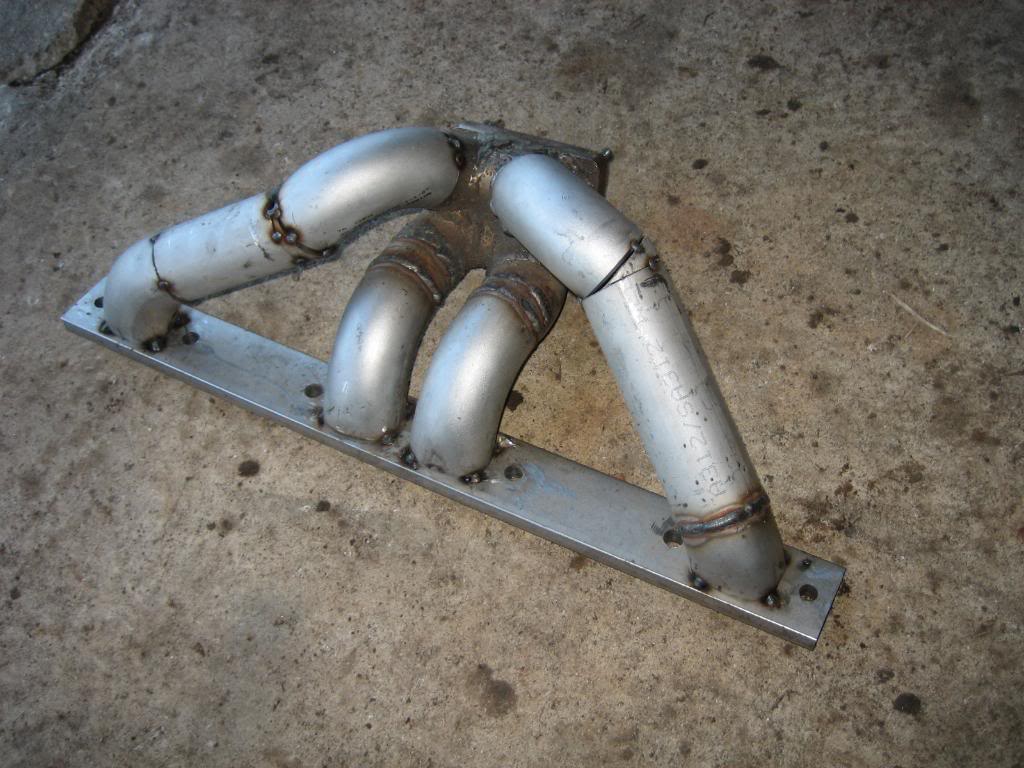
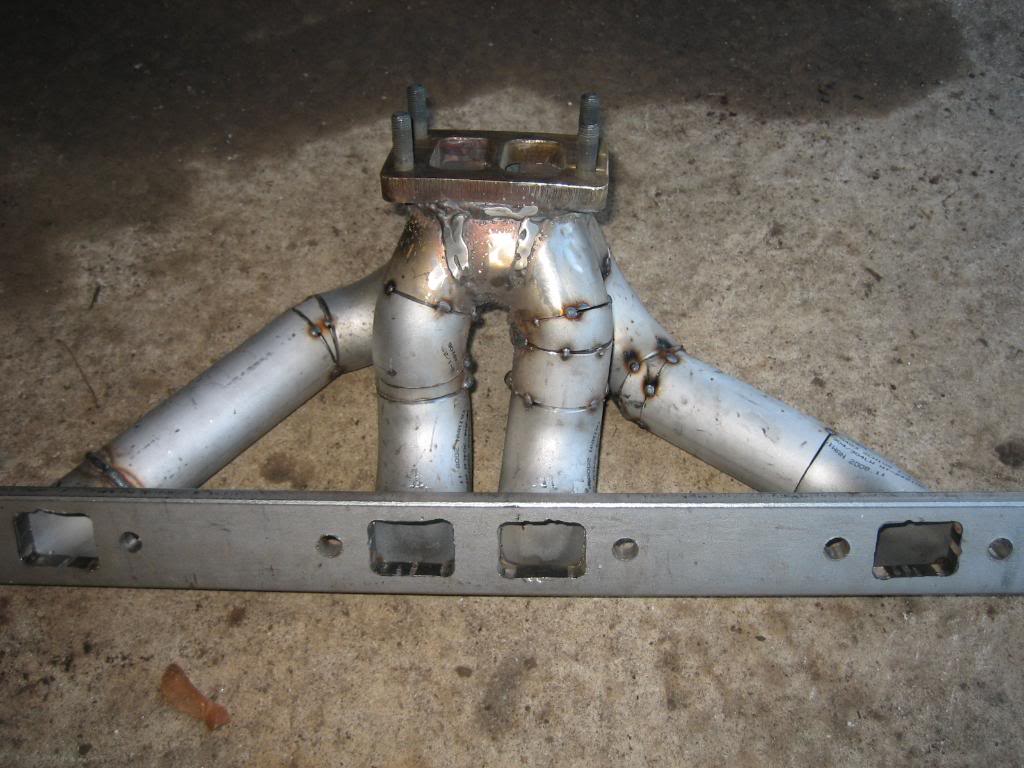
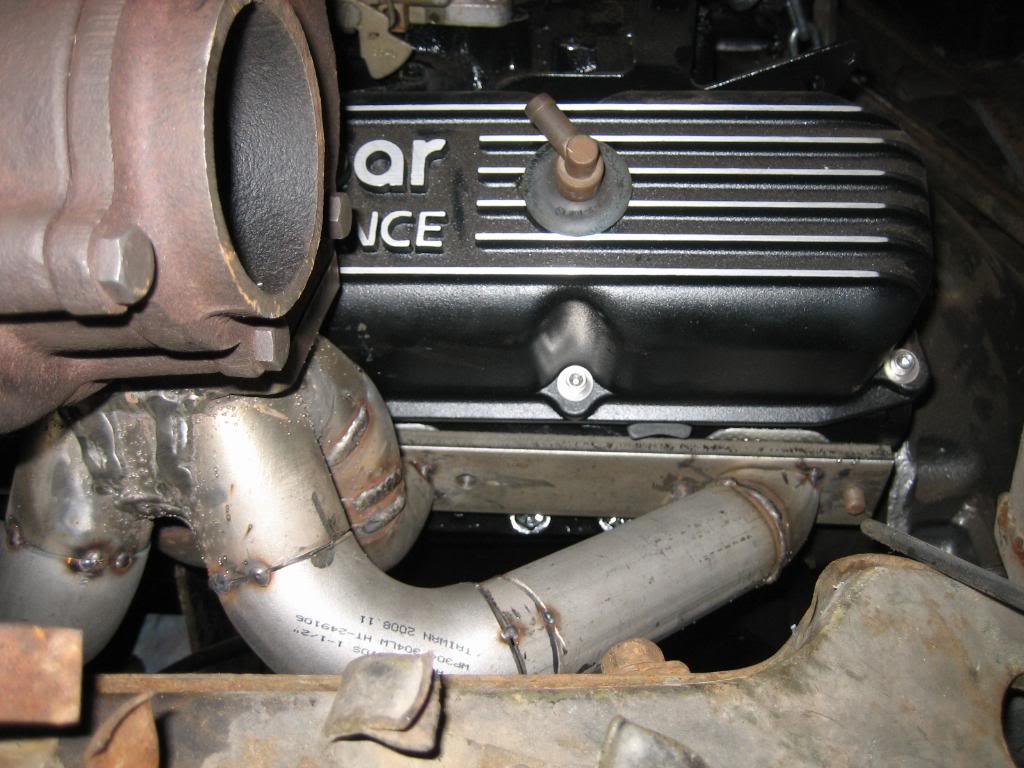
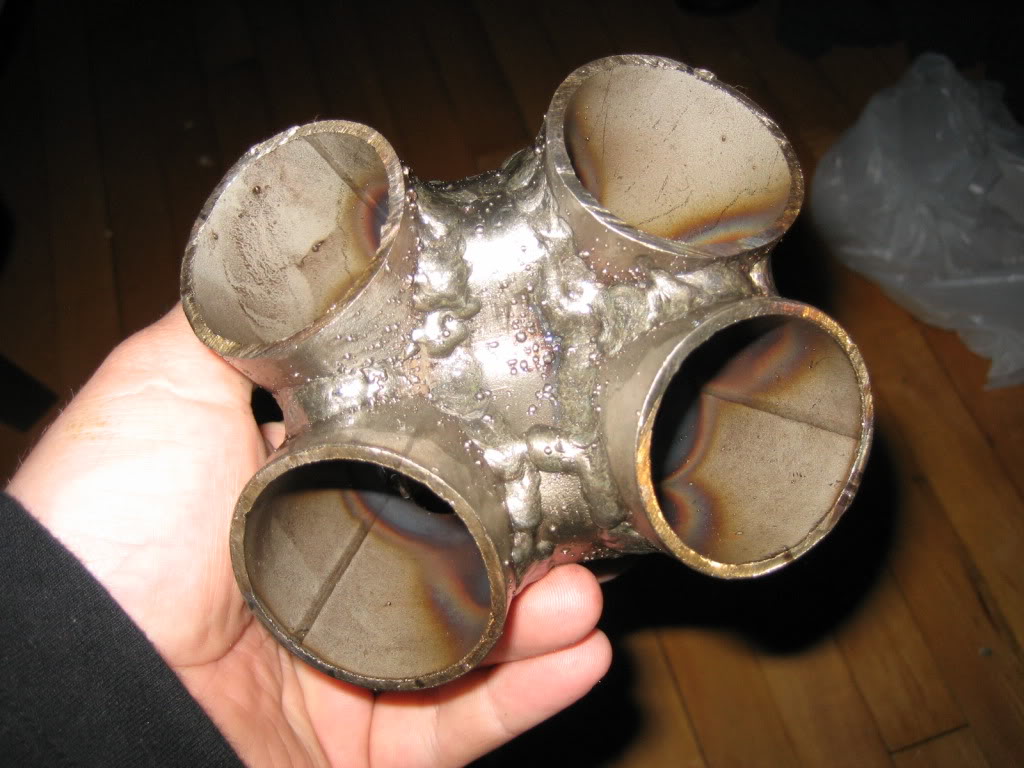
I spent my time working on the headers though. I've discovered that welding thick stainless is VERY different from welding thin stainless, and, welding it with MIG is VERY different from TIGing it... so, the collector, which is where I started, admitttedly looks pretty rough, but, it should be strong, and outlast the rest of the truck. I just thank god that they are top mount manifolds, so, with the turbo on, you cant see how ugly they really are! LOL
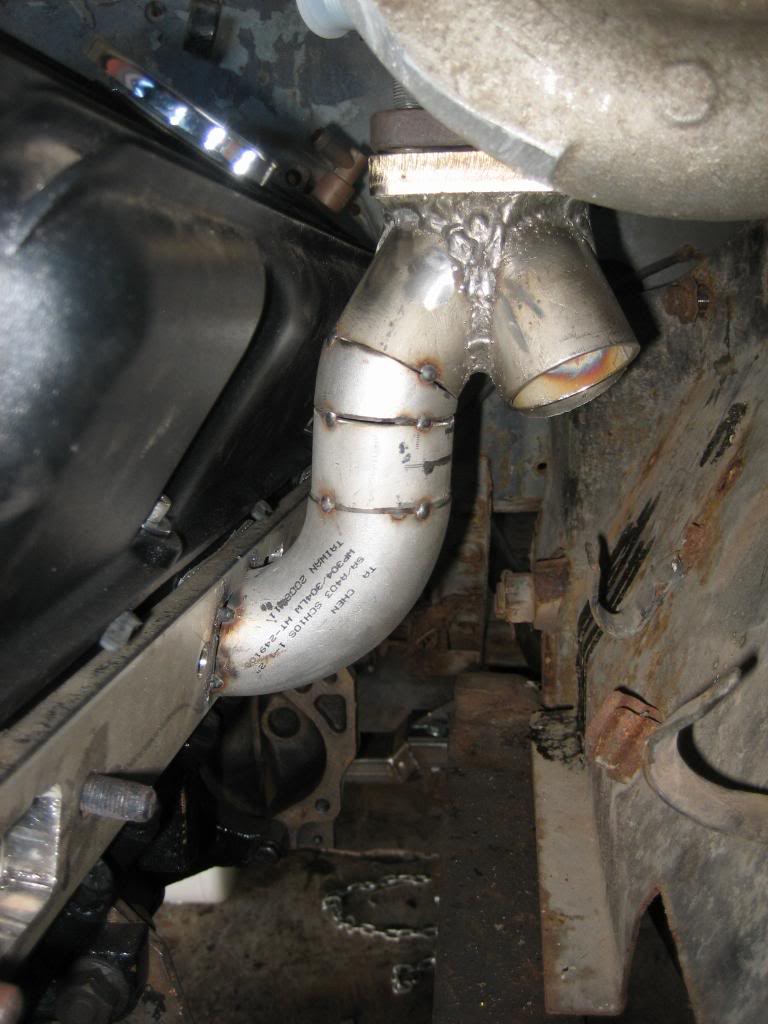
I made the transitions from teh square ports to the round tube by clamping the fittings in my vise, and crushing them, then hammering them on the short side to make them square up. It actually worked alot better than I thought it would...
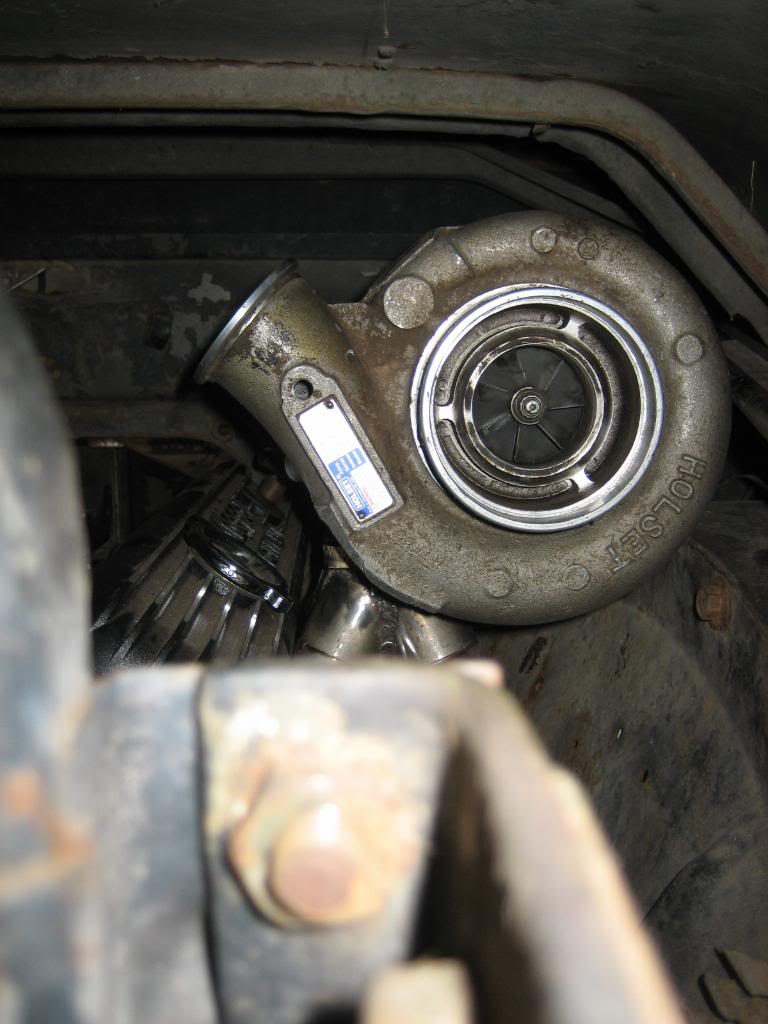
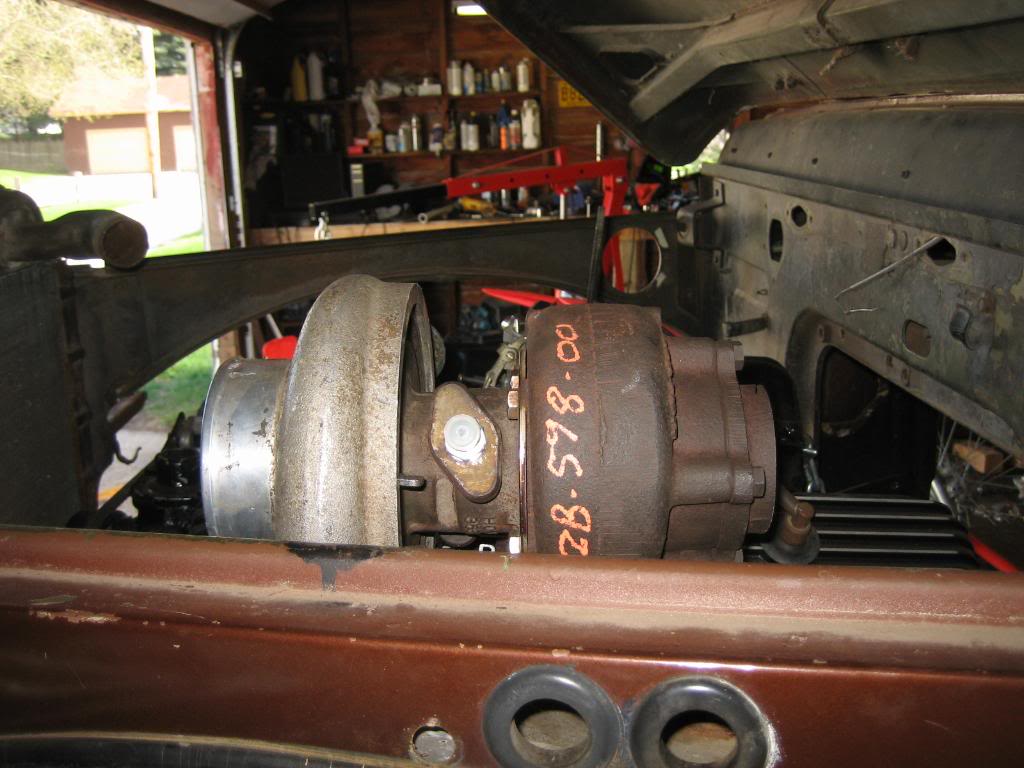
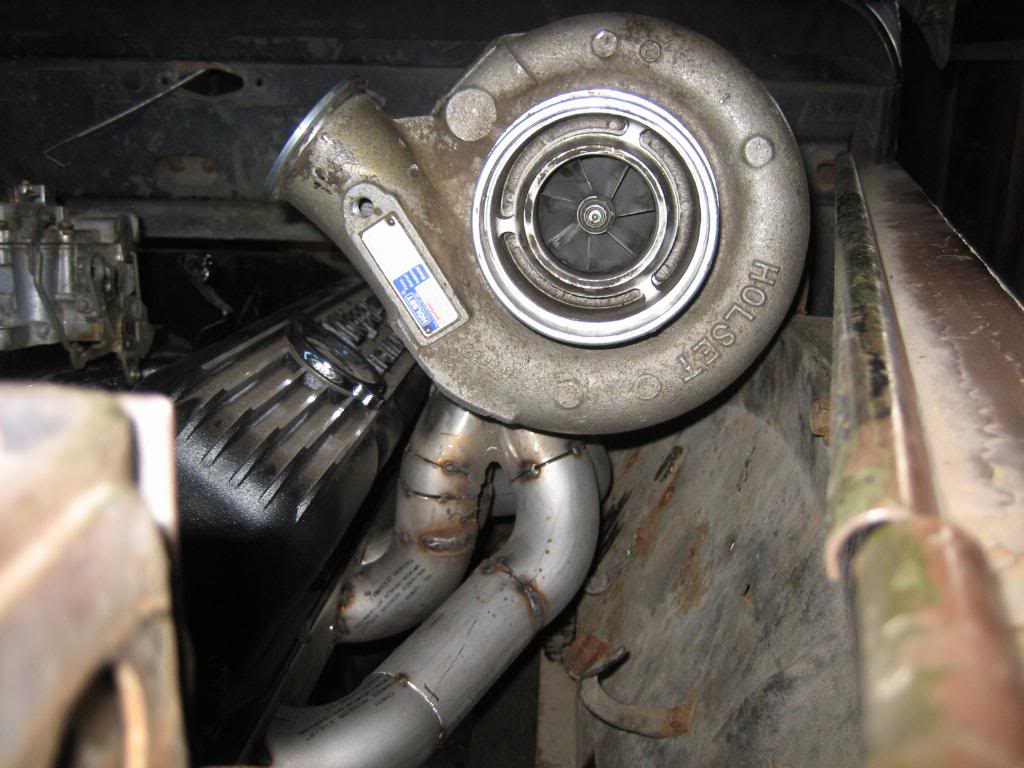
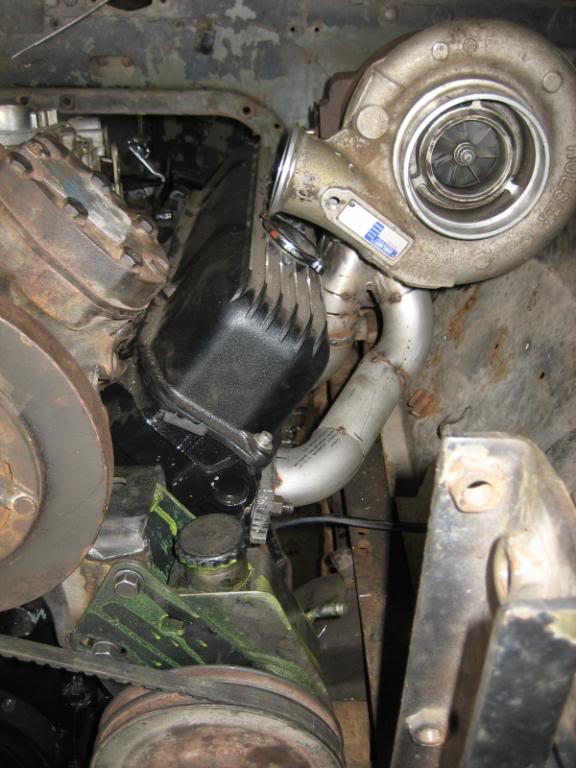
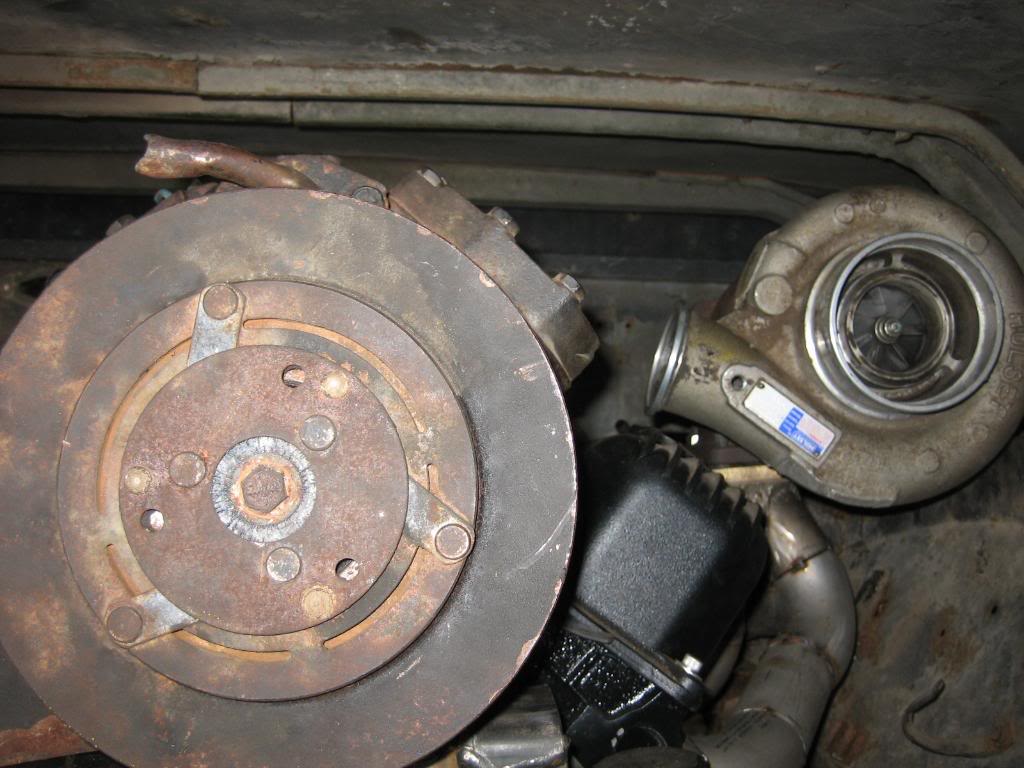
Initial turbo placement was too close to the fender (actually touching it) so I had to do some tweaking, and, 3 attempts later, got it right:
Initial position, right against the fender:
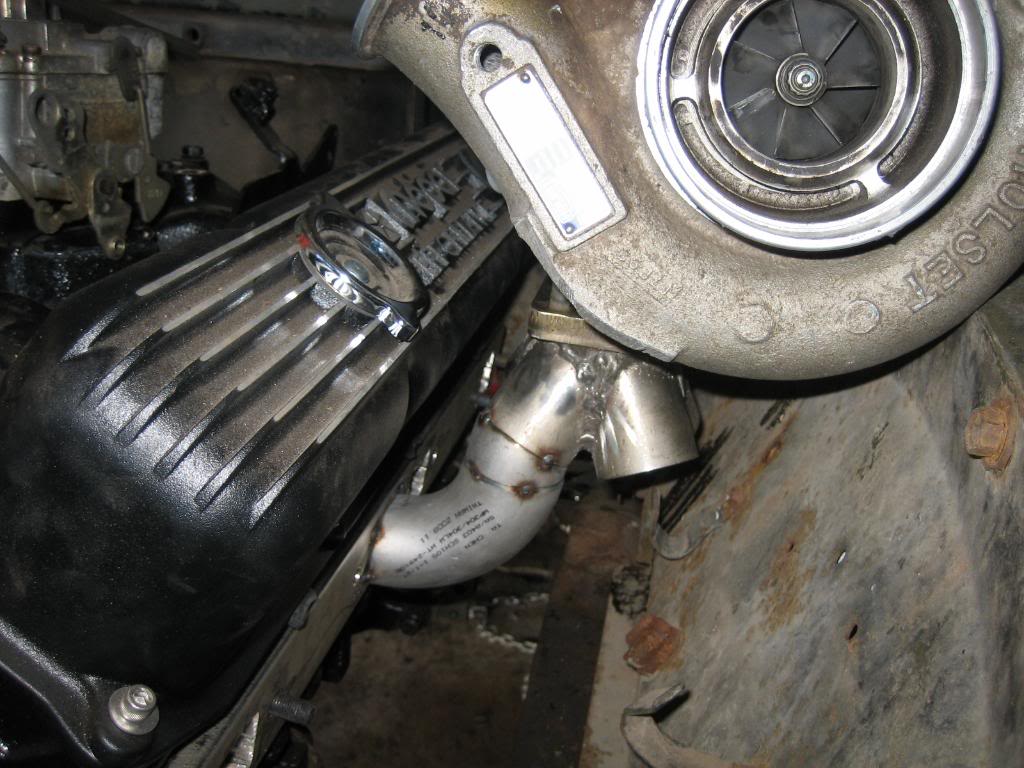
yup, need to do some tweaking!
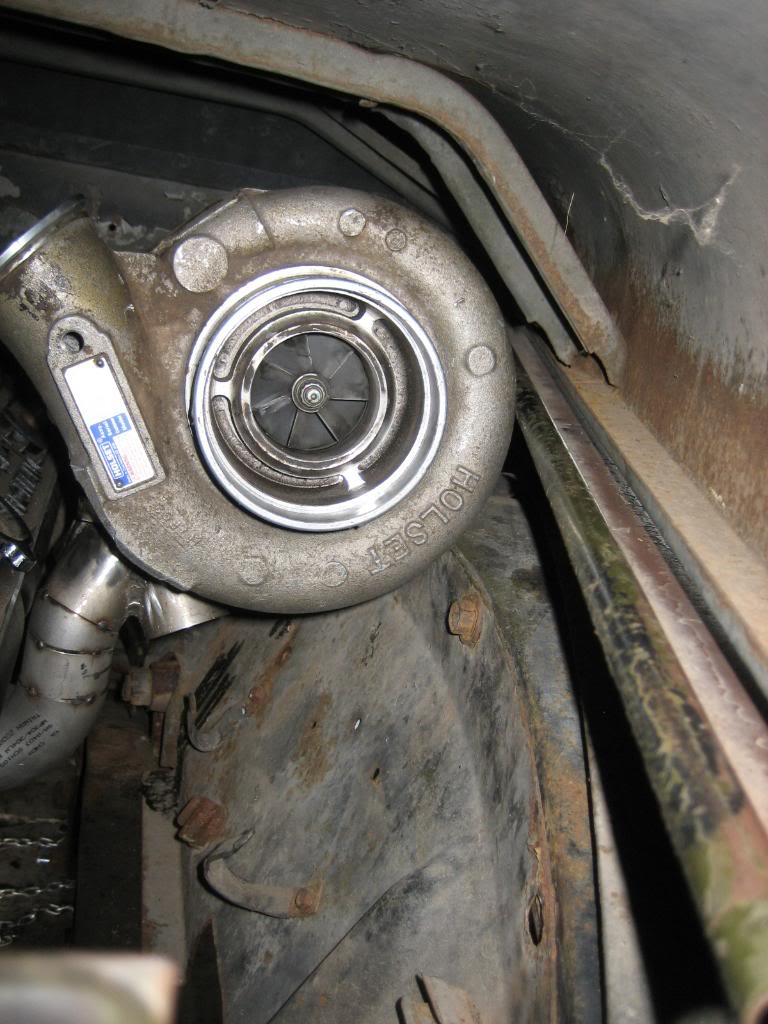
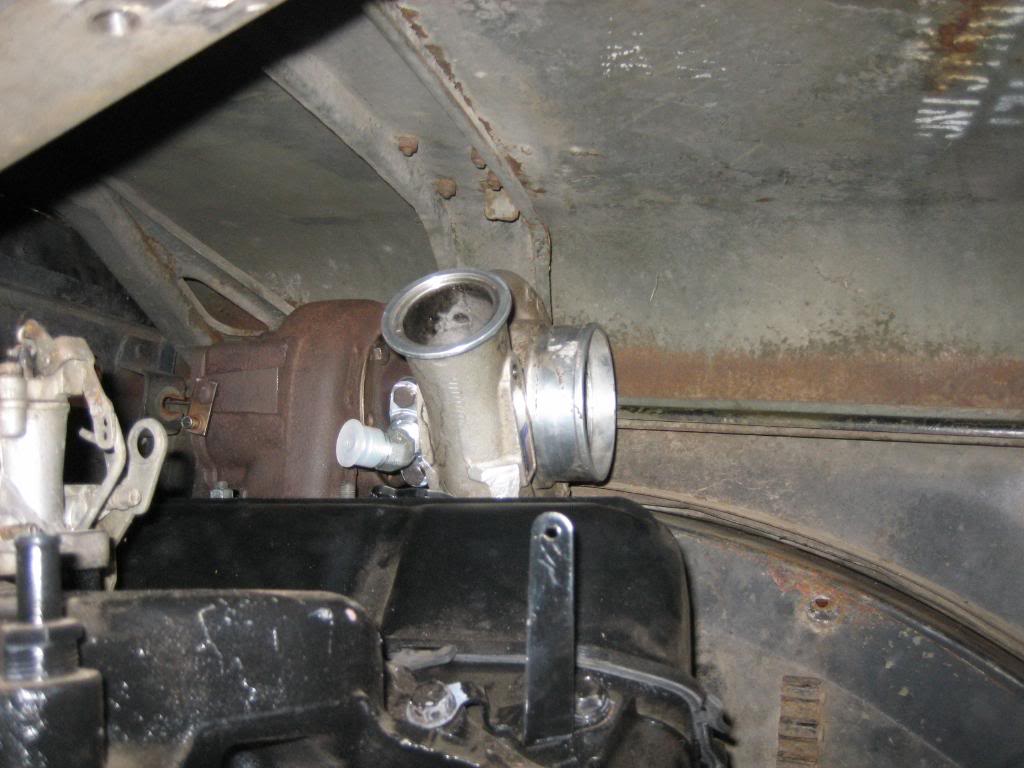
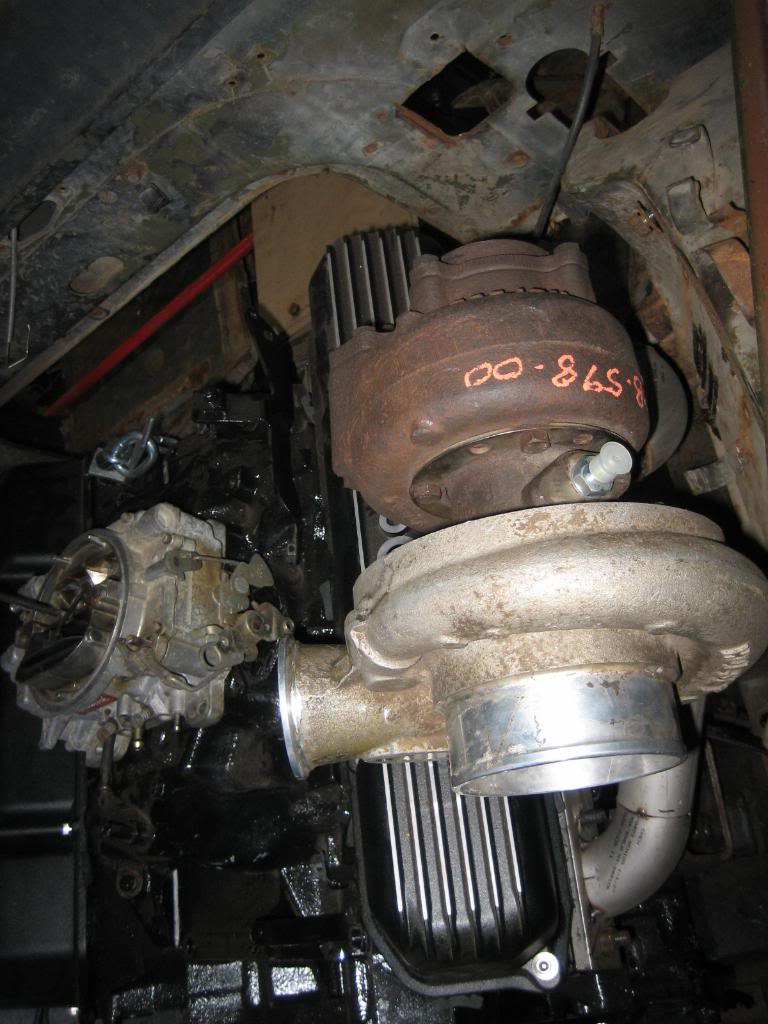
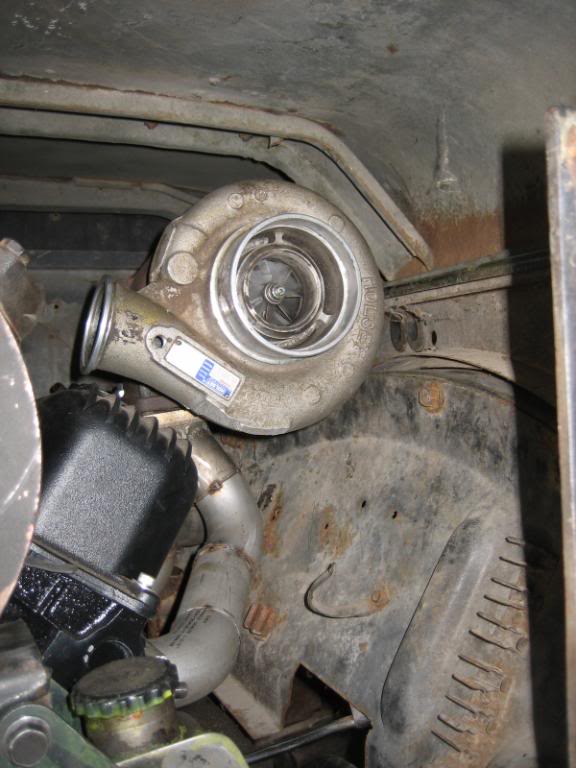
Tweaked, for the 3rd time...
Notice how much closer to the valve cover it is:
looks like its laying on the fender, but, its not:
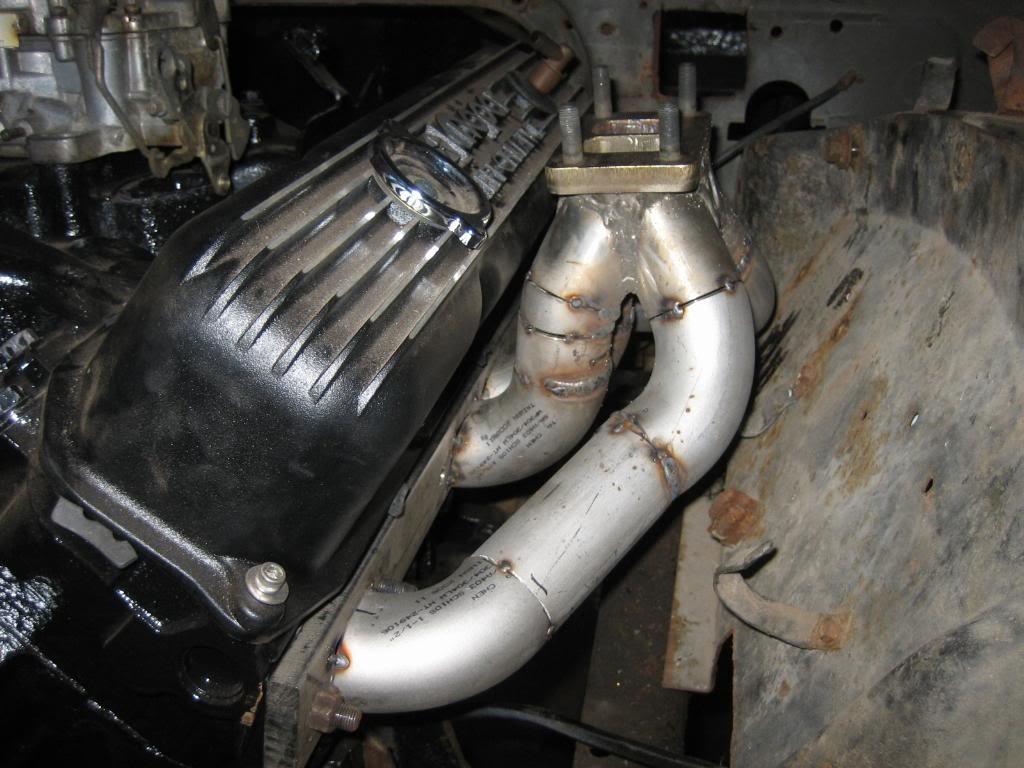
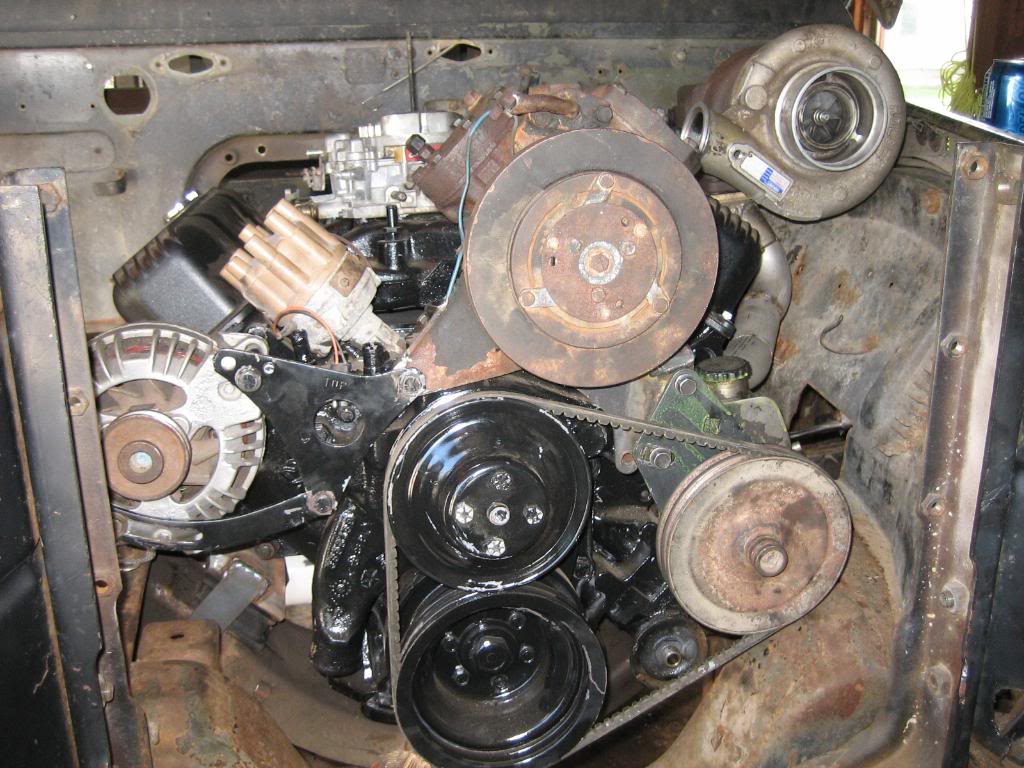
AH HAHAHAHAHAHAHA That, is a BIG TURBO... and the're gonna be two!:
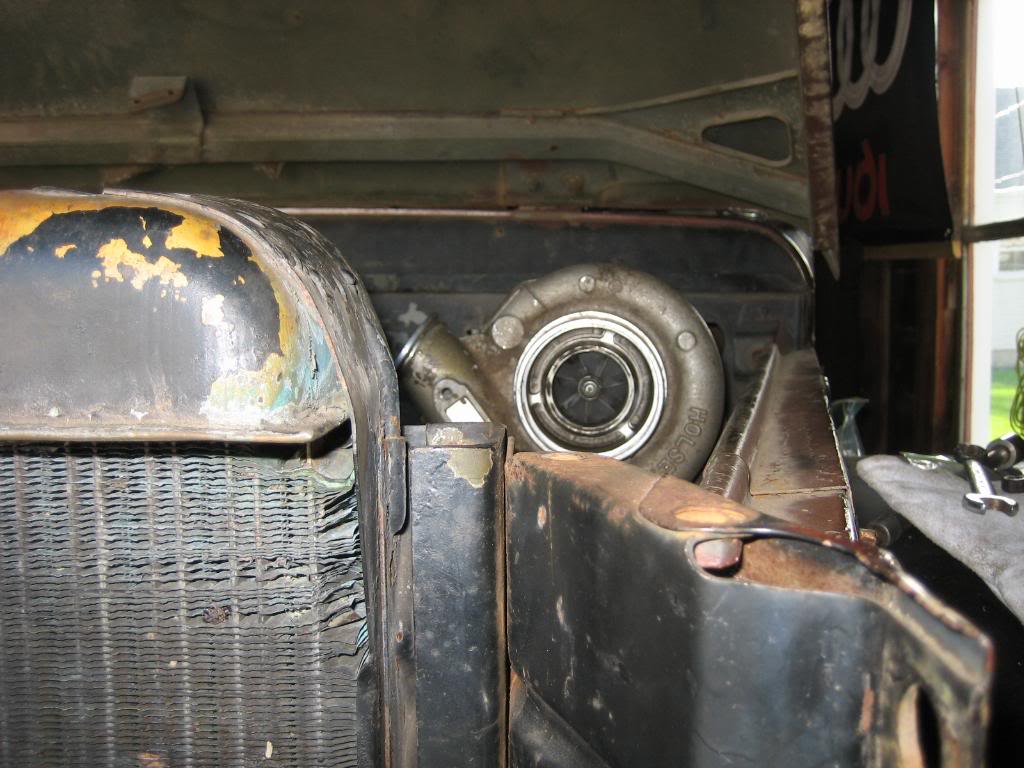

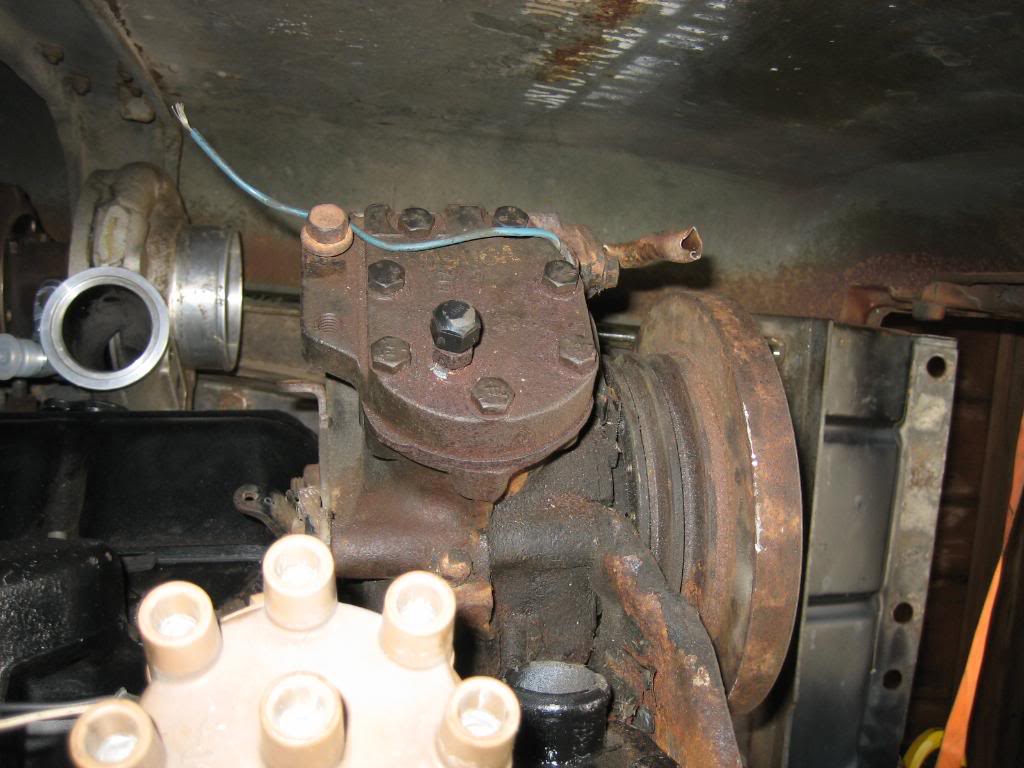
hood/fender clearance:
building the other runners:
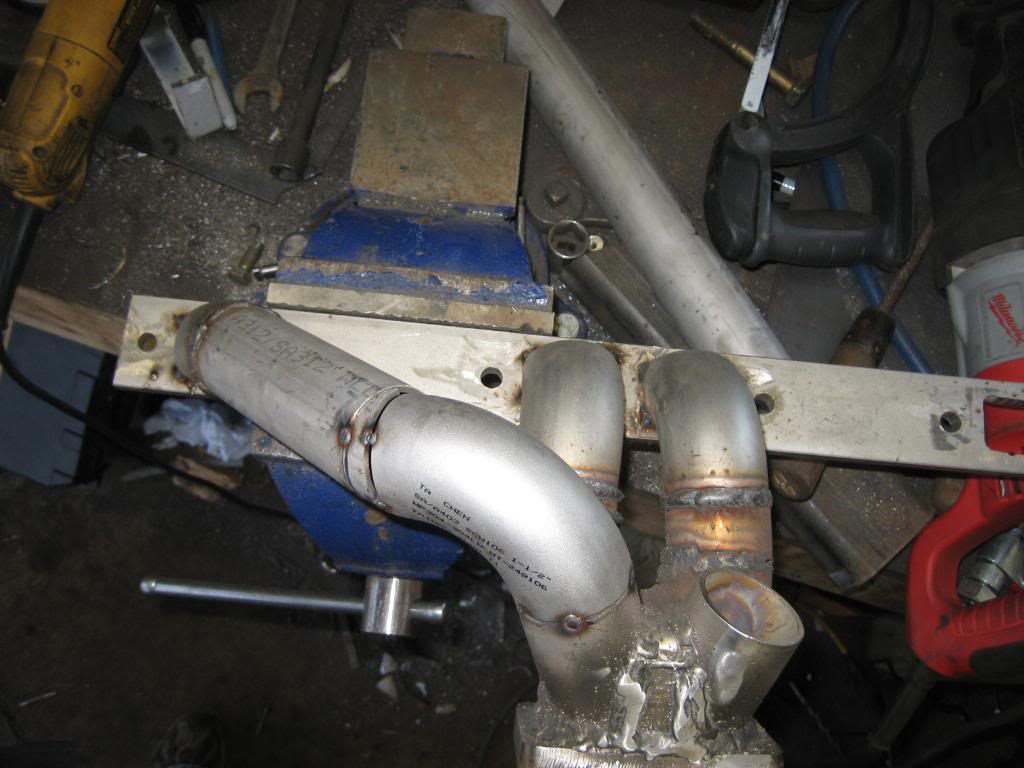

close, but it makes it:

all tacked:
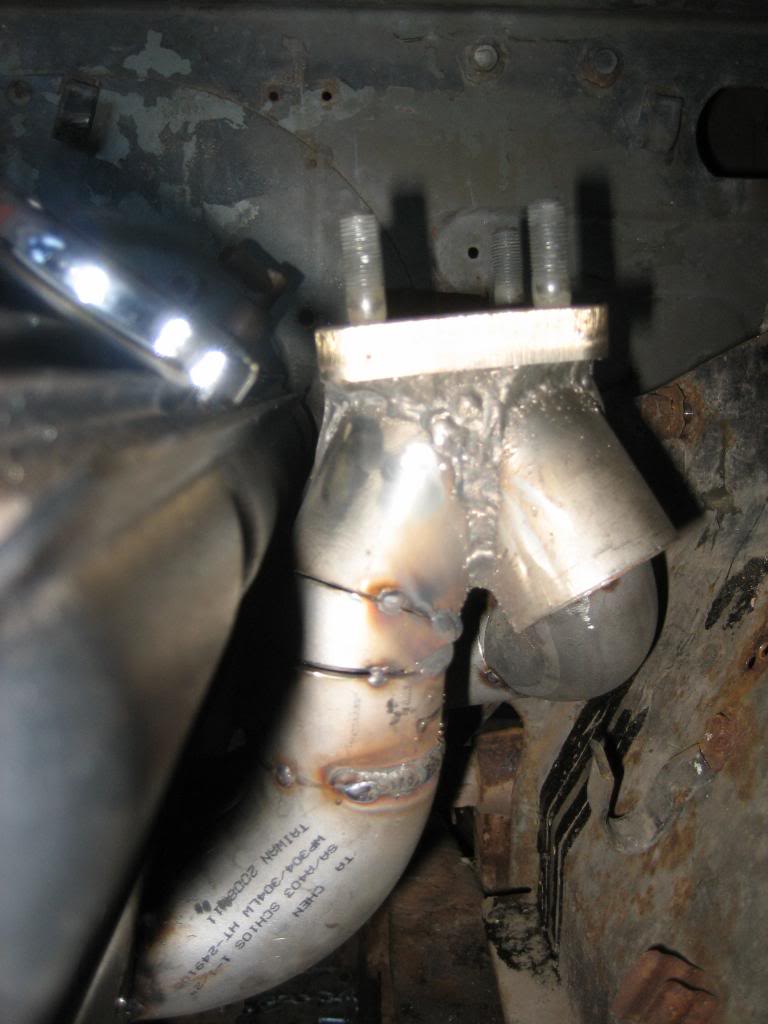
on the truck:

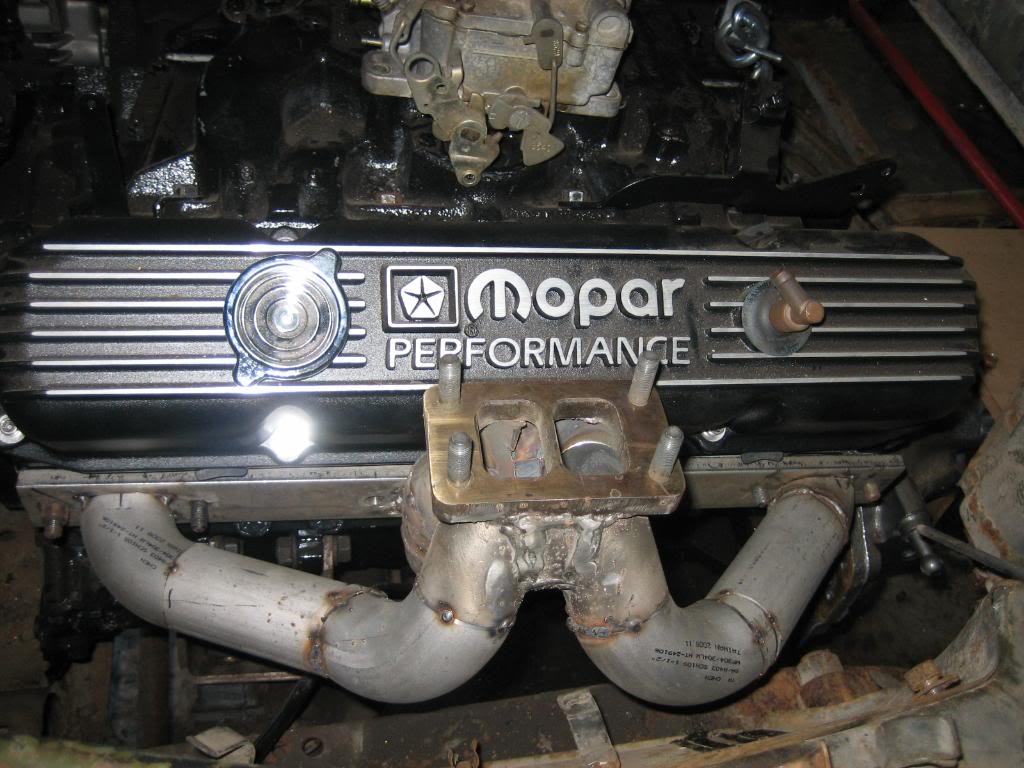
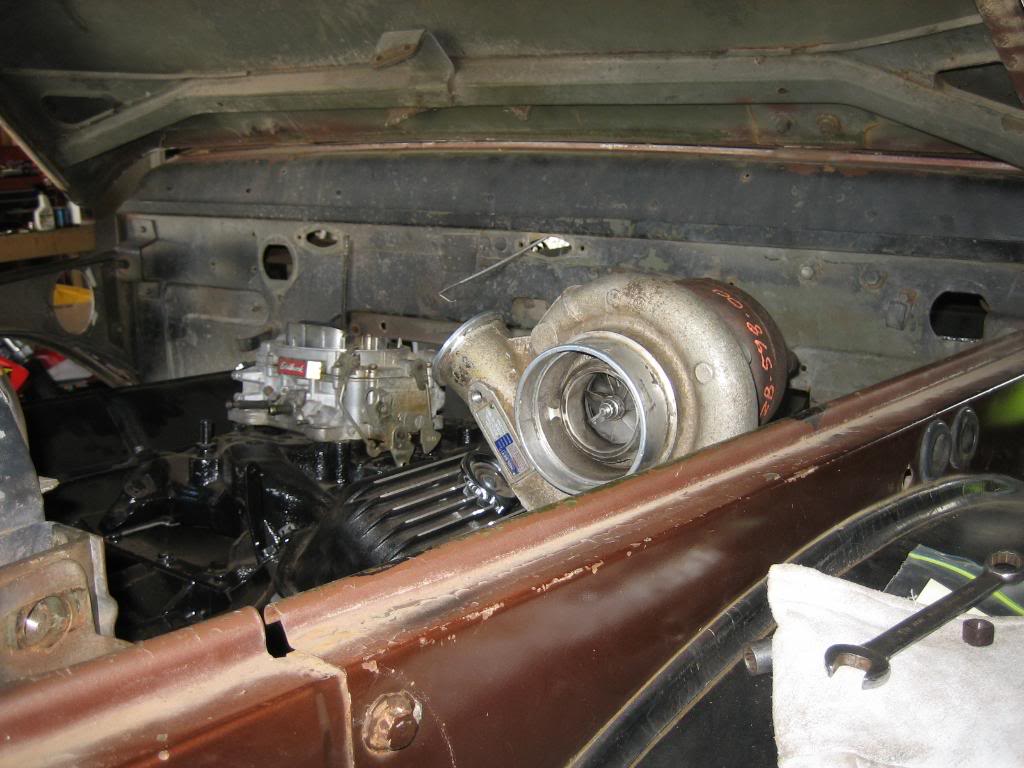
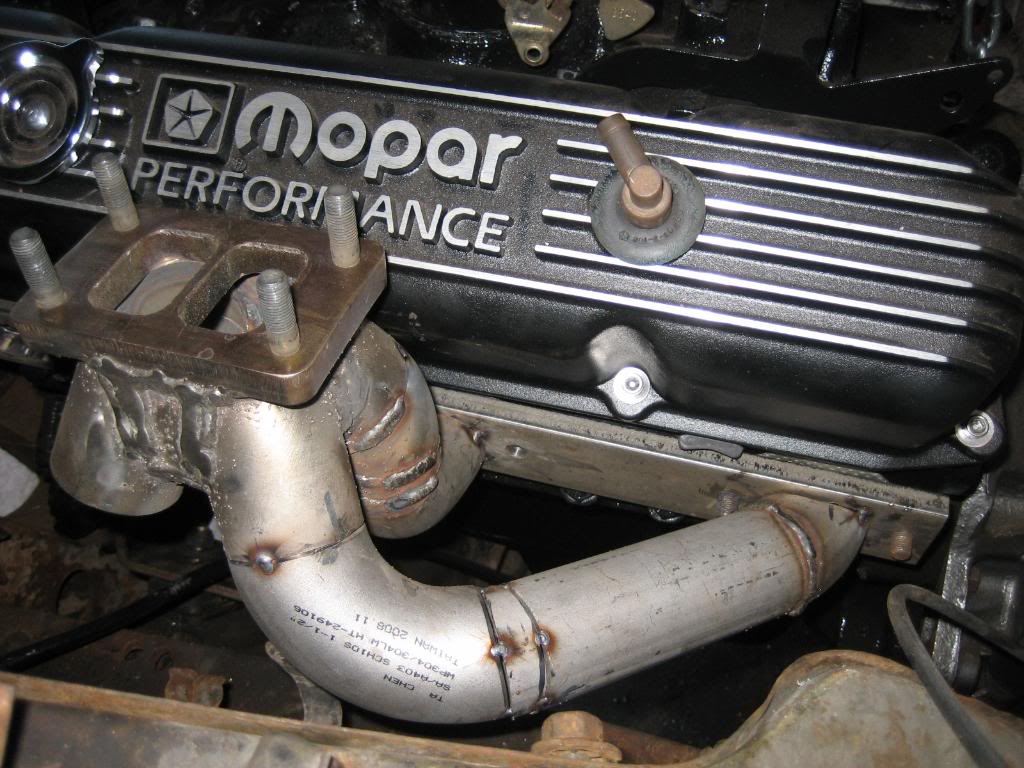
and... the money shot:

Picked up a York model 210 A/C compressor off an old ford for $25. I'll work good for my on board air system. Need to clean it up and build brackets for it, and I'll be good to go.
I spent my time working on the headers though. I've discovered that welding thick stainless is VERY different from welding thin stainless, and, welding it with MIG is VERY different from TIGing it... so, the collector, which is where I started, admitttedly looks pretty rough, but, it should be strong, and outlast the rest of the truck. I just thank god that they are top mount manifolds, so, with the turbo on, you cant see how ugly they really are! LOL
I made the transitions from teh square ports to the round tube by clamping the fittings in my vise, and crushing them, then hammering them on the short side to make them square up. It actually worked alot better than I thought it would...
Initial turbo placement was too close to the fender (actually touching it) so I had to do some tweaking, and, 3 attempts later, got it right:
Initial position, right against the fender:
yup, need to do some tweaking!
Tweaked, for the 3rd time...
Notice how much closer to the valve cover it is:
looks like its laying on the fender, but, its not:
AH HAHAHAHAHAHAHA That, is a BIG TURBO... and the're gonna be two!:
hood/fender clearance:
building the other runners:
close, but it makes it:
all tacked:
on the truck:
and... the money shot:


Thread Starter
1.0 BAR
Joined: Feb 2003
Posts: 461
From: Wisconsin
probably going to get a griffin 3 core unit from summit racing. a little toller then the stocker, and designed for a 400 HP road racing engine, which should work for what I am going to do. There isnt a whole lot of frontal area, and the stock radiator might be 4 cores thick and made of brass, but its not a pressurized unit, so, its more of a heat sink than a heat exchanger. It could barely keep the 360 cool
Thread Starter
1.0 BAR
Joined: Feb 2003
Posts: 461
From: Wisconsin
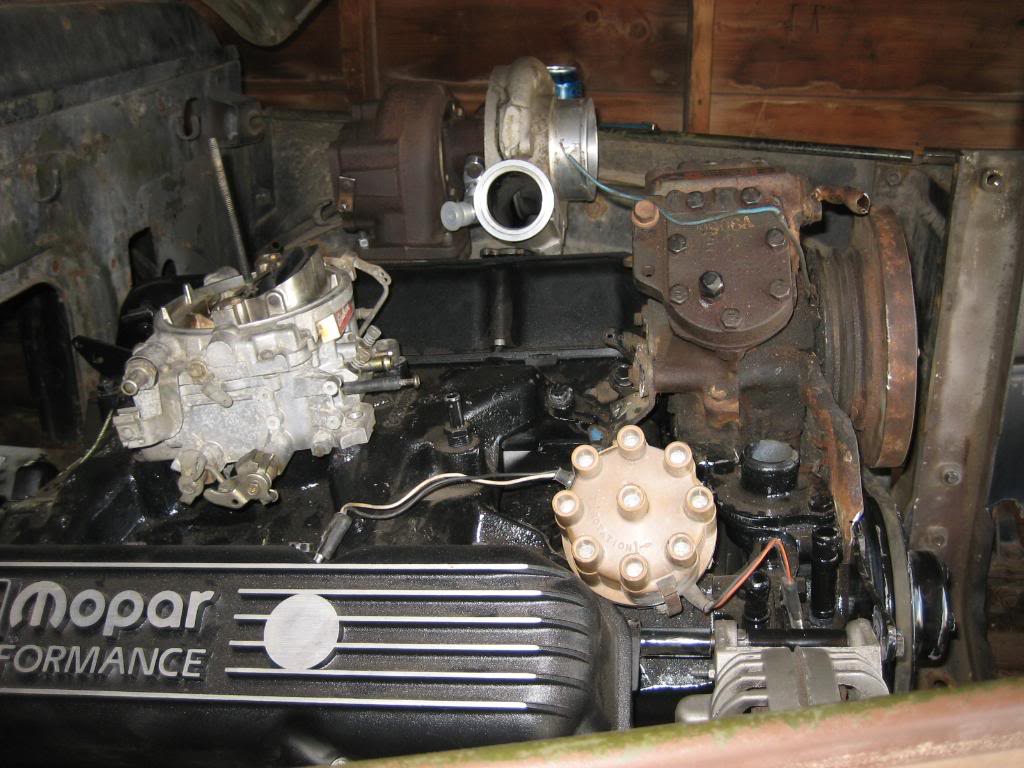
finally back from my trip! Went up to my paren'ts house, and while there, stopped by a friend from high school and he hooked me up with some parts I needed. I got my saginaw revers rotation box, lines, pump, distributor, and an RV2 twin piston compressor!
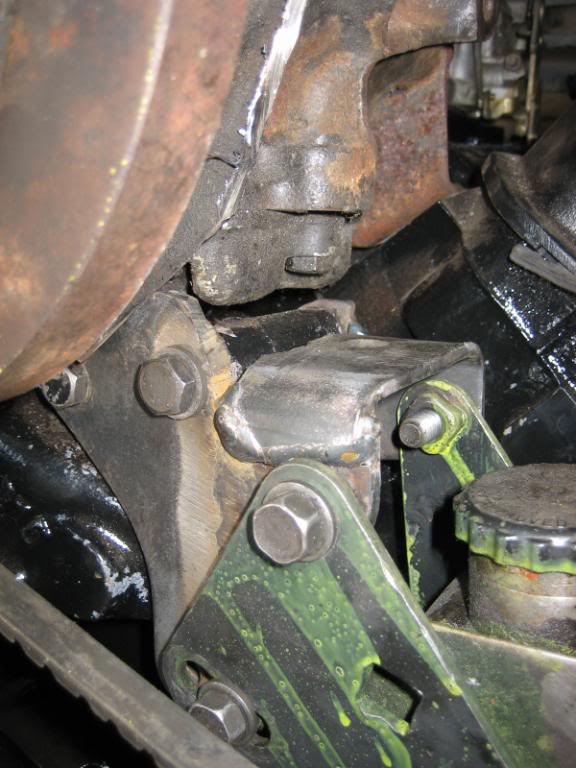
I got the dizzy in, just to help keep crud out of the engine, and mounted the RV2 compressor. I then tried to mount the PS pump with the truck brackets, but, they wouldnt work, as they hit the compressor, so, I ended up making my own...
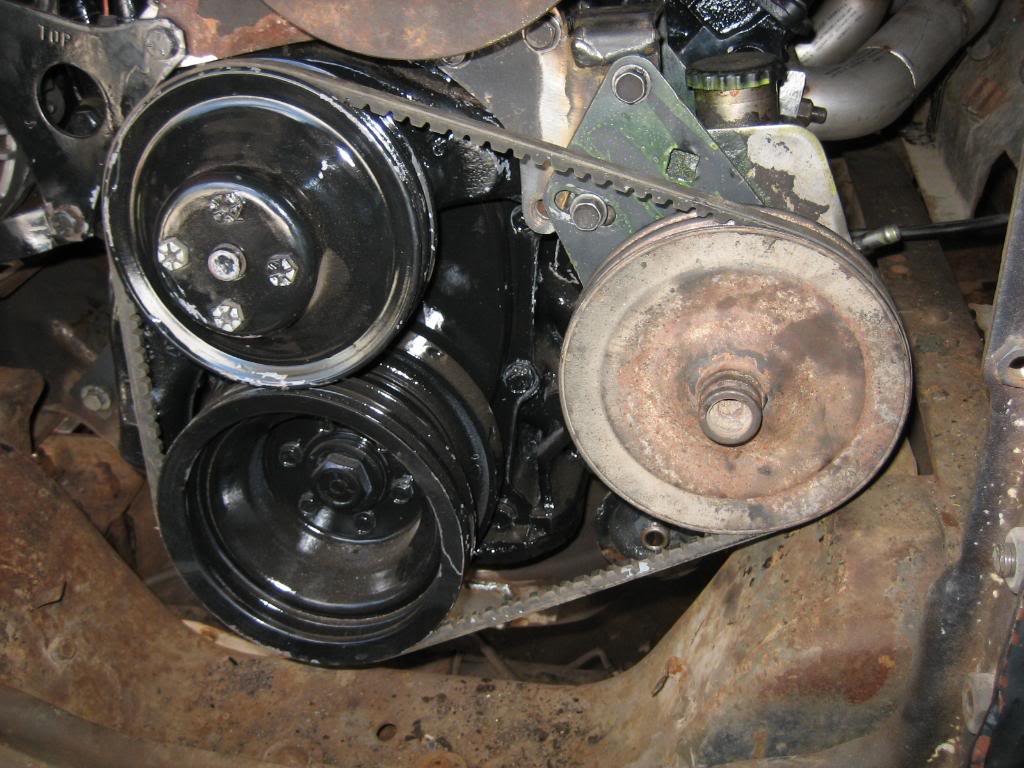
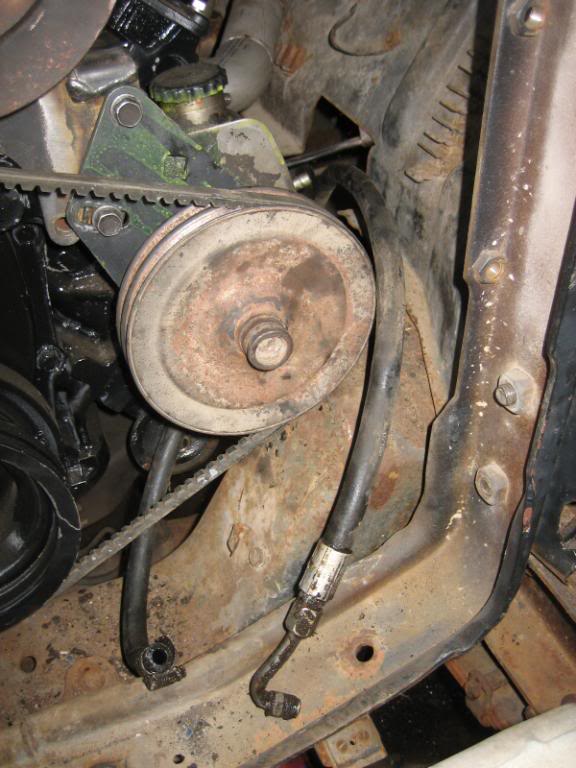
dual shive pulleys... will use the front rib to drive the water and PS pumps, and, will use the rear one to run the compressor and alternator. Tested the clutch on the AC pump, and, it works...
ignore the yellow paint... I have the worst luck in the world... I was working on the PS brackets, and, a full can of yellow spray paint fell off my shelf and impaled itself on a piece of angled cut off steel scrap... needless to say, it made a big mess!!
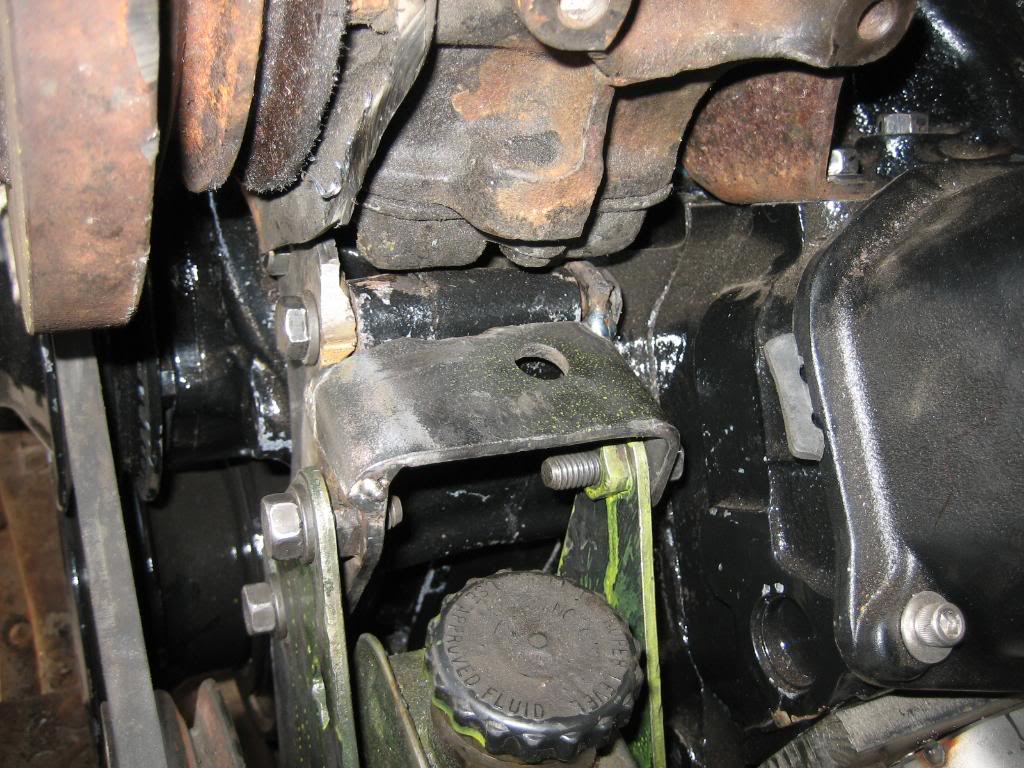
just enough room to get the oil filter adapter on:
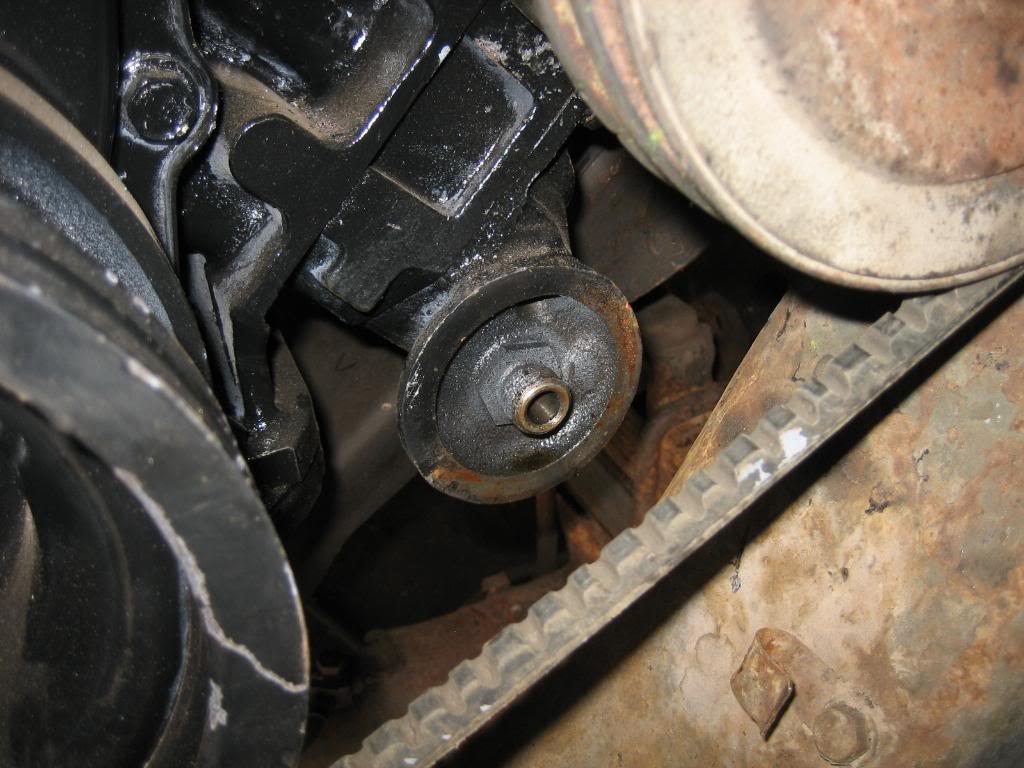
going to have to shorten up the PS lines...
plenty of hood clearance:
I got the dizzy in, just to help keep crud out of the engine, and mounted the RV2 compressor. I then tried to mount the PS pump with the truck brackets, but, they wouldnt work, as they hit the compressor, so, I ended up making my own...
dual shive pulleys... will use the front rib to drive the water and PS pumps, and, will use the rear one to run the compressor and alternator. Tested the clutch on the AC pump, and, it works...
ignore the yellow paint... I have the worst luck in the world... I was working on the PS brackets, and, a full can of yellow spray paint fell off my shelf and impaled itself on a piece of angled cut off steel scrap... needless to say, it made a big mess!!
just enough room to get the oil filter adapter on:
going to have to shorten up the PS lines...
plenty of hood clearance:
Thread Starter
1.0 BAR
Joined: Feb 2003
Posts: 461
From: Wisconsin
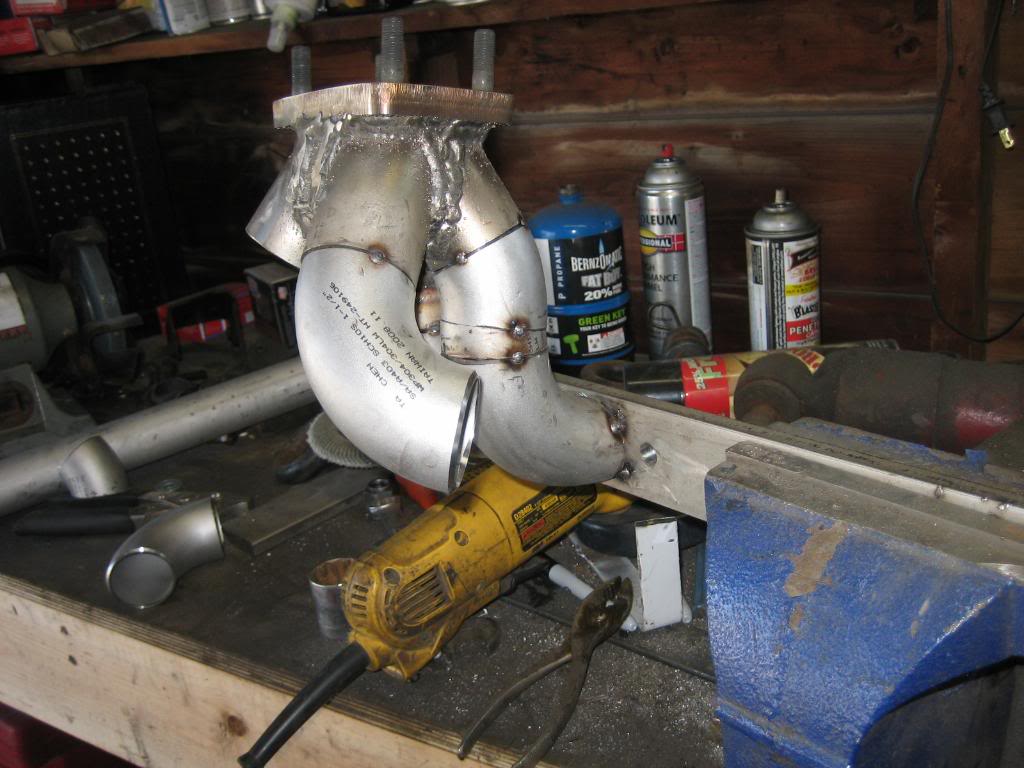
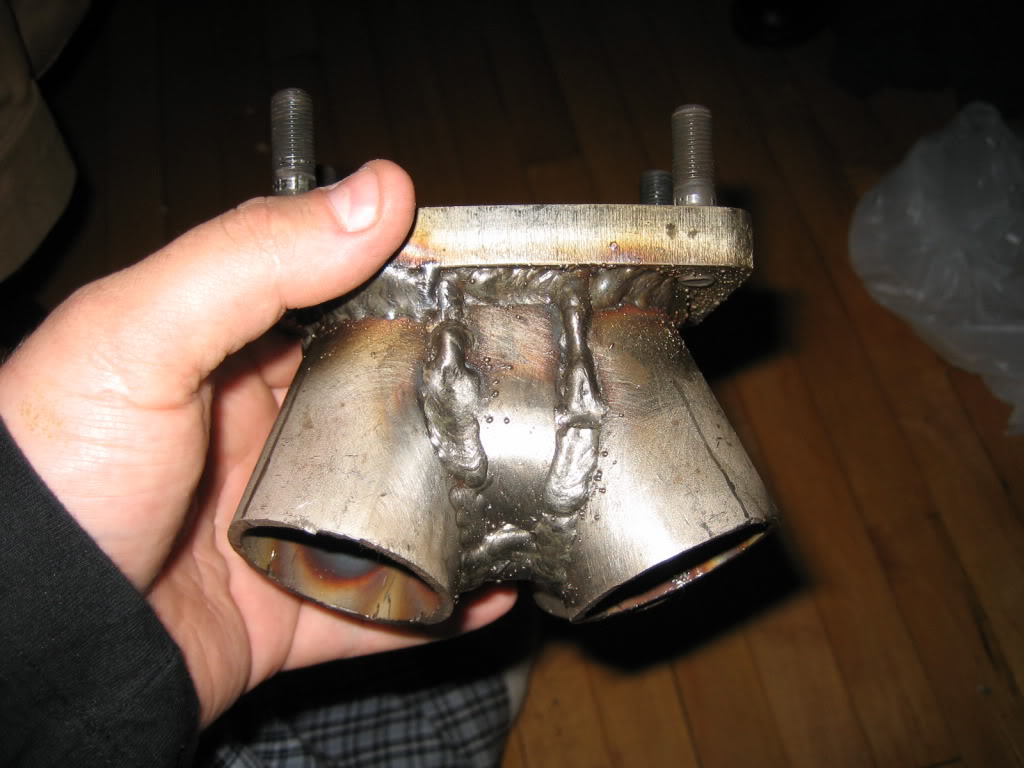
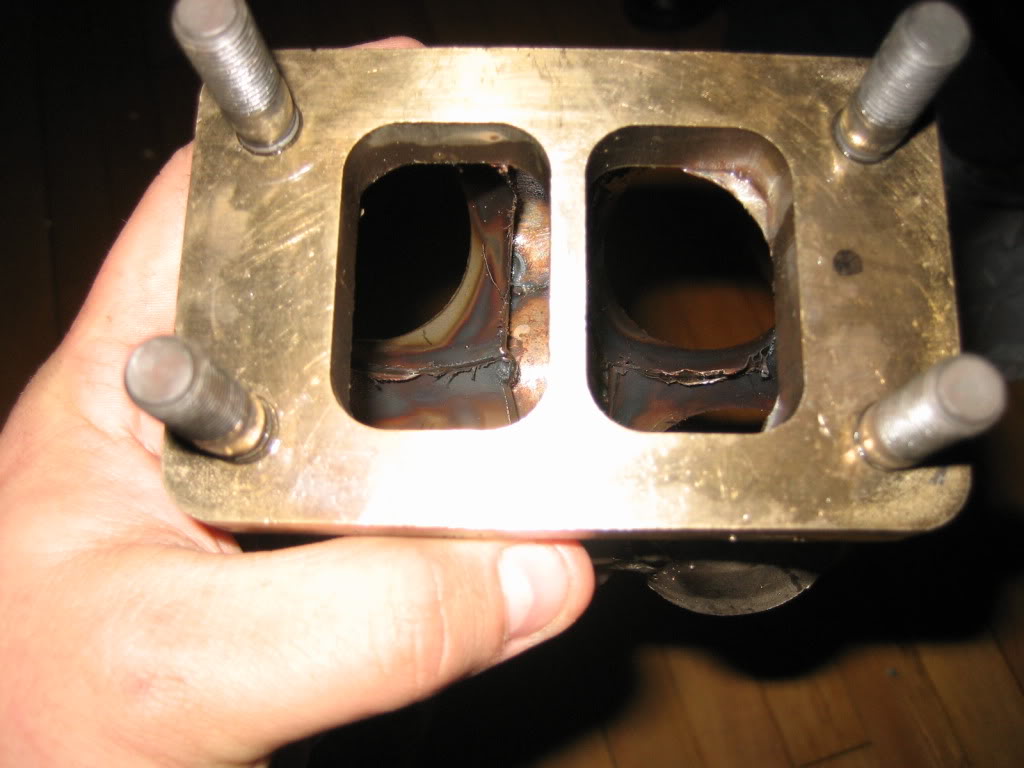
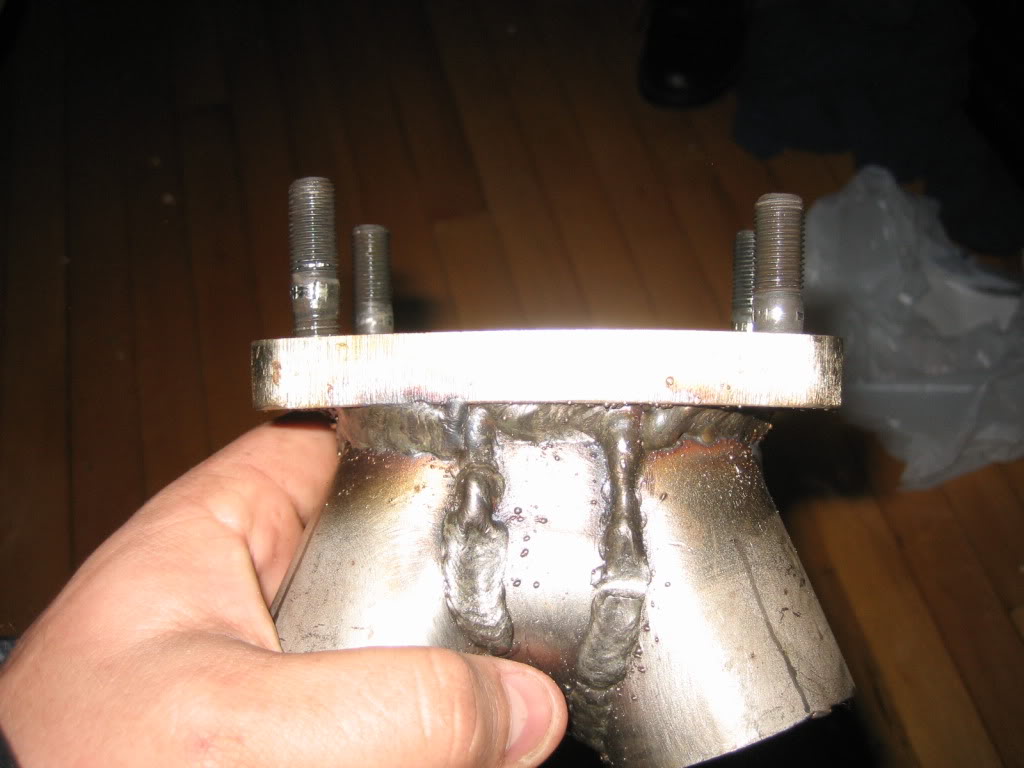
more work done. Made the second header collector. I HATE making these things, they take forever... At least its done. It ain't pretty, but, its .109 walled tube, and a 1/2" flange, so, it should last longer than the rest of the truck... This one warped as bad as the first one, and I welded it slower and differently to try and minimize the warpage. Must be a function of the stainless steel, as the mild steel one I made for my escort didnt warp hadly at all. Oh well, just have to order some copper gaskets with a crush ring.
Also ordered a 1980 Chevy C30 master cylinder for the brakes. It'll be here on tuesday. It's the one recommended by Ray on Inex Page for the retrofit. Was $43 for a rebuilt one, or, 95 for a new one, so, I got the rebuilt one...
Also ordered a 1980 Chevy C30 master cylinder for the brakes. It'll be here on tuesday. It's the one recommended by Ray on Inex Page for the retrofit. Was $43 for a rebuilt one, or, 95 for a new one, so, I got the rebuilt one...


