
Power Wagon Rebuild (Update: 11/5/08)


Thread Starter
1.0 BAR
Joined: Feb 2003
Posts: 461
From: Wisconsin
yup, should have her all set in another month or so. I want it done before winter gets here.
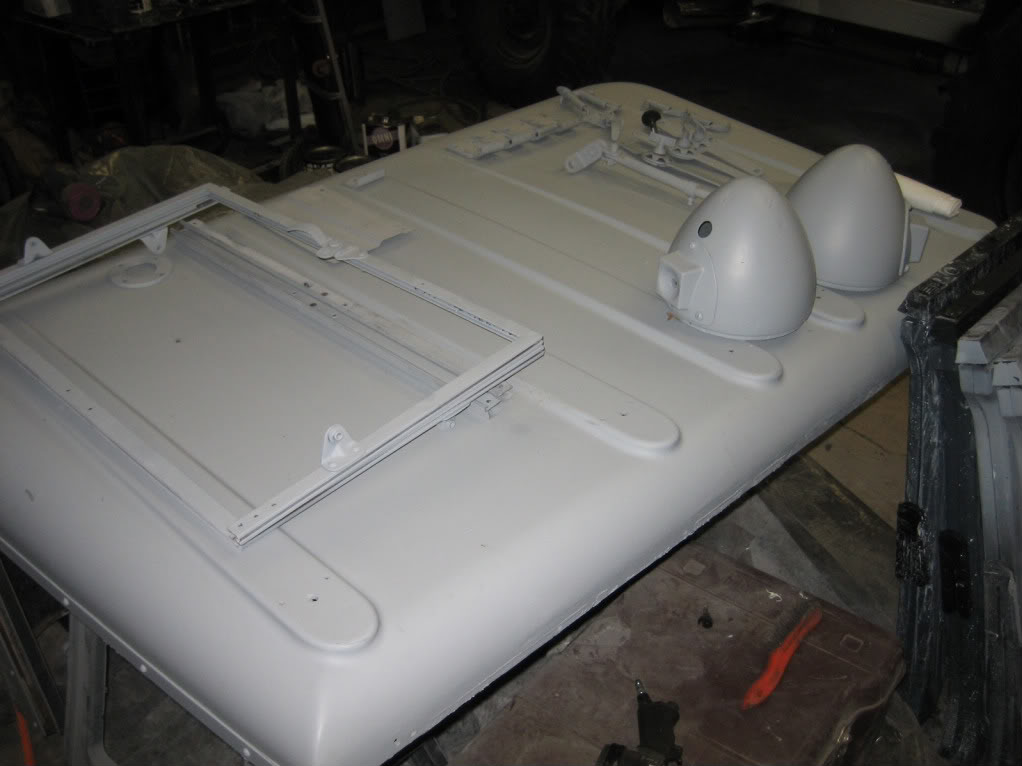
bodywork is FINALLY nearing completion. I have the cab top, windshield frames, and doors left, along with a few other rnadom things like the headlight buckets.
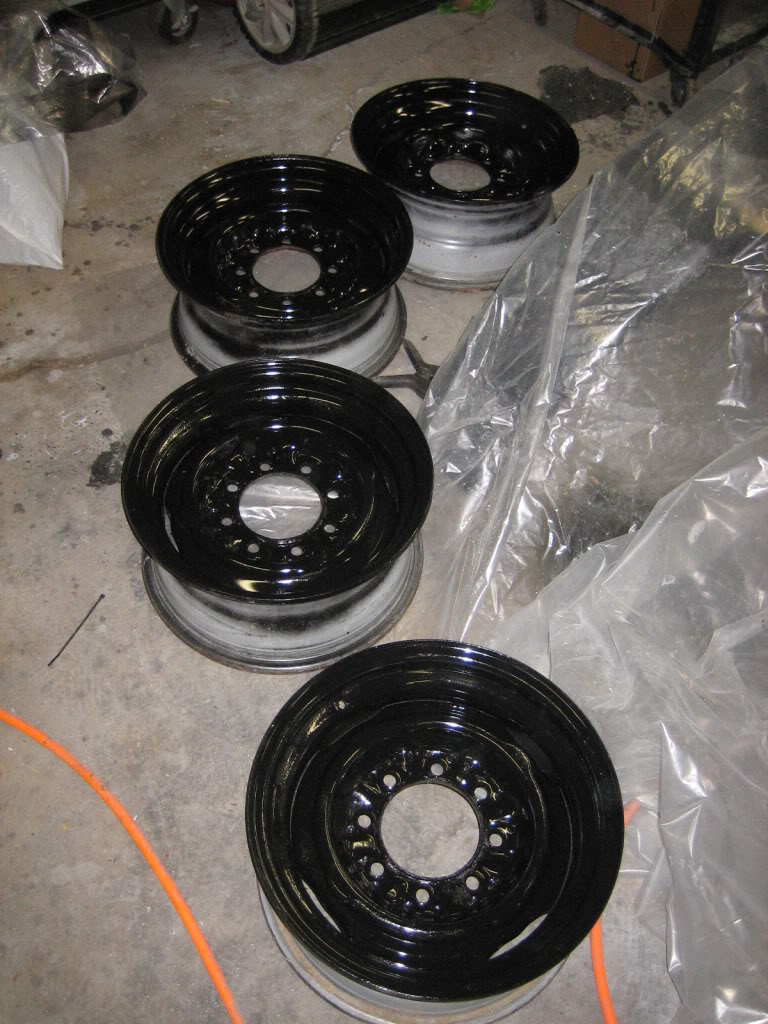
Got the new set of rims stripped and repainted, they look decent. Didn't spend a whole lot of time on them, good enough...
Spent most of the night working on the door skins. Someone beat the hell out of them, and then someon else tried to straighten them with a stud puller and just made them worse, and they have been a pet peeve of mine since I got the truck. They're all set now though, flatter than Kiera Knightly! :mrgreen:
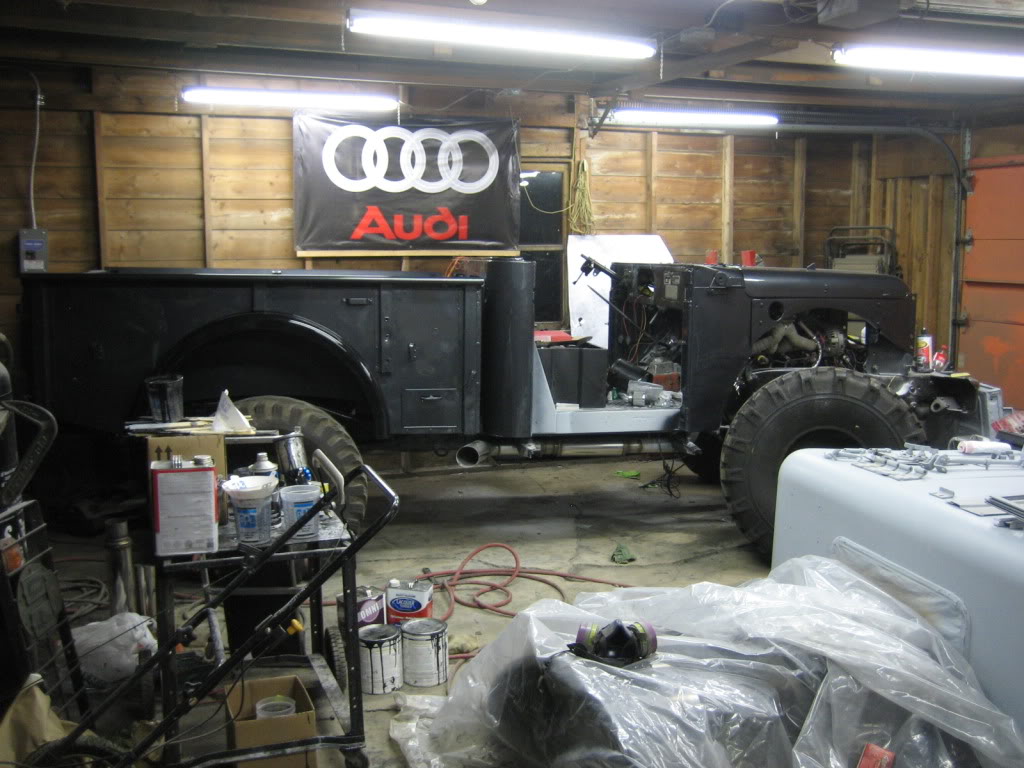
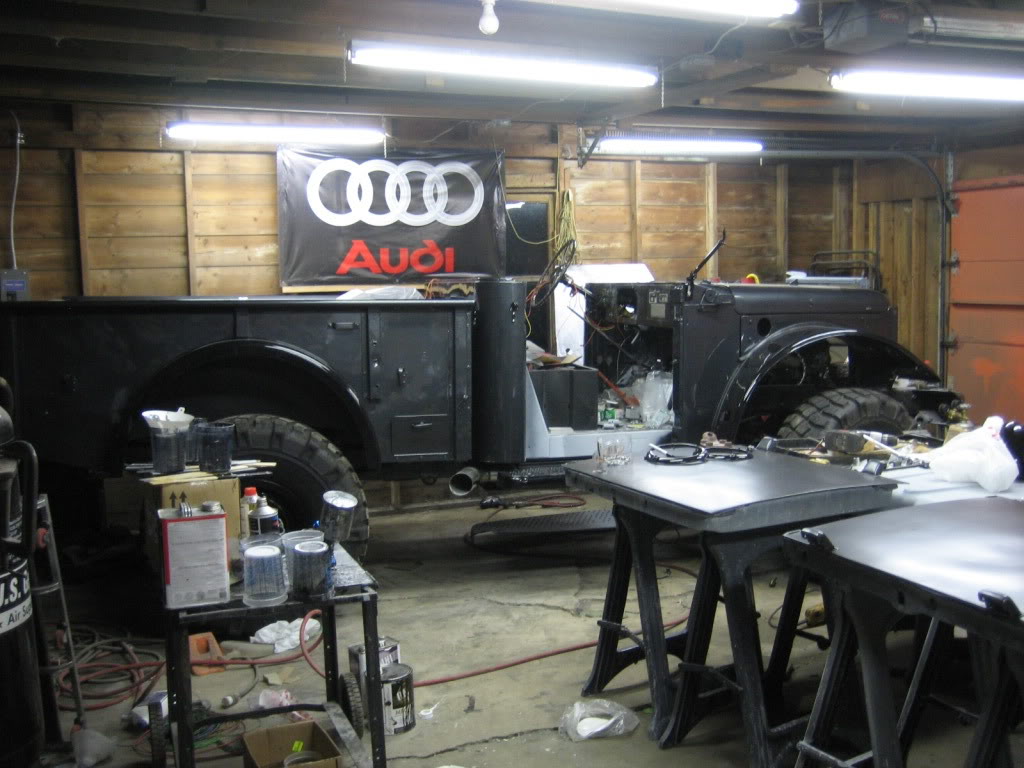
all that's left!
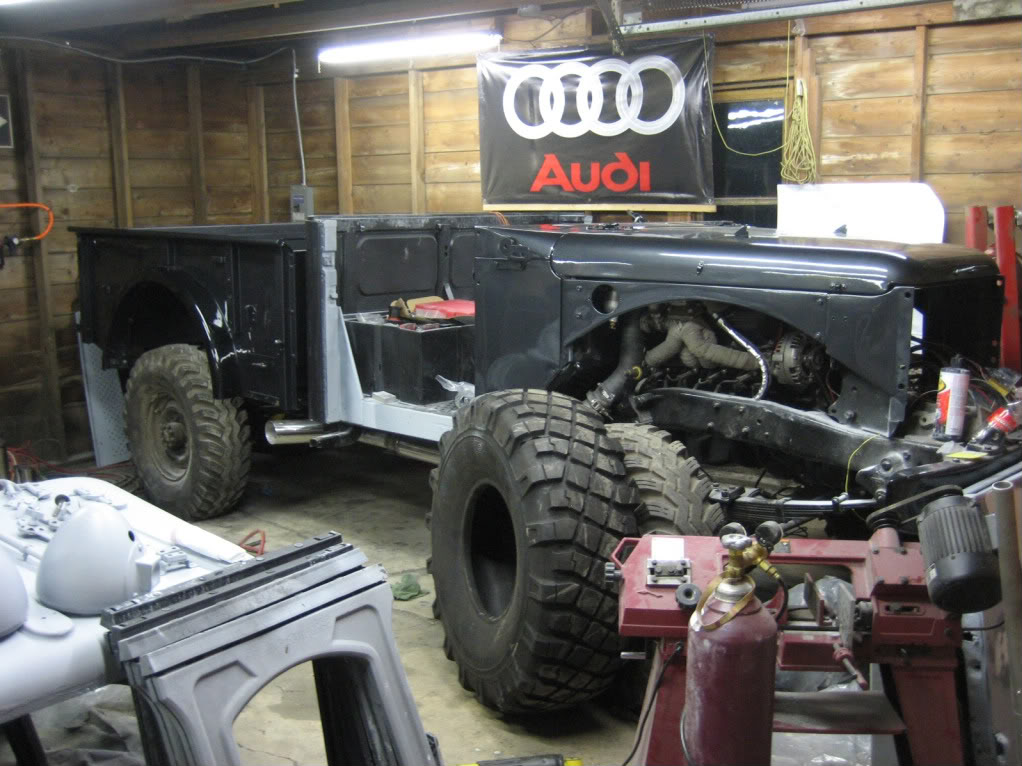
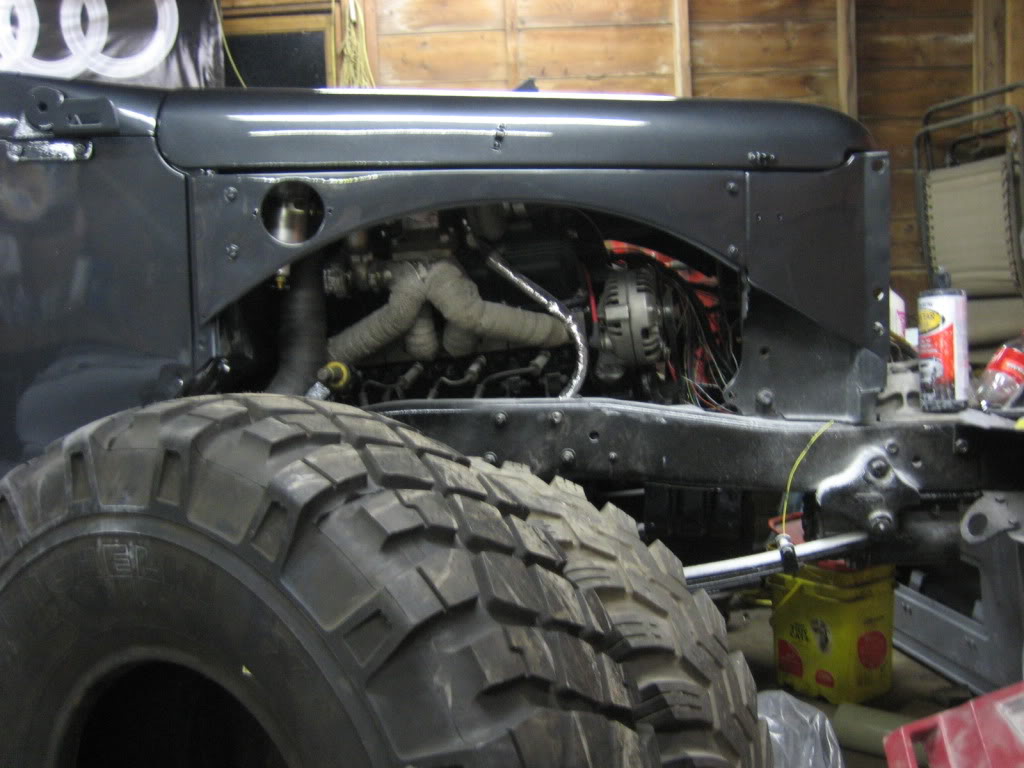
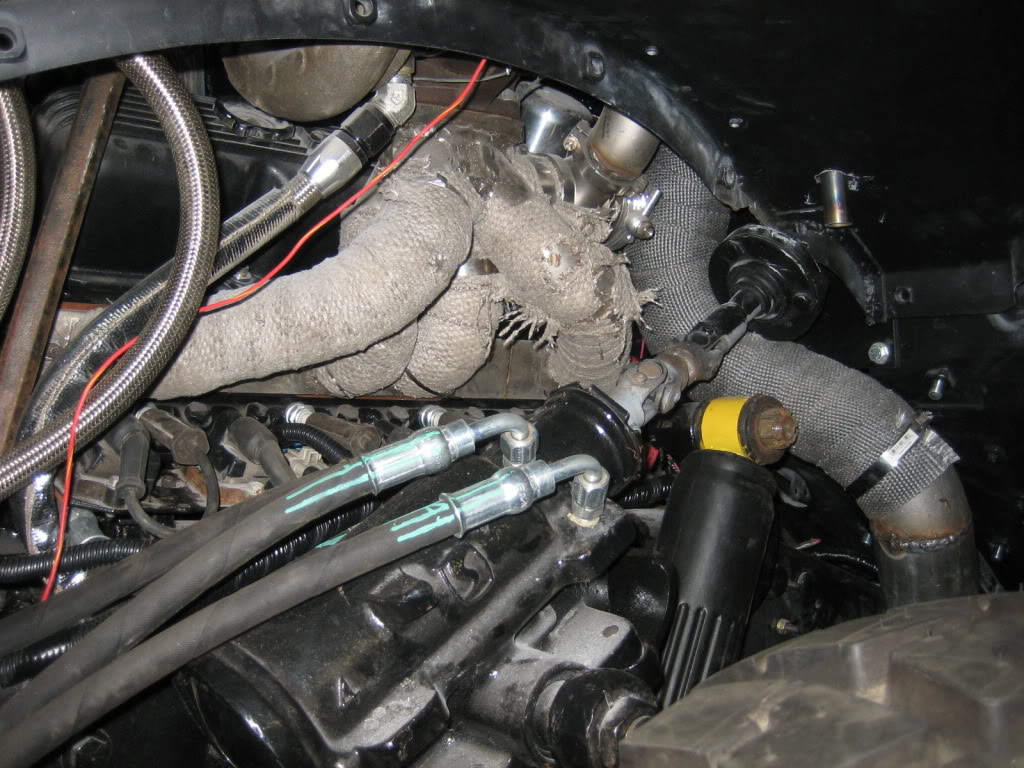
The beast lurking inside...
bodywork is FINALLY nearing completion. I have the cab top, windshield frames, and doors left, along with a few other rnadom things like the headlight buckets.
Got the new set of rims stripped and repainted, they look decent. Didn't spend a whole lot of time on them, good enough...
Spent most of the night working on the door skins. Someone beat the hell out of them, and then someon else tried to straighten them with a stud puller and just made them worse, and they have been a pet peeve of mine since I got the truck. They're all set now though, flatter than Kiera Knightly! :mrgreen:
all that's left!
The beast lurking inside...


Thread Starter
1.0 BAR
Joined: Feb 2003
Posts: 461
From: Wisconsin
thanks guys!
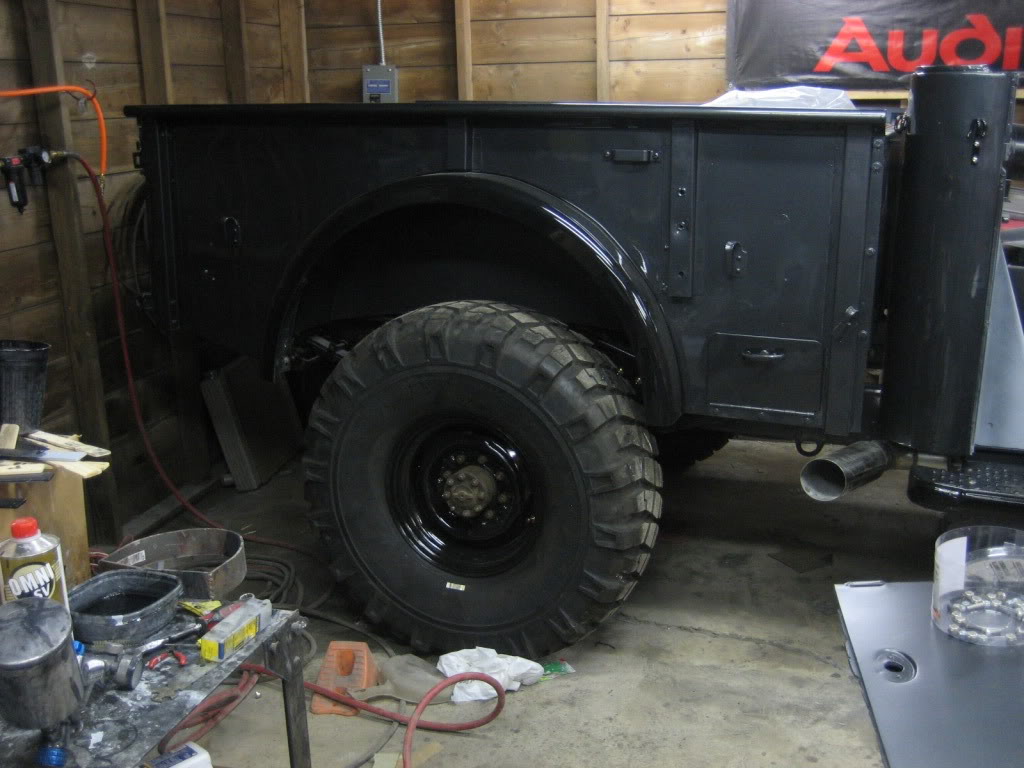
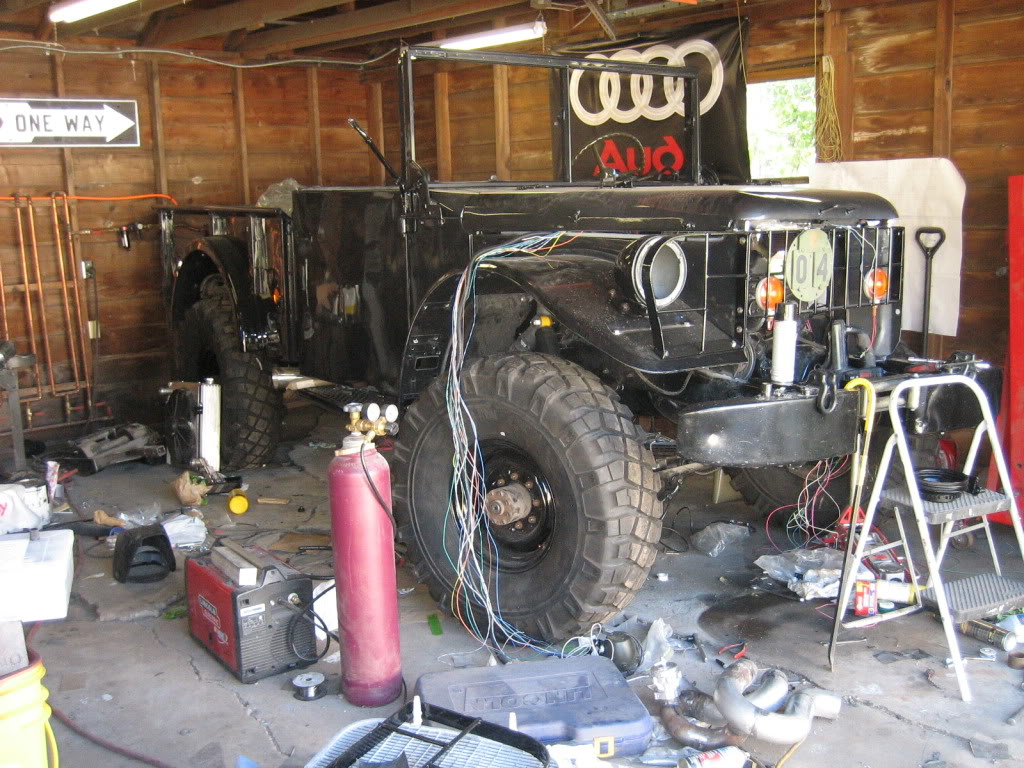
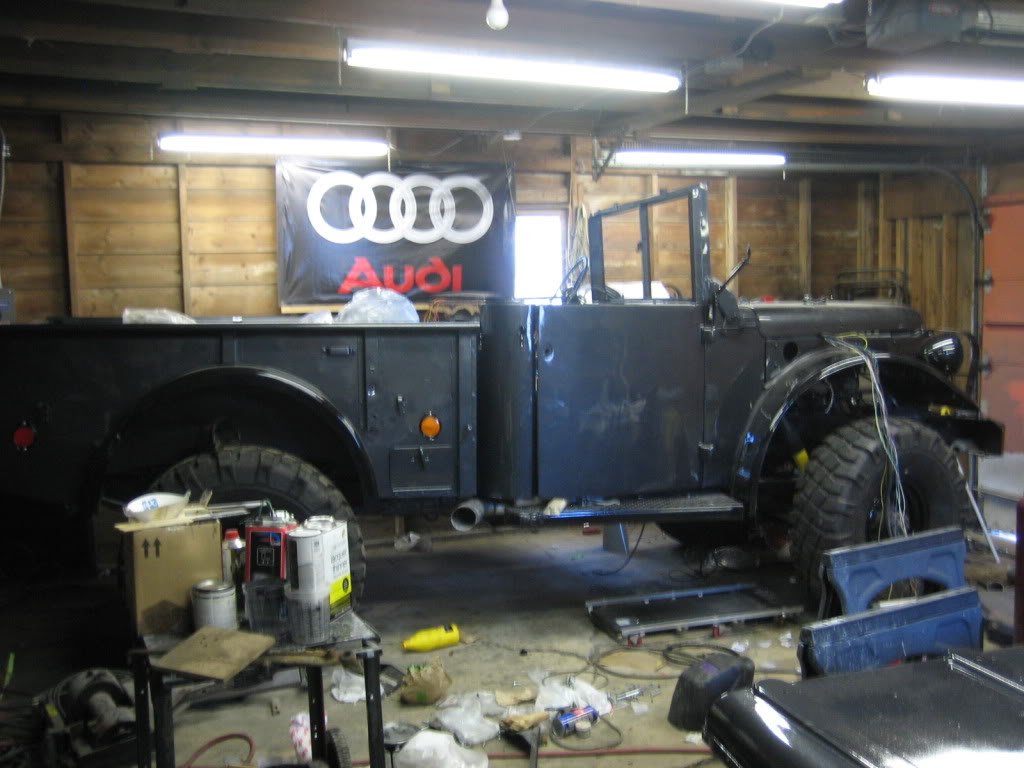
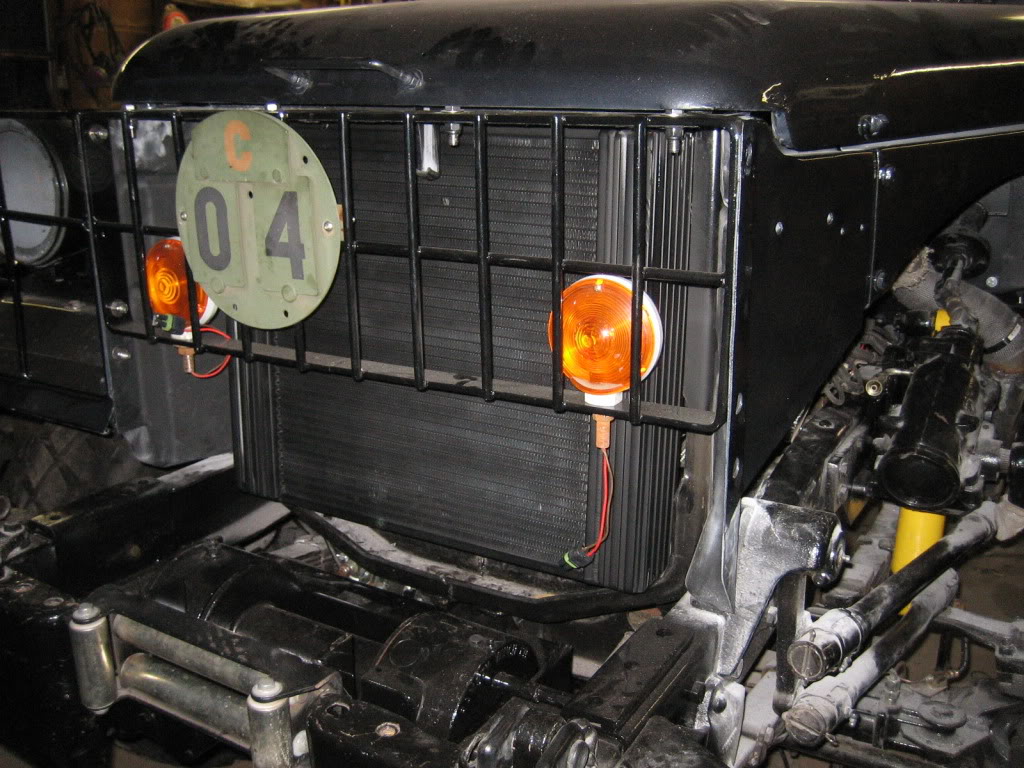
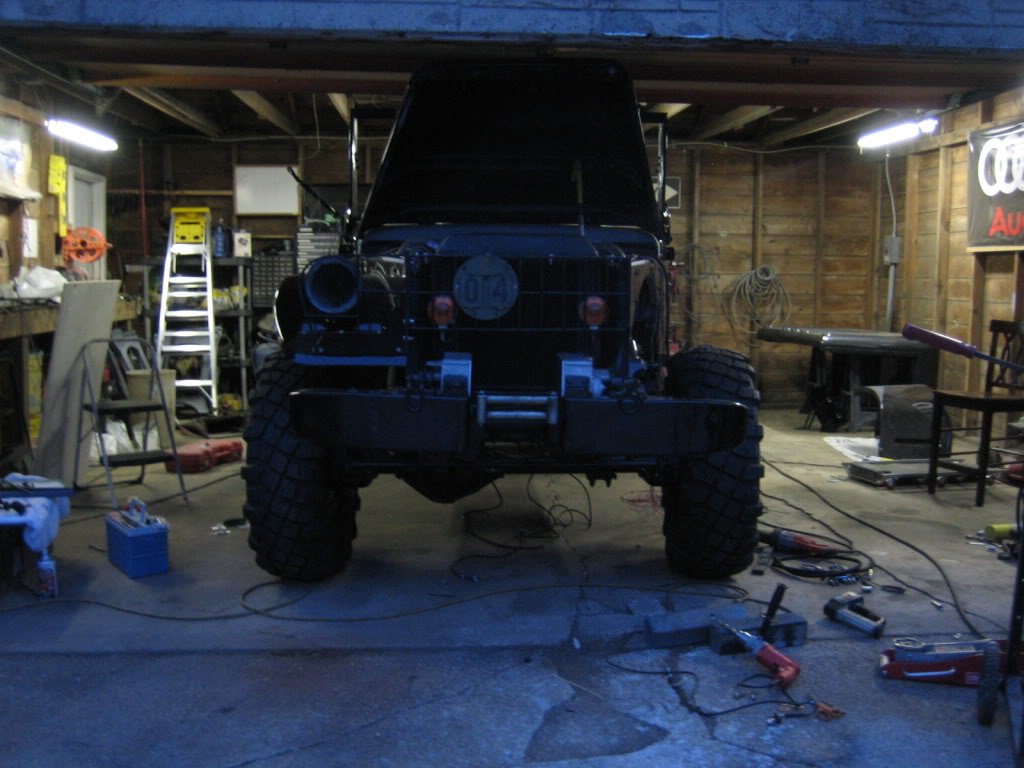
Time for an update... been busy, just havent been posting. Here is how she sits now... the raditor will get painted flat black...
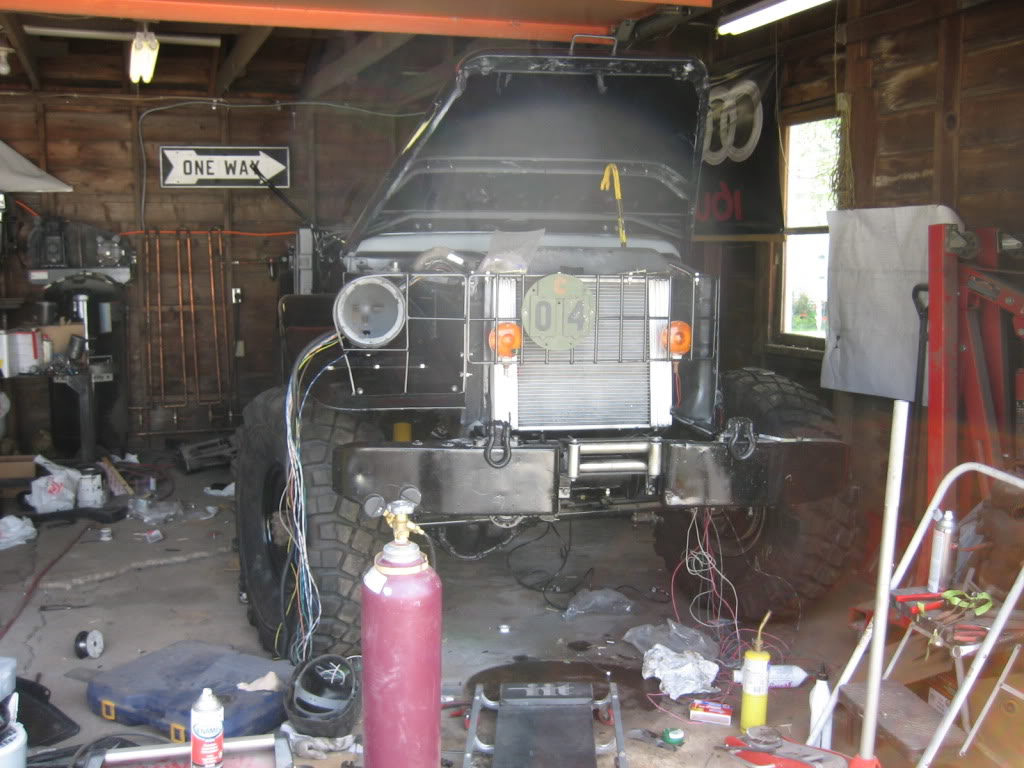
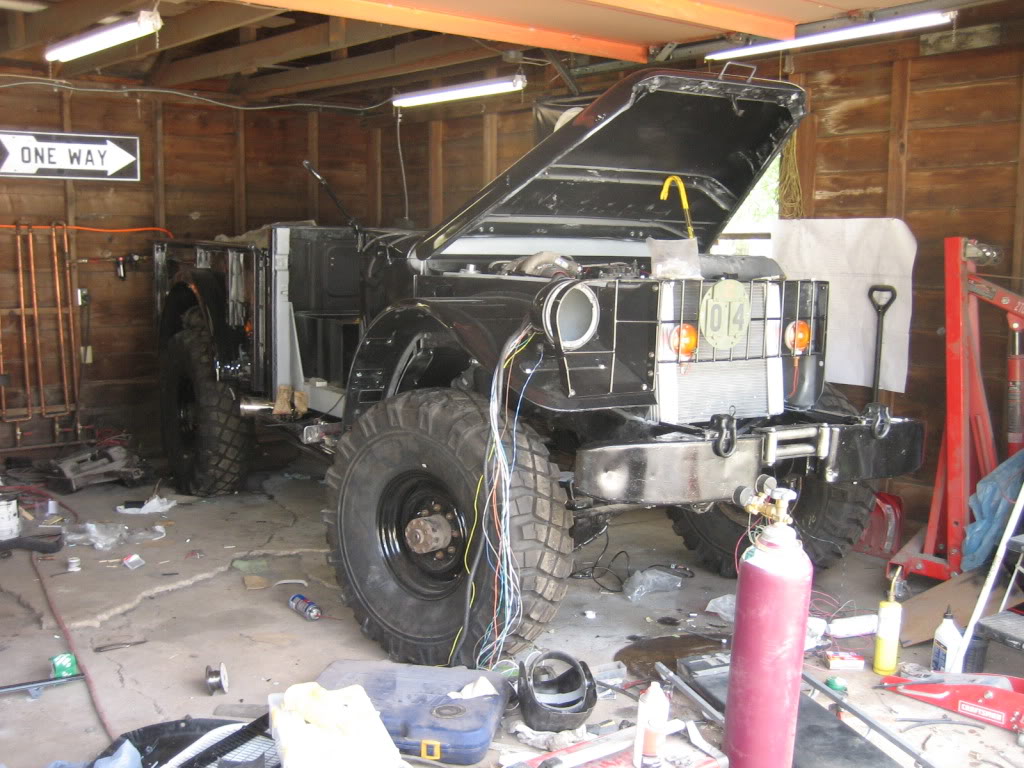
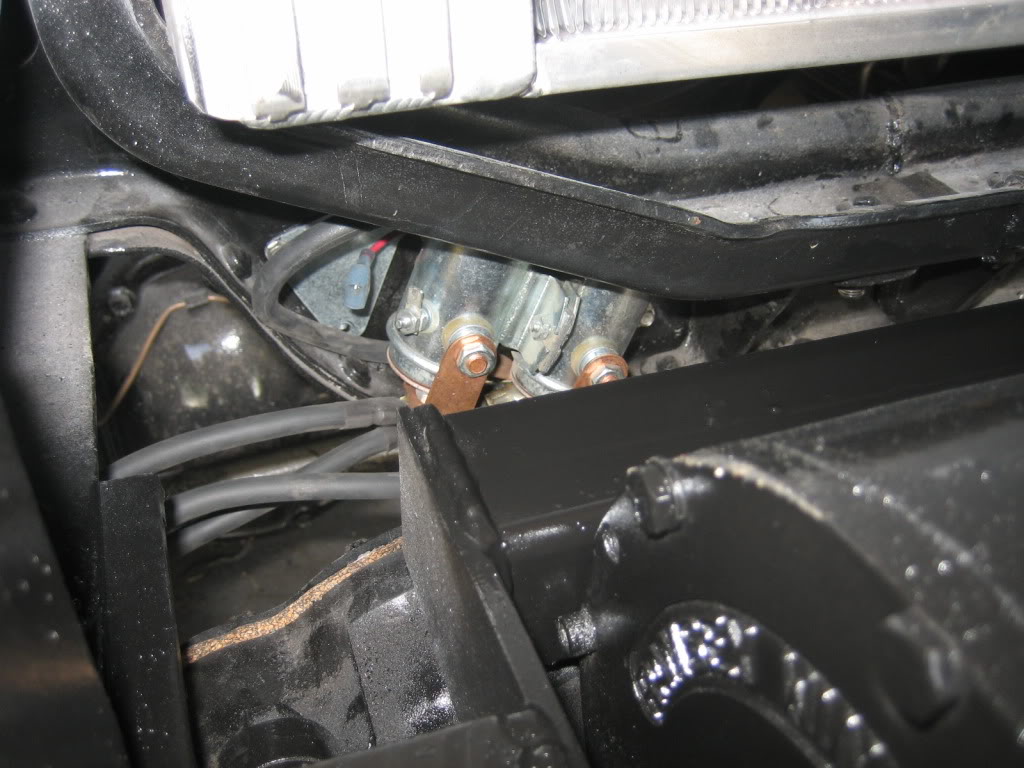
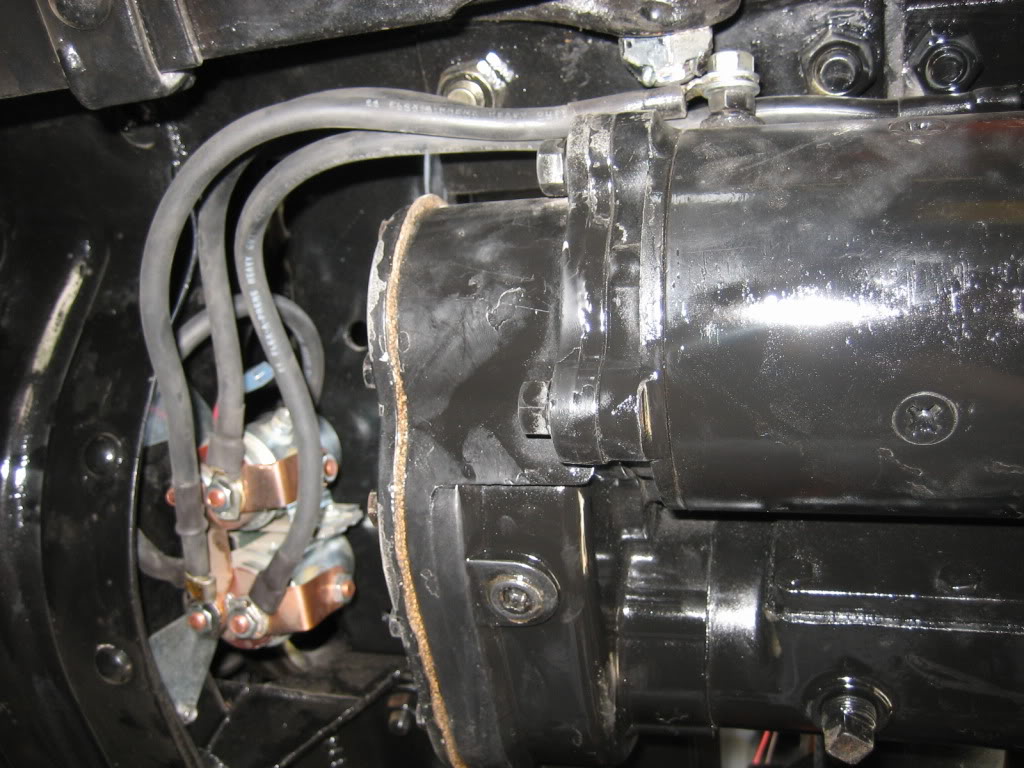
got the front winch wired up. Mounted the solenoids to the original crossmember in the front. Well protected, and, easy to get to if I need to change one. I got the aluminum plate I needed to finish the modifications to the original case, but, have been holding off on bolting them on until I finished the radiator mounts.
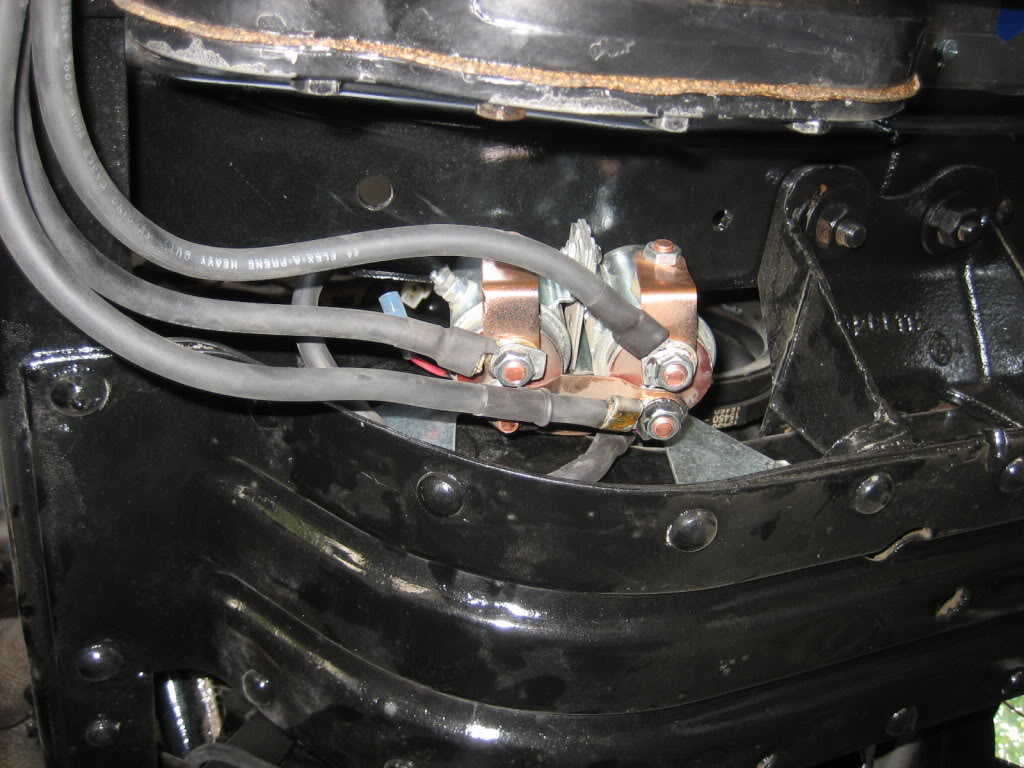
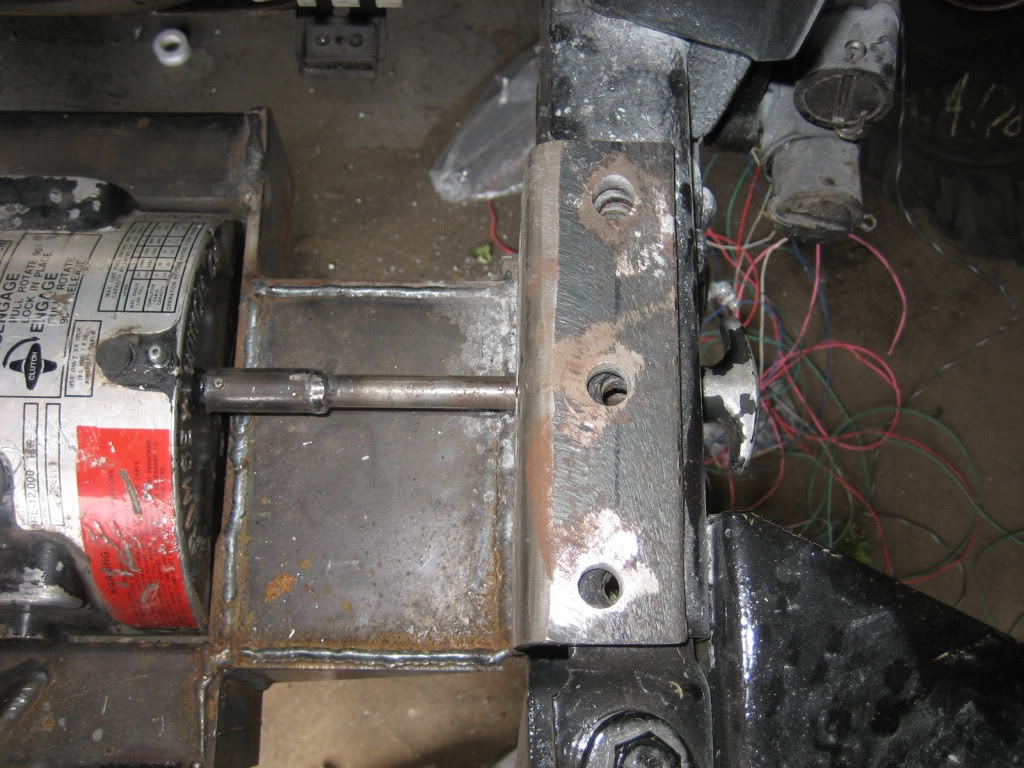
I had to modify the clutch handle for the winch as well. Because I am mounting the old case halves over the new winch to make the new one look like the original, I won't be able to get to it, so I made an extension, and passed it through the frame, behind the bumper, so that it is easy to get to.
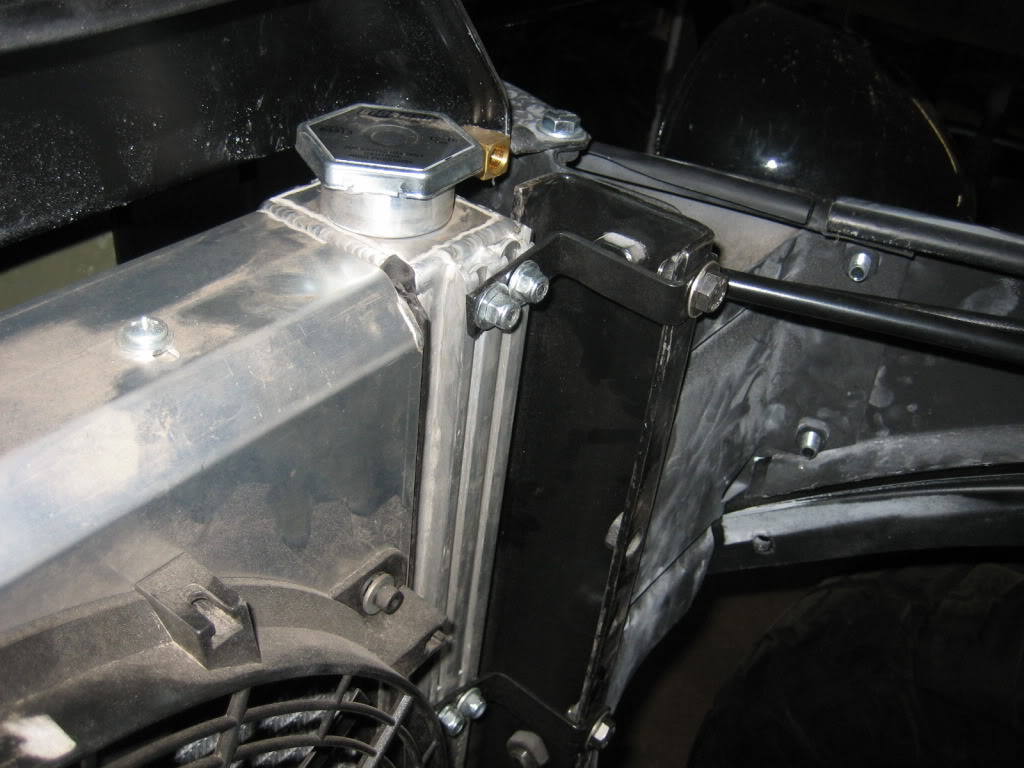
Speaking of radiator mounts... I got those done as well. Super easy. LOVE that flex-A_lite radiator. The rails on the sides of it make it so easy to mount it. I bent up some "Z" bent brackets that will bolt to the original radiator mount points. Waiting to install it until the crank position sensor (CPS) is finished, which, I also got done, just tonight.
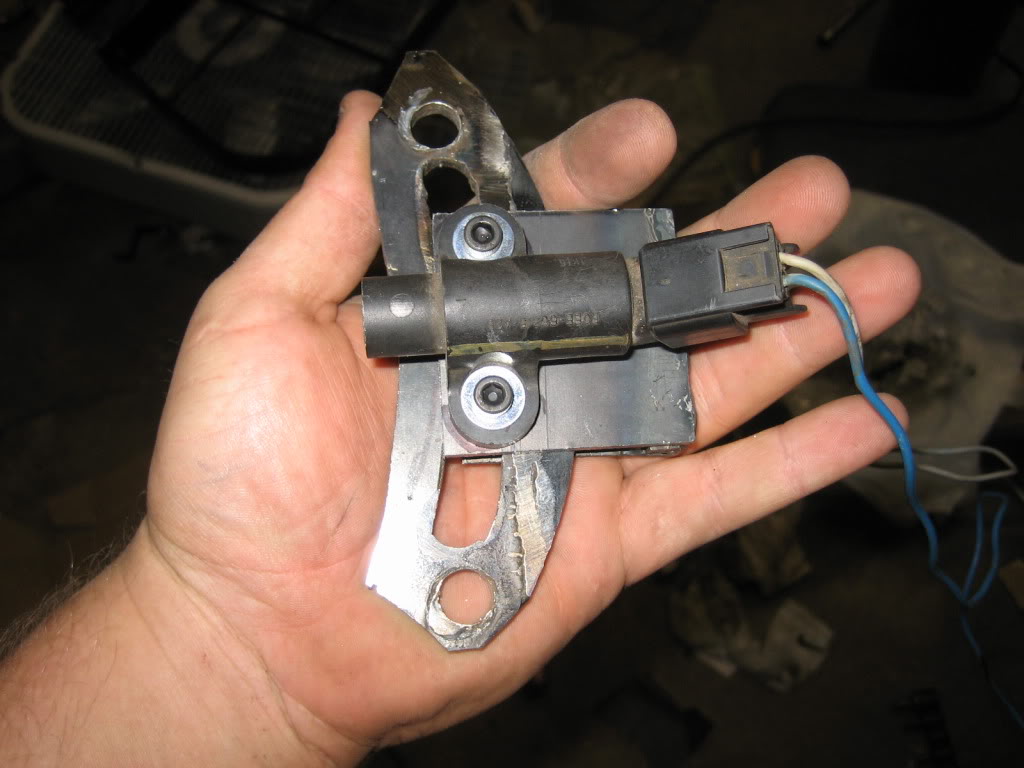
The CPS was a royal bitch. Murphy's law fought me the whole way. The CPS is the main sensor the EFI needs to run, all the injection, timing, and other functions are mainly derived from what it tells the ECU, so, it is very important that it be rigidly mounted, and accurately spaced and located.
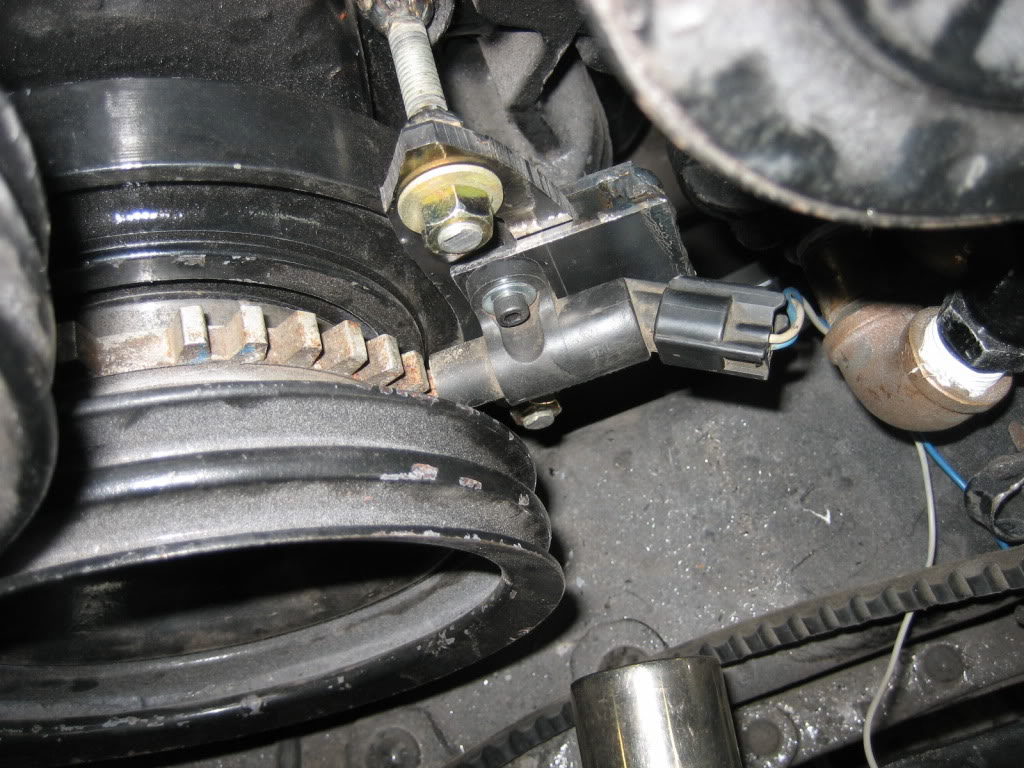
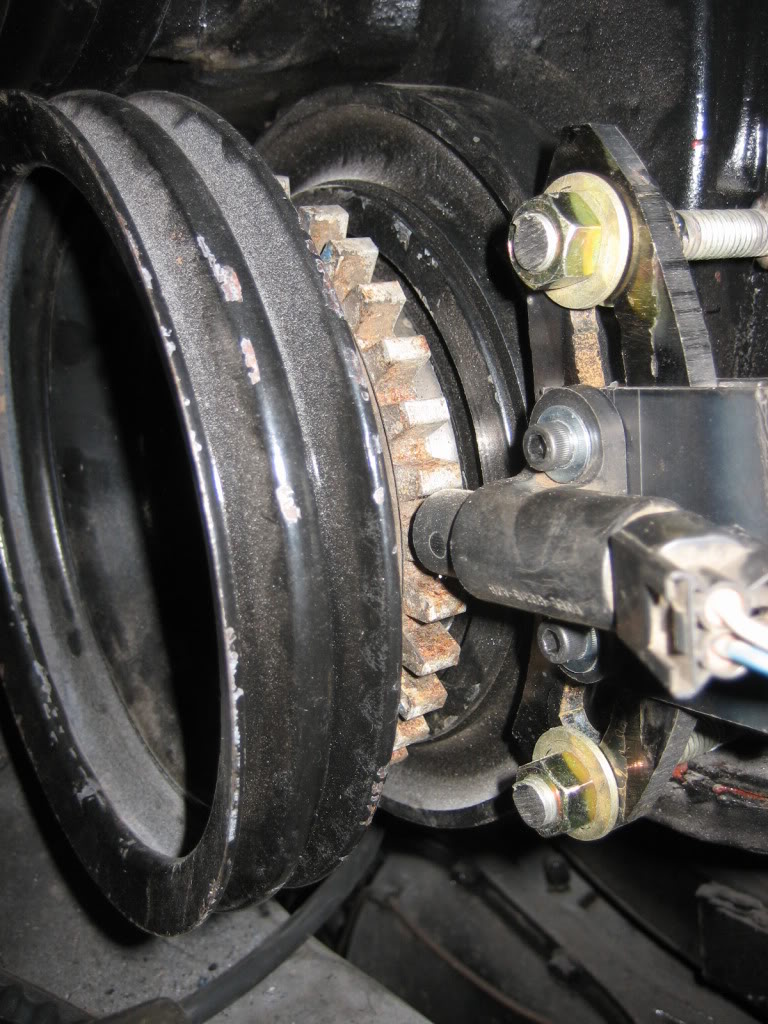
I had the original crank pulley OD turned some time ago so that it was a medium press fit to push the Ford escort 36-1 timing wheel onto it. They happened to almost be the same diameter, so, that part was easy. The hard part was the crank sensor mounting bracket. It needs both radial and degree adjustment, so it must be slotted. The diameter of the escort wheel also happens to be almost exactly the same diameter as the harmonic balancer, and, the offset of the factory pulley happens to be almost exactly the same as the depth of the sensor and bracket, so, it made building the bracket a challenge.
Ideally, I would just have a plate behind the bracket, pass bolts through the sensor, through the mounting bracket slot, and tighten them down and be done, BUT, with the harmonic balancer's OD being EXACTLY the same as the ID of the sensor slot, that idea went out the window, as the plate behind the bracket would hit the harmonic balancer.
So, after some brainstorming, I came up with the "C" clip idea... Bolts pass through the sensor, through the clip, through the mounting slot, and back through the clip, and bolt to the back of it, so, it clamps down on the bracket, without needing to come anywhere near the harmonic balancer... Works awesome! I clamped it down tight, and tried to pry it ou of position with a screwdriver and couldnt budge it.
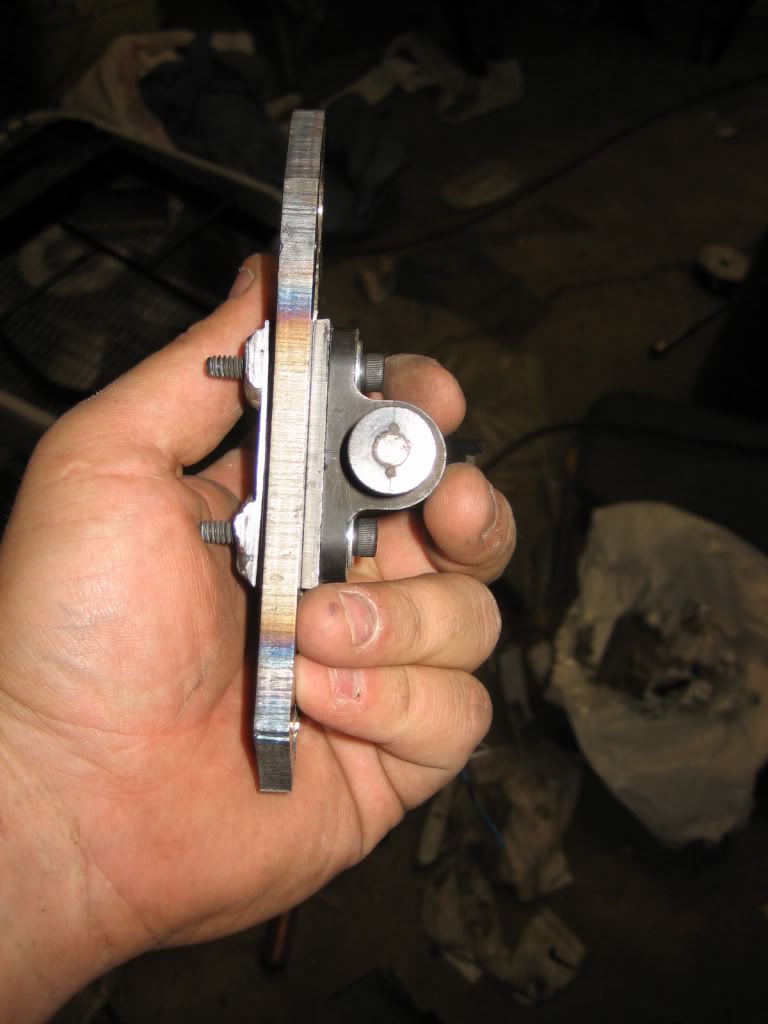
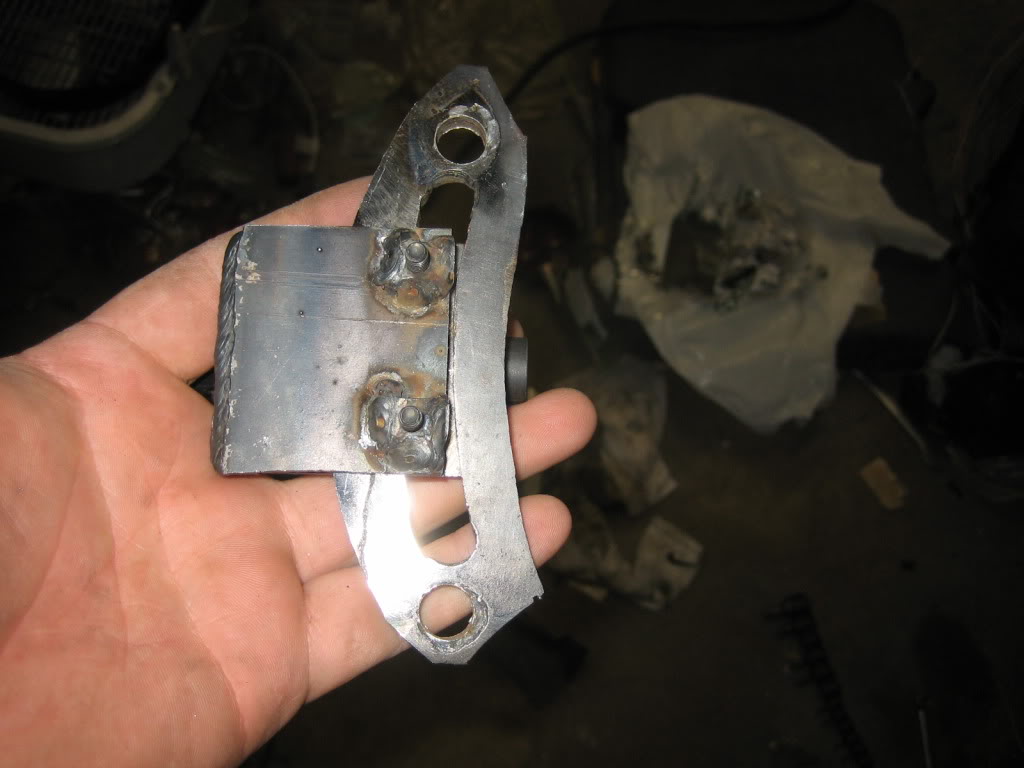
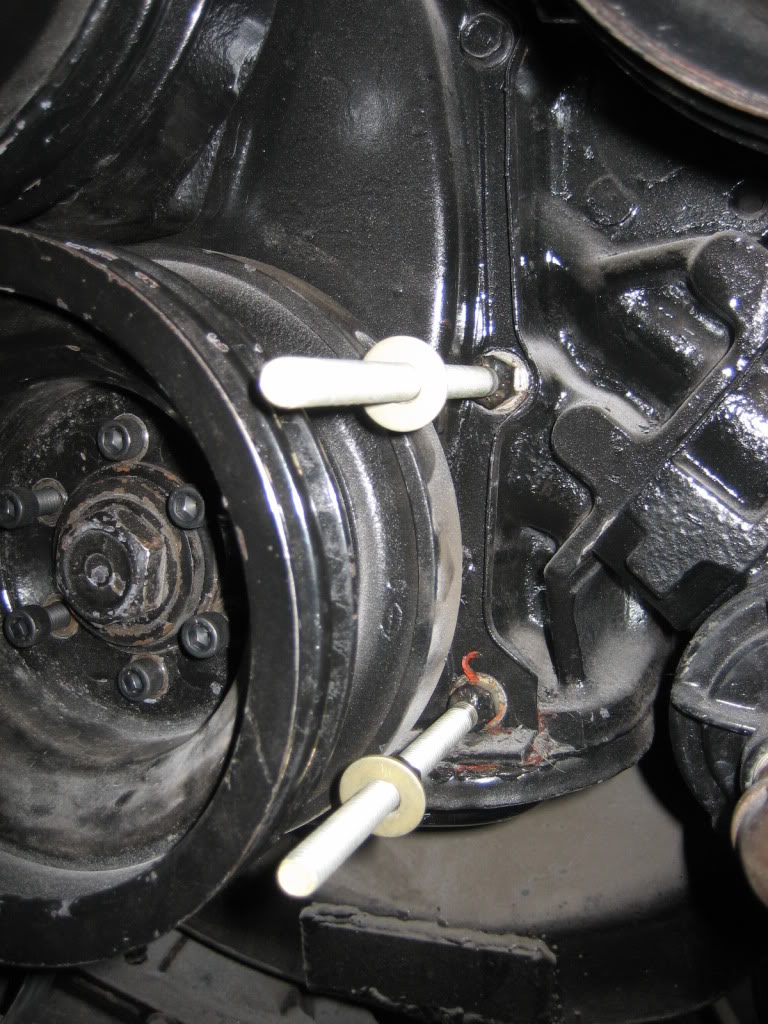
The main bracket is held to the block with two pieces of 3/8" all thread. I welded stop nuts where it hits the block (original bolts held the timing set cover down), and where the bracket threads on so that the bracket doesnt move or loosen up over time.
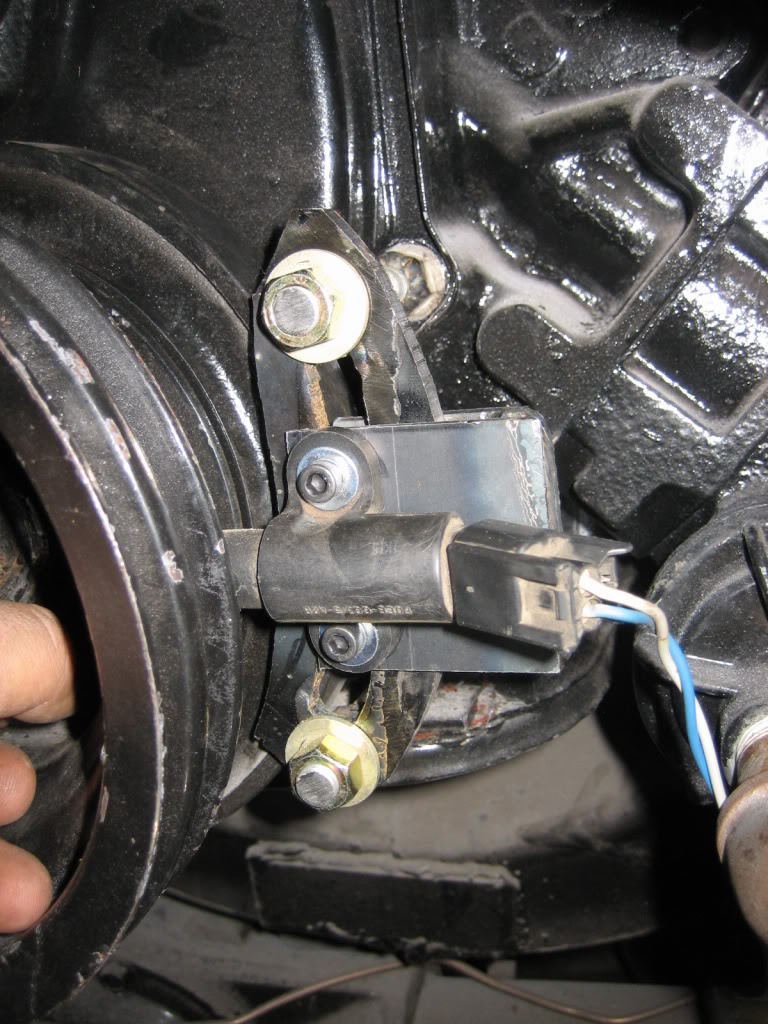
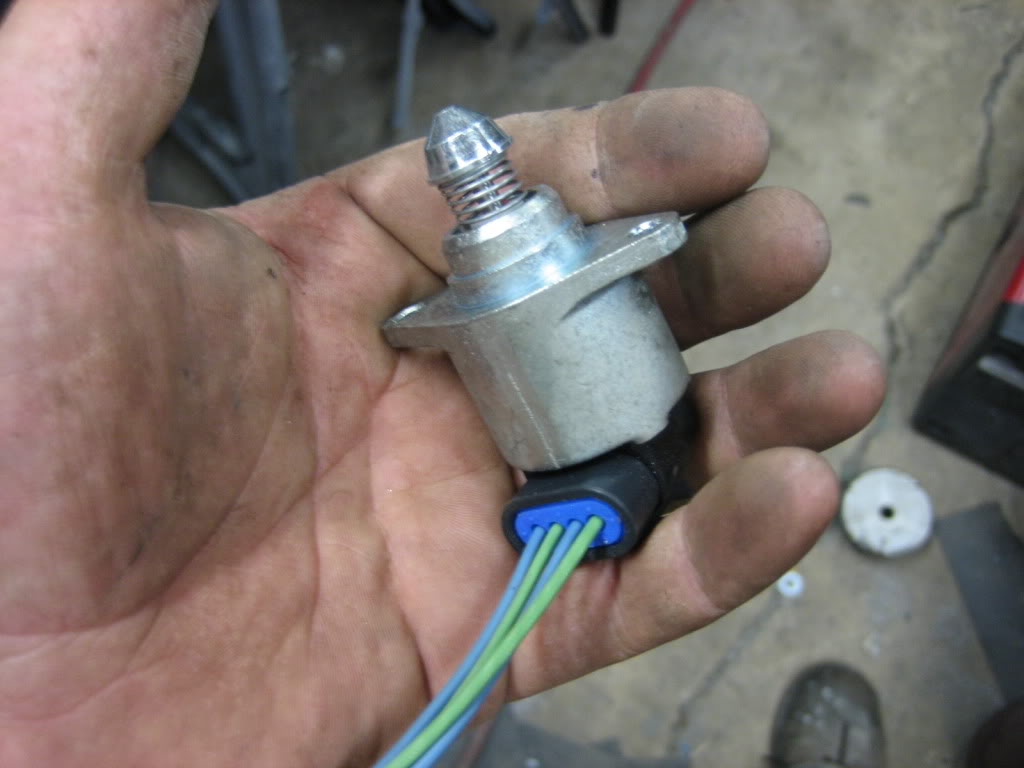
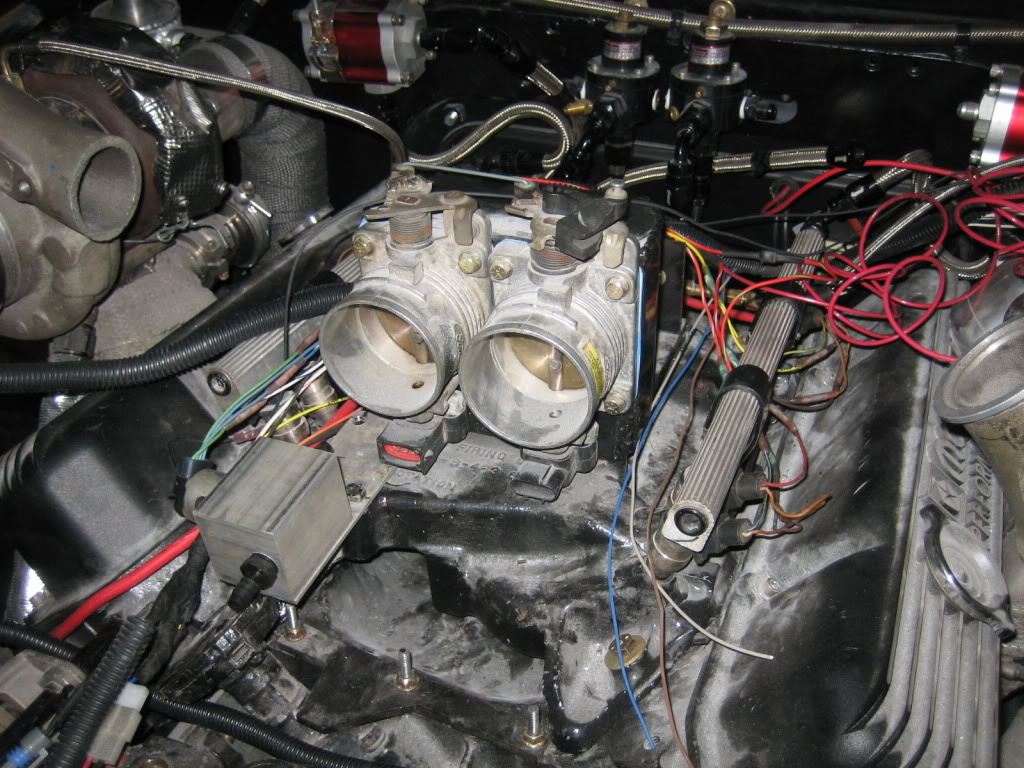
I also got the intake manifold on, bolted the fuel rails down, and all that jazz. I jsut have to make an Idle air Control valve block. The IAC controls the idle speed, and is what speeds up and slows down your idle when the car is cold and warming up. I could buy a block online, but, $70 for a hunk of aluminum with a few holes in it seems rediculous so, I'll make my own.
Once that's done, I need to do some work to the power steering system (didn't ensue proper clearances on a few things... D'oH!!!), install everything I just mentioned above, get som fluids in it, finish the wiring, and, we can light the beast!!!
Time for an update... been busy, just havent been posting. Here is how she sits now... the raditor will get painted flat black...
got the front winch wired up. Mounted the solenoids to the original crossmember in the front. Well protected, and, easy to get to if I need to change one. I got the aluminum plate I needed to finish the modifications to the original case, but, have been holding off on bolting them on until I finished the radiator mounts.
I had to modify the clutch handle for the winch as well. Because I am mounting the old case halves over the new winch to make the new one look like the original, I won't be able to get to it, so I made an extension, and passed it through the frame, behind the bumper, so that it is easy to get to.
Speaking of radiator mounts... I got those done as well. Super easy. LOVE that flex-A_lite radiator. The rails on the sides of it make it so easy to mount it. I bent up some "Z" bent brackets that will bolt to the original radiator mount points. Waiting to install it until the crank position sensor (CPS) is finished, which, I also got done, just tonight.
The CPS was a royal bitch. Murphy's law fought me the whole way. The CPS is the main sensor the EFI needs to run, all the injection, timing, and other functions are mainly derived from what it tells the ECU, so, it is very important that it be rigidly mounted, and accurately spaced and located.
I had the original crank pulley OD turned some time ago so that it was a medium press fit to push the Ford escort 36-1 timing wheel onto it. They happened to almost be the same diameter, so, that part was easy. The hard part was the crank sensor mounting bracket. It needs both radial and degree adjustment, so it must be slotted. The diameter of the escort wheel also happens to be almost exactly the same diameter as the harmonic balancer, and, the offset of the factory pulley happens to be almost exactly the same as the depth of the sensor and bracket, so, it made building the bracket a challenge.
Ideally, I would just have a plate behind the bracket, pass bolts through the sensor, through the mounting bracket slot, and tighten them down and be done, BUT, with the harmonic balancer's OD being EXACTLY the same as the ID of the sensor slot, that idea went out the window, as the plate behind the bracket would hit the harmonic balancer.
So, after some brainstorming, I came up with the "C" clip idea... Bolts pass through the sensor, through the clip, through the mounting slot, and back through the clip, and bolt to the back of it, so, it clamps down on the bracket, without needing to come anywhere near the harmonic balancer... Works awesome! I clamped it down tight, and tried to pry it ou of position with a screwdriver and couldnt budge it.
The main bracket is held to the block with two pieces of 3/8" all thread. I welded stop nuts where it hits the block (original bolts held the timing set cover down), and where the bracket threads on so that the bracket doesnt move or loosen up over time.
I also got the intake manifold on, bolted the fuel rails down, and all that jazz. I jsut have to make an Idle air Control valve block. The IAC controls the idle speed, and is what speeds up and slows down your idle when the car is cold and warming up. I could buy a block online, but, $70 for a hunk of aluminum with a few holes in it seems rediculous so, I'll make my own.
Once that's done, I need to do some work to the power steering system (didn't ensue proper clearances on a few things... D'oH!!!), install everything I just mentioned above, get som fluids in it, finish the wiring, and, we can light the beast!!!
Thread Starter
1.0 BAR
Joined: Feb 2003
Posts: 461
From: Wisconsin
windshield frame and doors are on. Friggin cab is bent like 1/2"!! Went to close the doors and nowhere close to fitting. had to "adjust" the hinges in the front with my 3 lb mallet, which, of course screwed up the paint, so, gotta touch that up. Luckily it is on the back side of the hinge, so it won't be too obvious. Still pissed me off though!
Thread Starter
1.0 BAR
Joined: Feb 2003
Posts: 461
From: Wisconsin
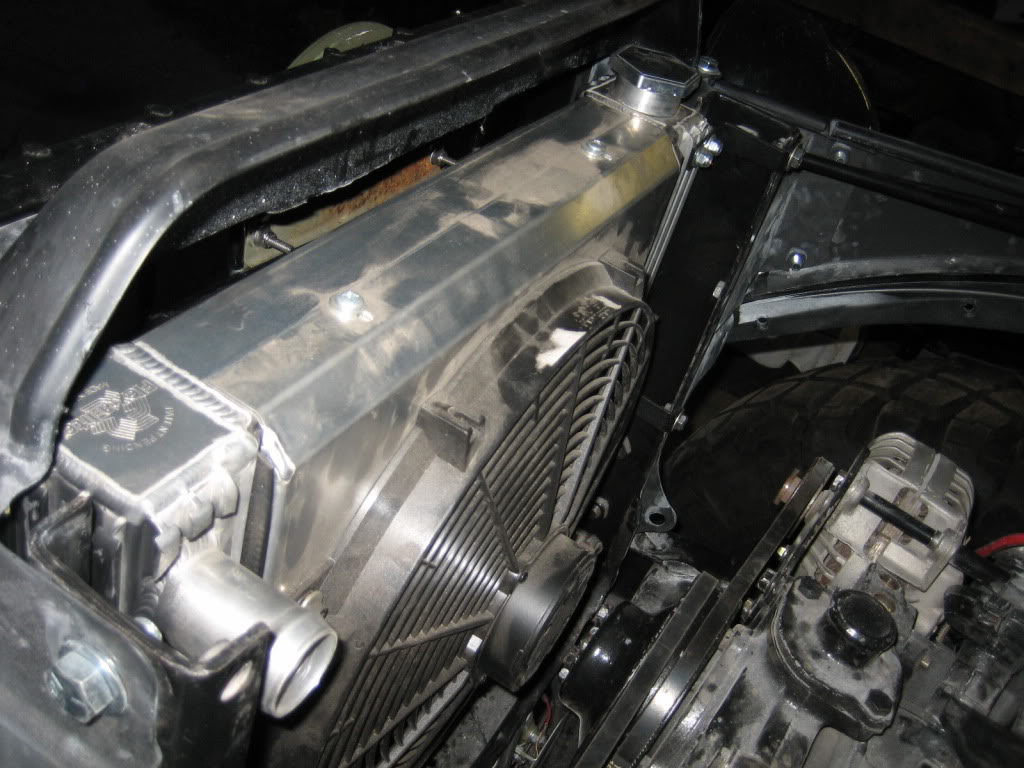
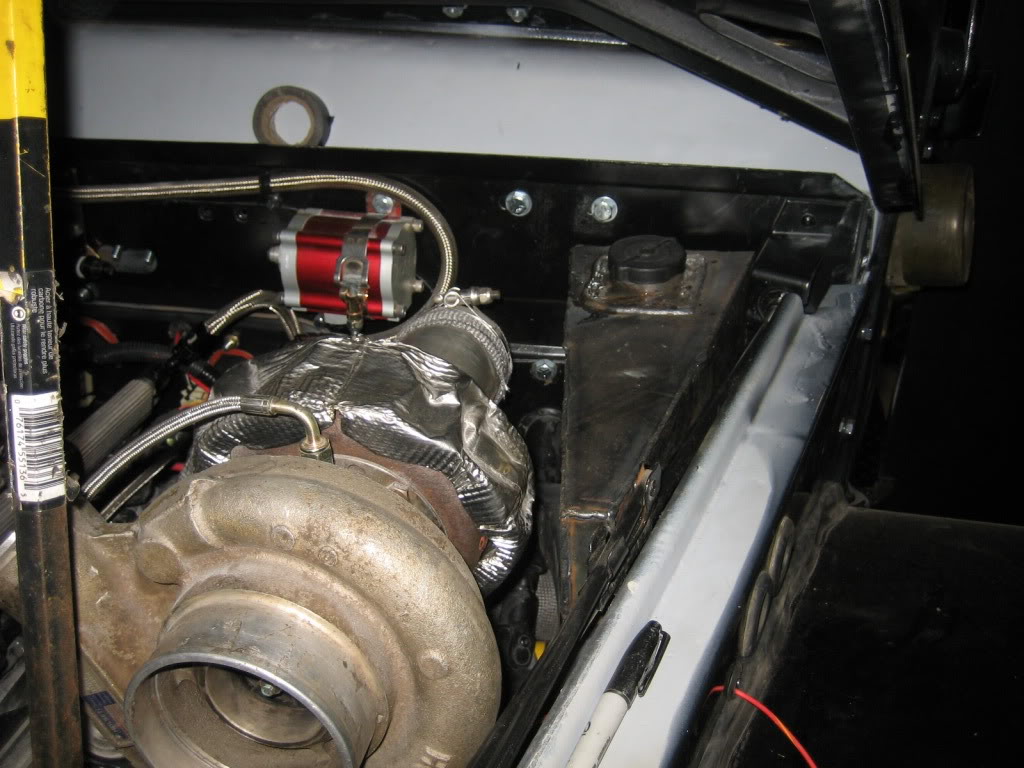
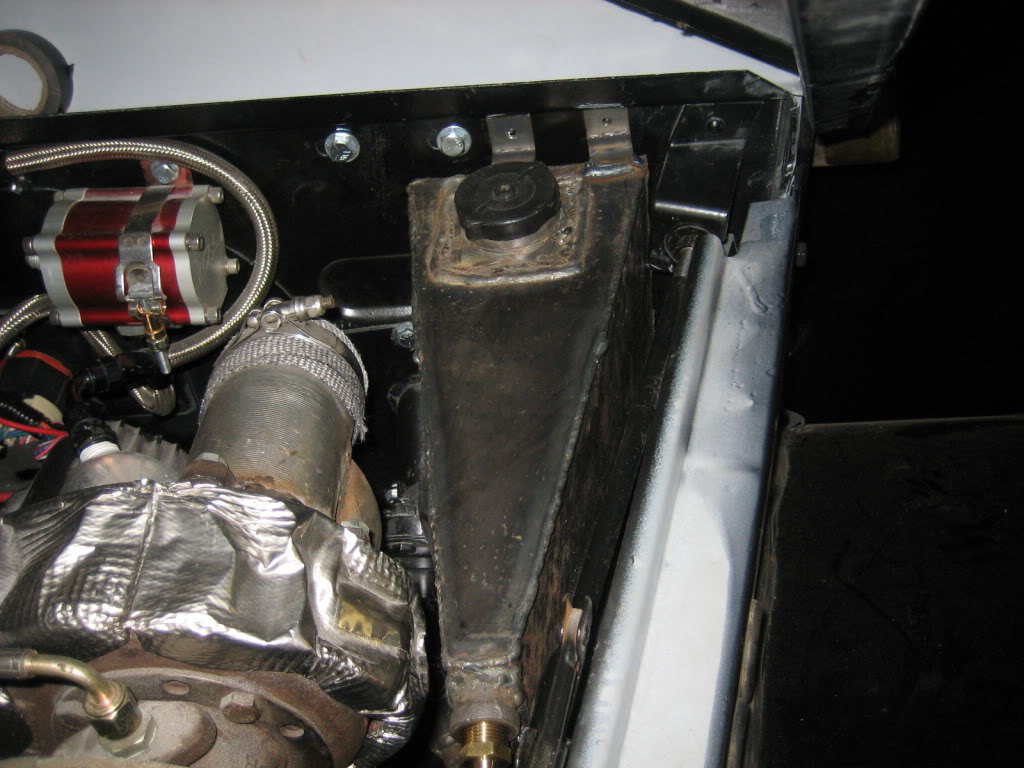
Got the CPS mounted and aligned. Also got the radiator in, the brackets I cooked up for it worked out great. Got the radiator expansion tank in, and the winch covers half mounted. LOVE that Flex-A-Lite radiator. the slotted mounts on the tanks make it so easy to mount, and it fits the truck perfectly!
Also got the rear winch half wired as well. Great progress tonight:

Also got the rear winch half wired as well. Great progress tonight:
Thread Starter
1.0 BAR
Joined: Feb 2003
Posts: 461
From: Wisconsin
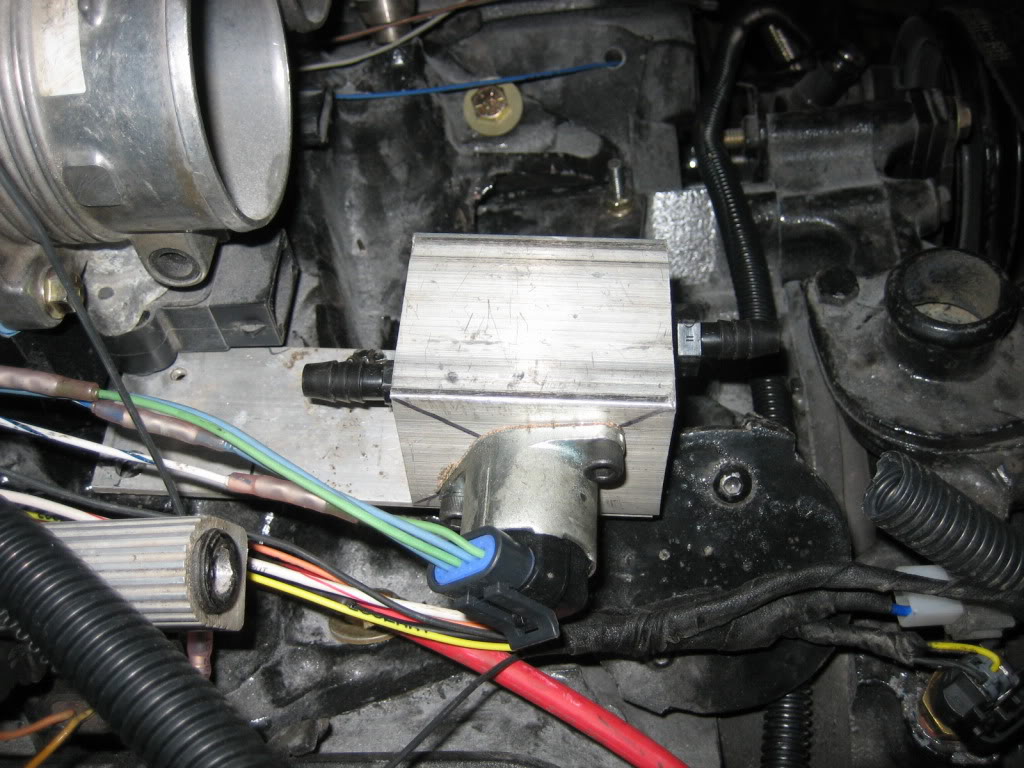
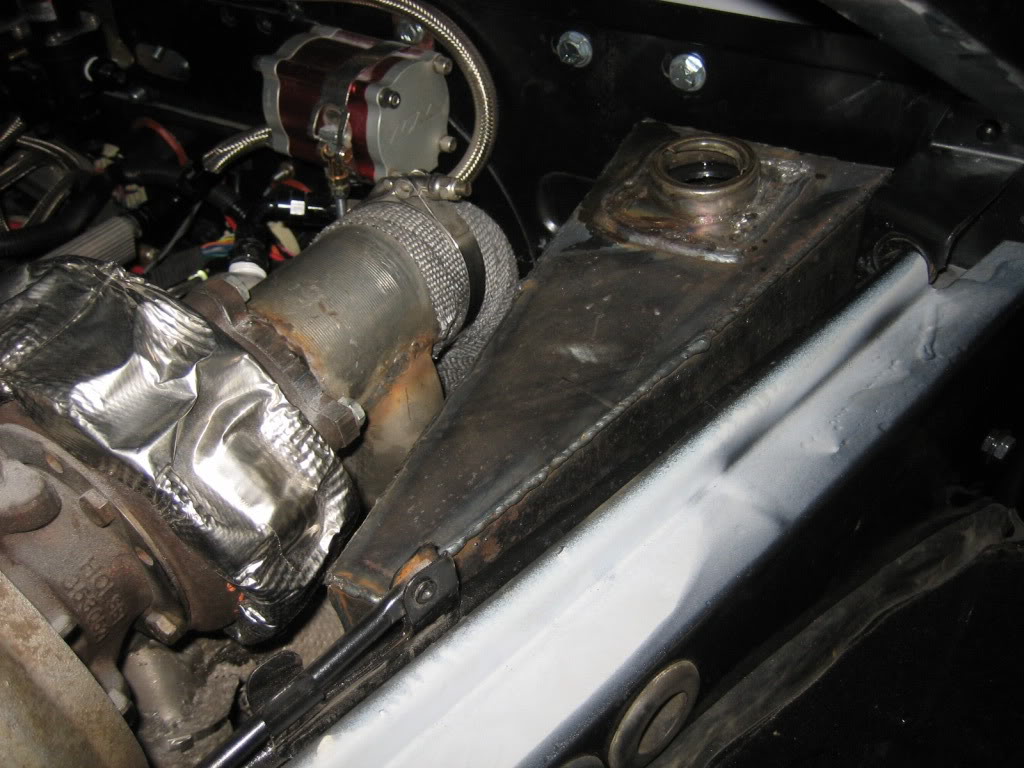
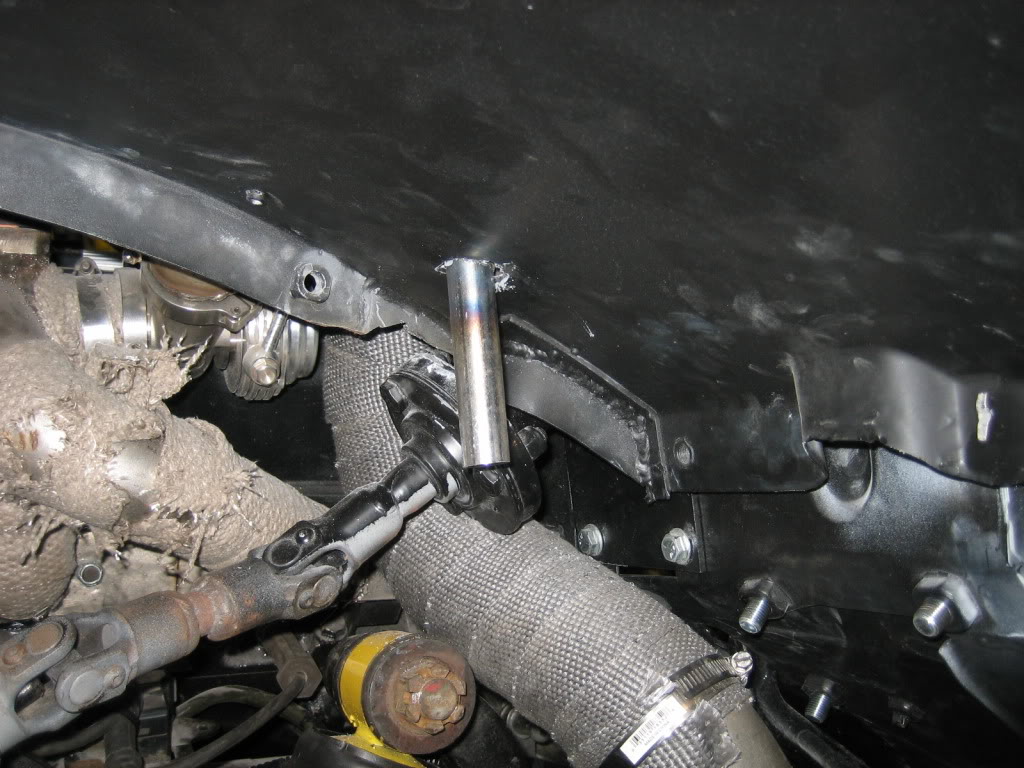
more work done... 22 hous of wiring. EFI is done, haven't powered it up yet, as I still need to finish the main power cables. Got the IAC motor mounted, making the block to hold it wasn't bad at all, and certainly not worth the $75 for one online. got the winch cases mounted in the front, looks good! Also got the power steerig lines done, all I need to do is make a reservoir to sit on the drivers fender up by the cab. The one I nabbed from the boneyard isn't going to work without some serious modification, and, if I have to do that much work, I'll just make a new one that fits exactly how I want it. Driver's side fender is also on, but, not in the pictures.
IAC block, wiring mess half done. looks much much better now, I need to toake another shot of it:

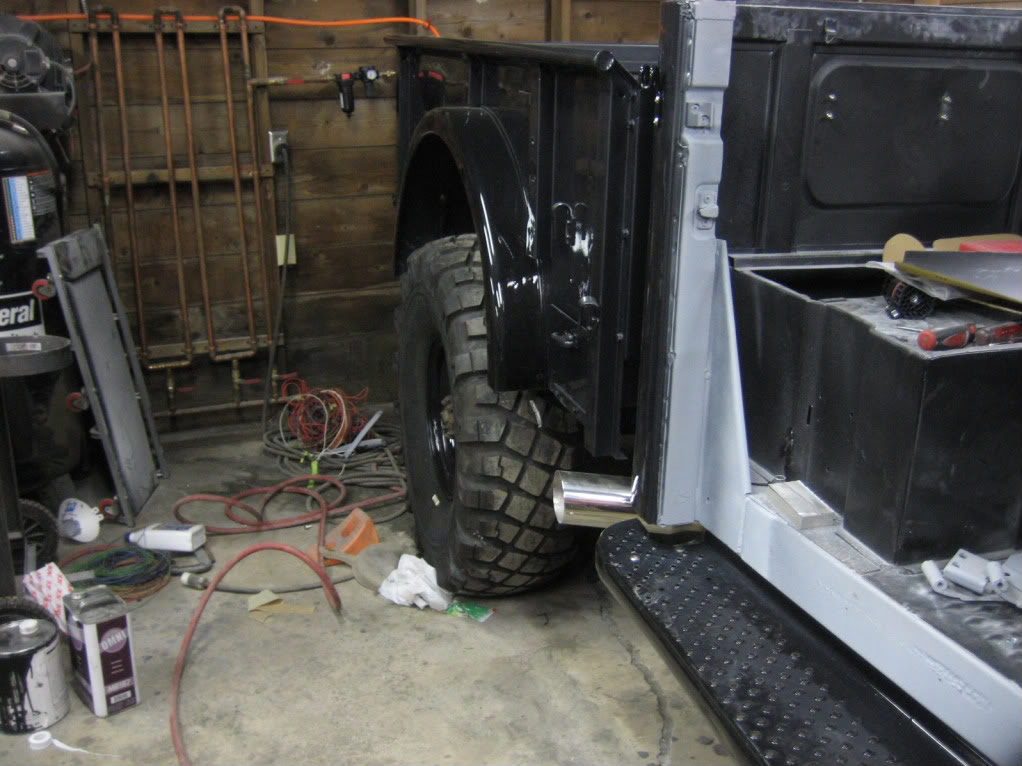
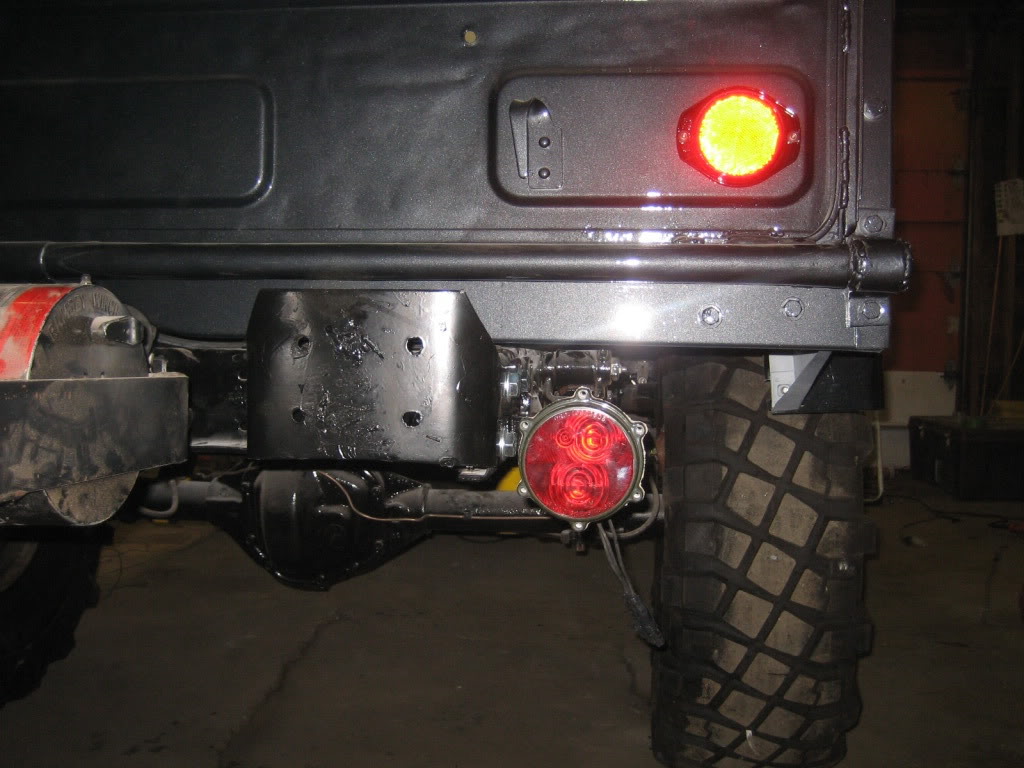
tailights mounted as well... a bit lower than I originally intended...will probably go back later and move them up some:
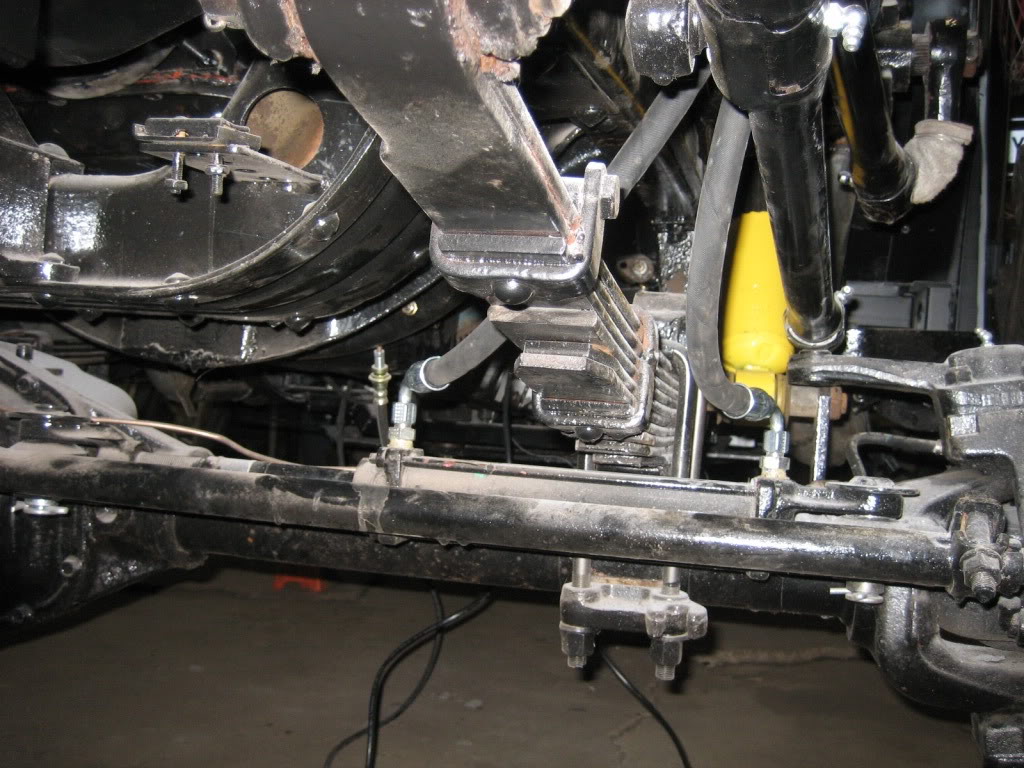
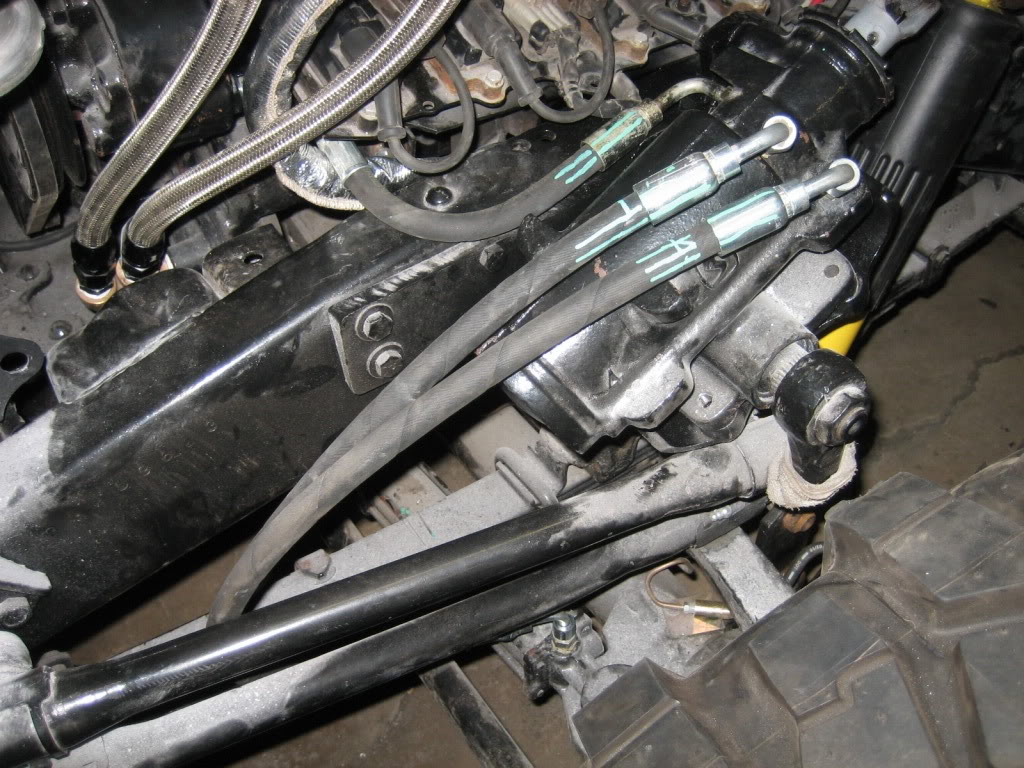
hydro assist ram lines:
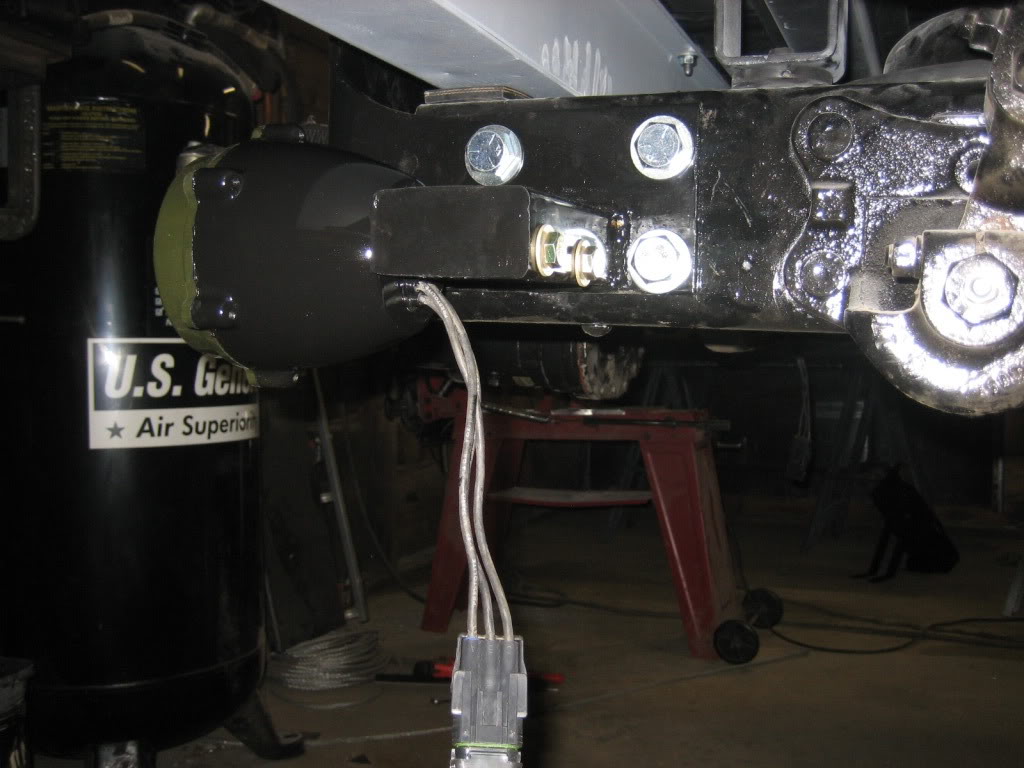
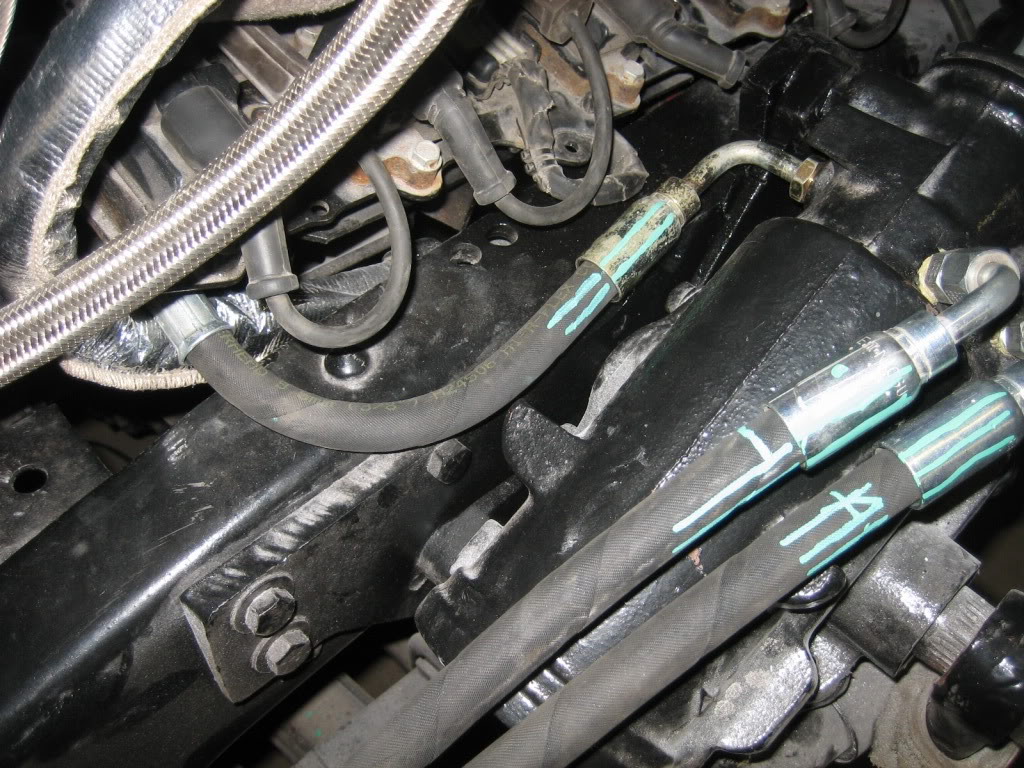
feed in line is ultra short:
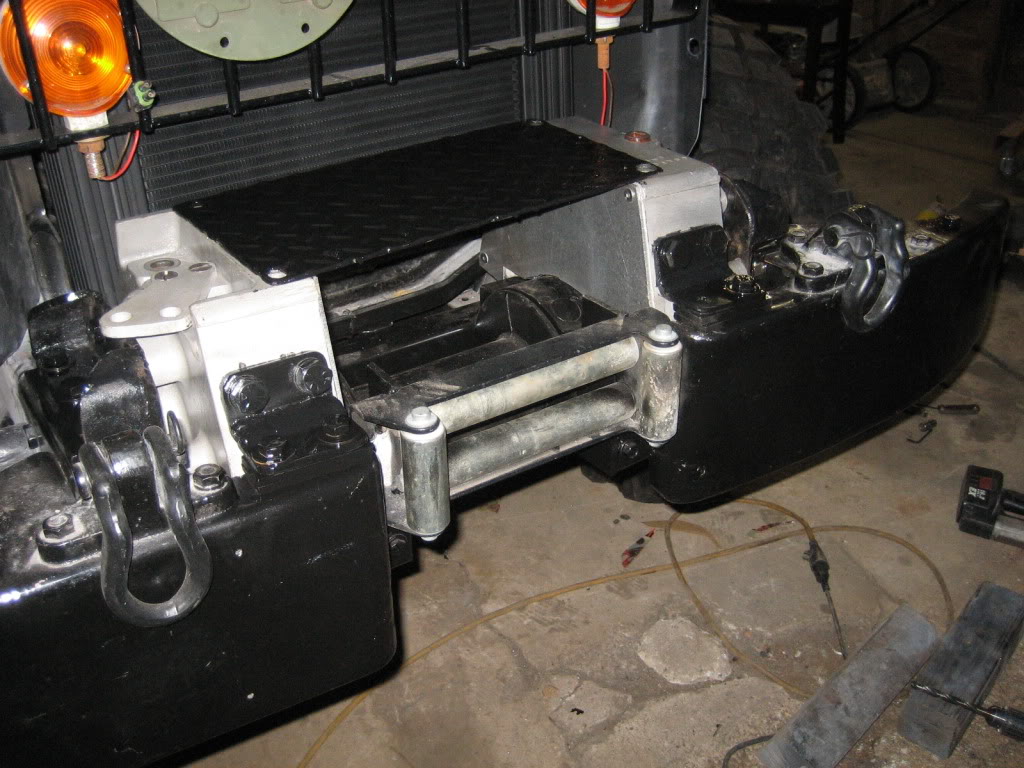
winch cases. you can see the plates I made for the inside of each case. countersunk the heads so they look factory to anyone that doesnt know any better. Clear coated them with 3 coats of clear as well so they stay pretty:
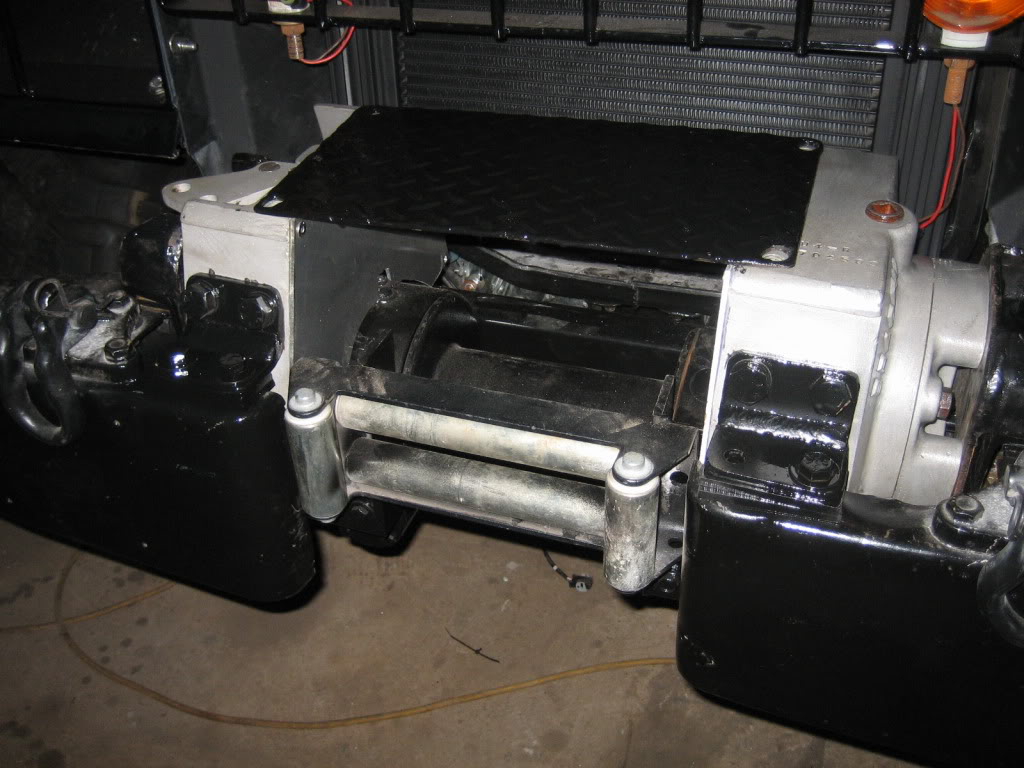
looks dumb without the drivers fender... it's on now, but, you get the idea:

IAC block, wiring mess half done. looks much much better now, I need to toake another shot of it:
tailights mounted as well... a bit lower than I originally intended...will probably go back later and move them up some:
hydro assist ram lines:
feed in line is ultra short:
winch cases. you can see the plates I made for the inside of each case. countersunk the heads so they look factory to anyone that doesnt know any better. Clear coated them with 3 coats of clear as well so they stay pretty:
looks dumb without the drivers fender... it's on now, but, you get the idea:
Thread Starter
1.0 BAR
Joined: Feb 2003
Posts: 461
From: Wisconsin
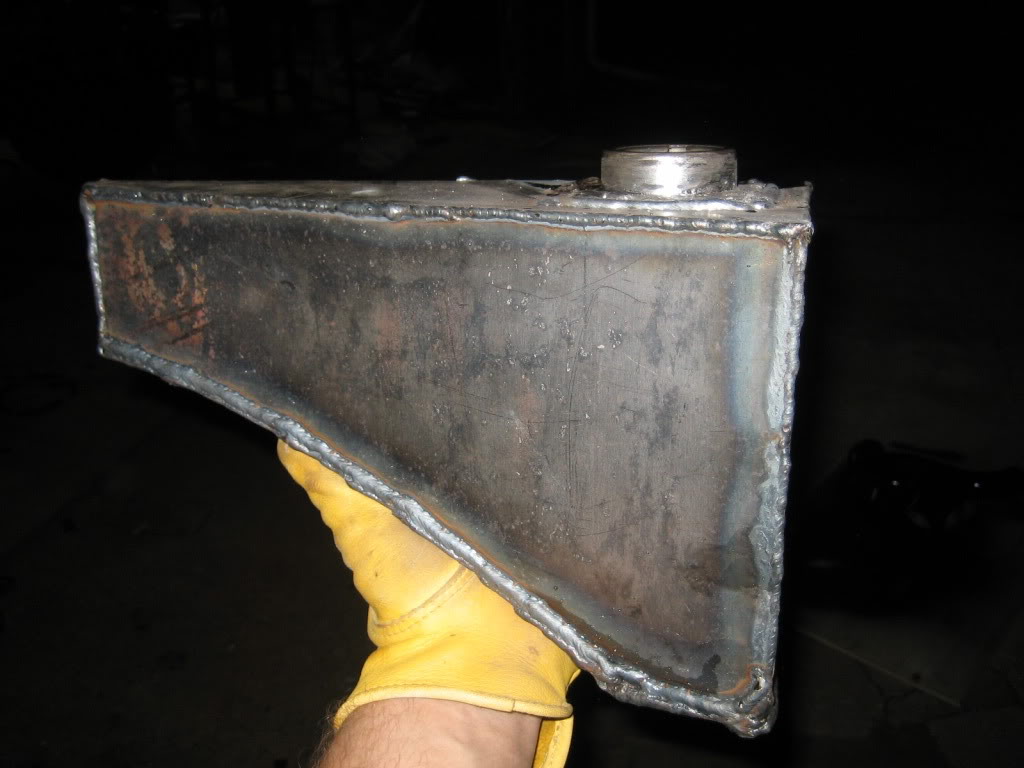
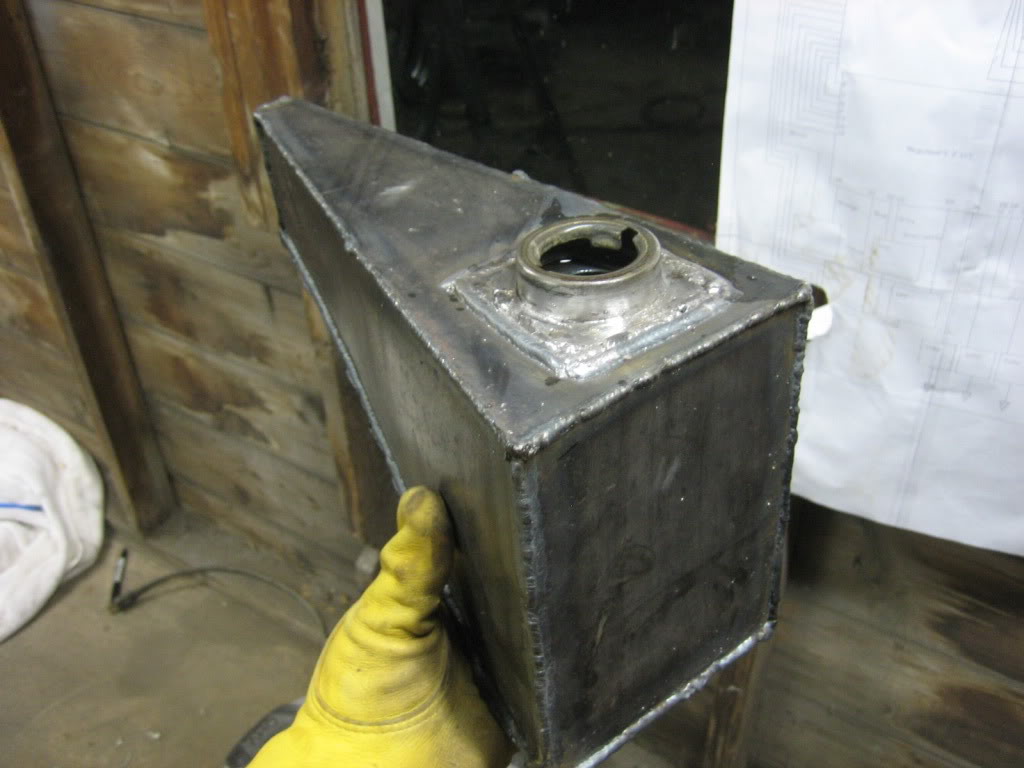
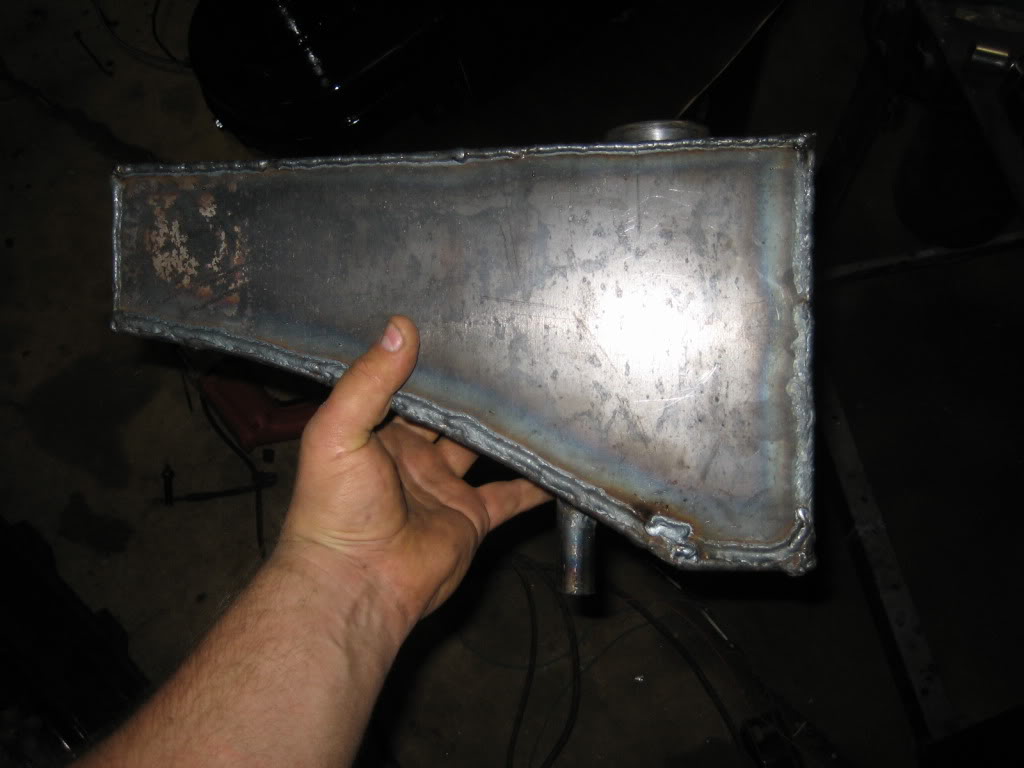
Got the power steering tank made tonight. Fits the truck perfectly, which it should, since it is hand made from flat steel. The tube out the bottom is the feed to the pump, while the fitting in the nose is the return back from the box. Holds just over a gallon of fluid.
Thread Starter
1.0 BAR
Joined: Feb 2003
Posts: 461
From: Wisconsin
well, good, and bad news.
Good news is, all of the electrical works, except two things: the turn signals, and, the CPS.
I think the turn signals are the flasher module, it didnt have any plug markings, so, I just took a guess.
The CPS of course is the main sensor for the EFI, so, everything else on the EFI is working but that, and, unfortunately, that controls the ignition and injection timing, so, it won't light.
I have a few ideas though. Either A. my ground isnt any good B. the sensor is bad (very possible, got it from the junkyard) or, C. I have the + and - wires backwards.
So, I have a few things to try tomorrow. I am willing to bet the + and - wires are backwards, which wouldn't give me any signal at all, just like I am seeing. of course, the other two would react the same, but, The ground should be good (grounded it right to the EFI case, and everything else on it is working fine), and, CPS sensors don't go bad that often.
Everything else electrically works though, headlights, taillights, running lights, winches, brake lights, widebands! not bad!
on a funny side note:
Got the starting circuit done first, cranked it, worked fine the first try. Checked oil pressure. nothing. Tried again for a few seconds, still nothing. At that point, I didn't want to crank any more without oil pressure, so, I pulled the dizzy and made a tool to spin the pump with, an I was spinning it for bout 45 seconds, full blast and getting nothing... getting VERY pissed off, then, I realized... I was going clockwise. Dizzy in the big blocks spin counterclockwise. D'oH built pressure in about 5 seconds after I started turning it the right way!


