
Turbo Miata Build Thread (56K-Not Today)


Thread Starter
0.0 BAR
Joined: Apr 2008
Posts: 0
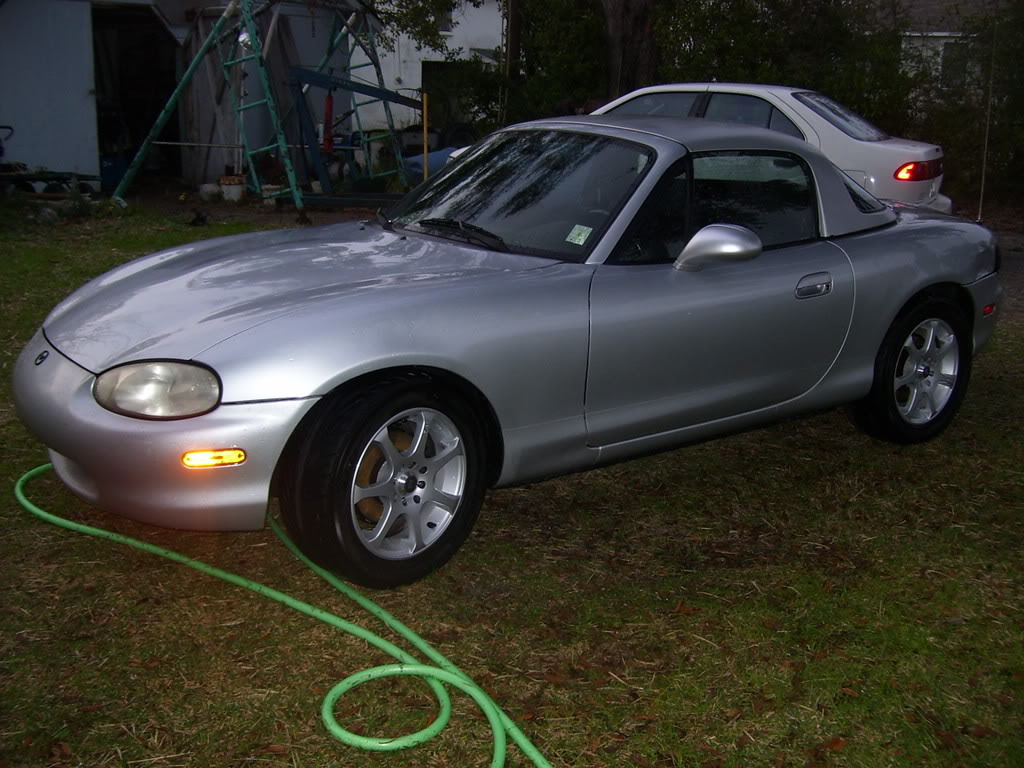
I did a DIY turbo setup for my car. The goals were to build a setup that's powerful, but to keep the car a sleeper. I tried to keep it cheap, but� pretty much failed there. This is my first turbo setup and it was a huge learning experience. I've been collecting parts for about a year. Built a MegaSquirt II to run the engine Jan. 08' and have been running that ever since. This summer I mounted the intercooler and fucked with a SC project and then abandoned it. Then in August I started buying turbo ---- so I could turbo it over Christmas break.
I tried to buy used ---- to save money.
MS2E, wiring harness stuff, etc. $600
LC-1 w/controller $190
Intercooler(new-second hand) $90
"Tial Style" BOV and 38mm gate, Silicone bends, couplers, and T-bolts, some flanges I didn't use. All from Evans Performance
$330
Autozone air filter 20
New GT3271 bought second hand $350
T2 based Flyin' Miata Manifold(used) $120
2", 2.5", and 3" Mandrel Bend Builder's kit from Racing Solutions $210
Magnaflow muffler, glasspacks, hangers, etc $200
Tools needed to do the job $200
-12AN oil drain ---- from Summit Racing $68
-4AN oil feed stuff from Egay $40
Ebay MBC $20
---- from Autozone to finish the build $150
RC 550's low ohm(used) $150
ACT Extreme Clutch(used) $100
I don't even wanna add that up, but I'm sure it cost a lot more than that in reality.
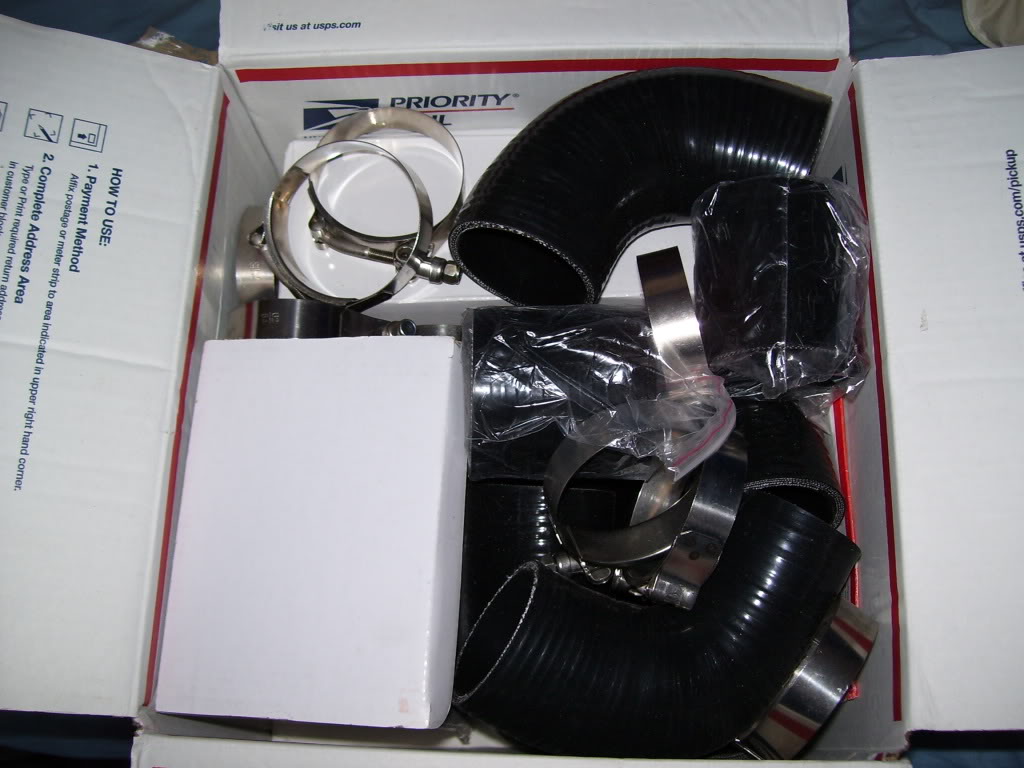
Box of CDM goodness
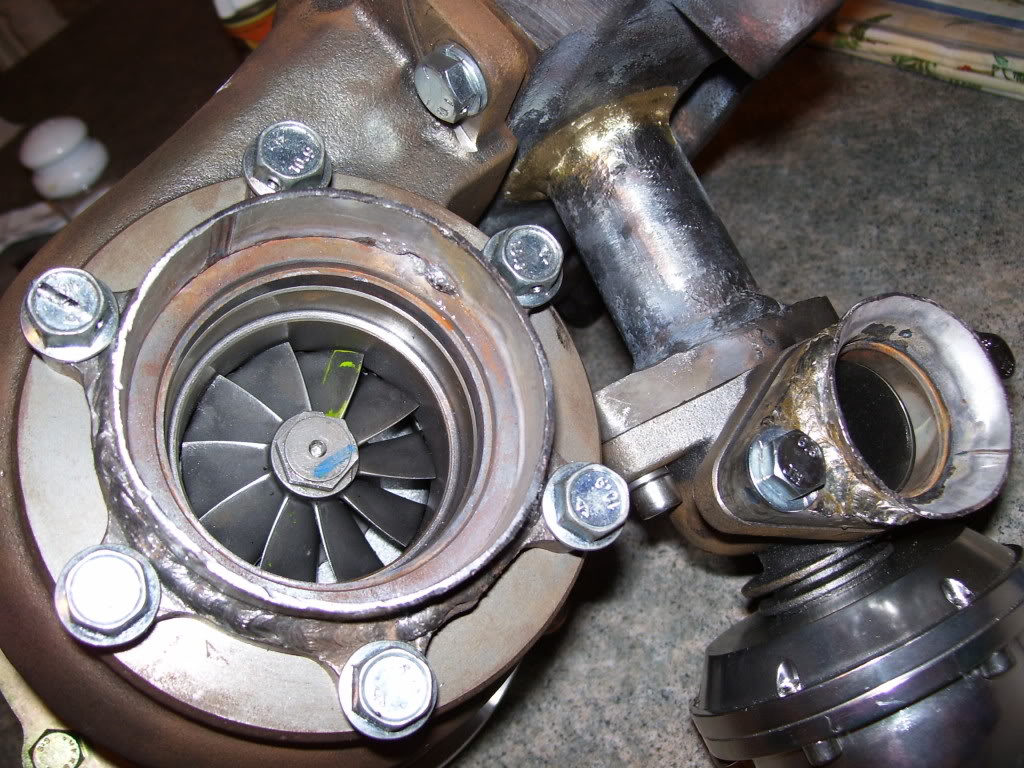
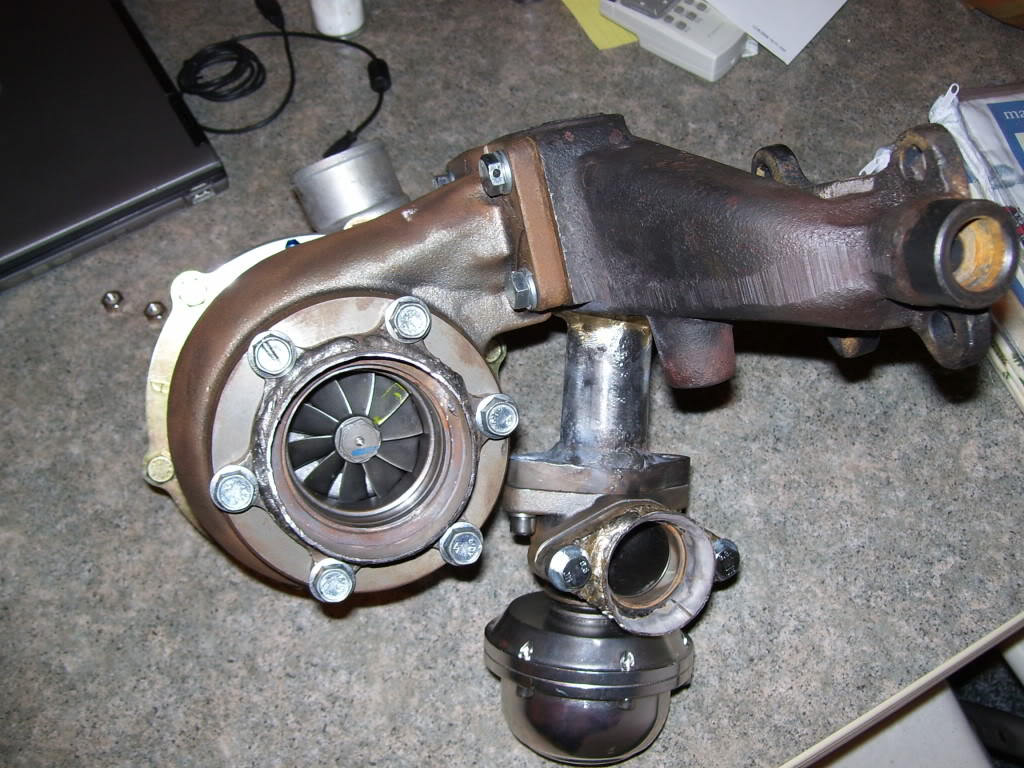
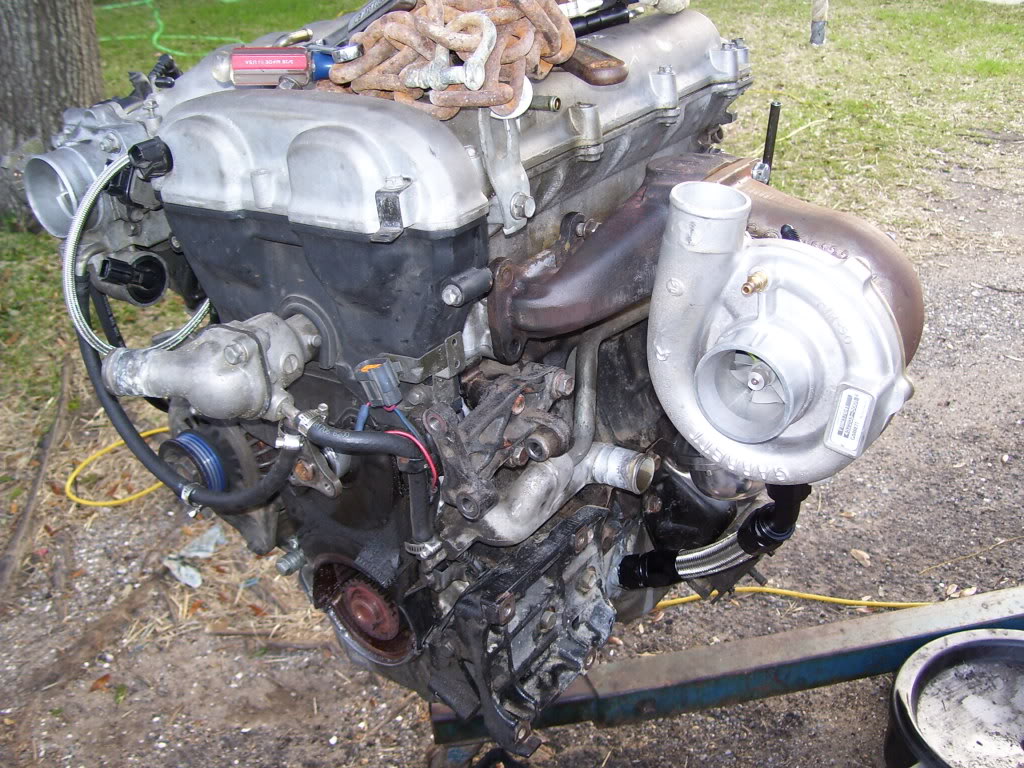
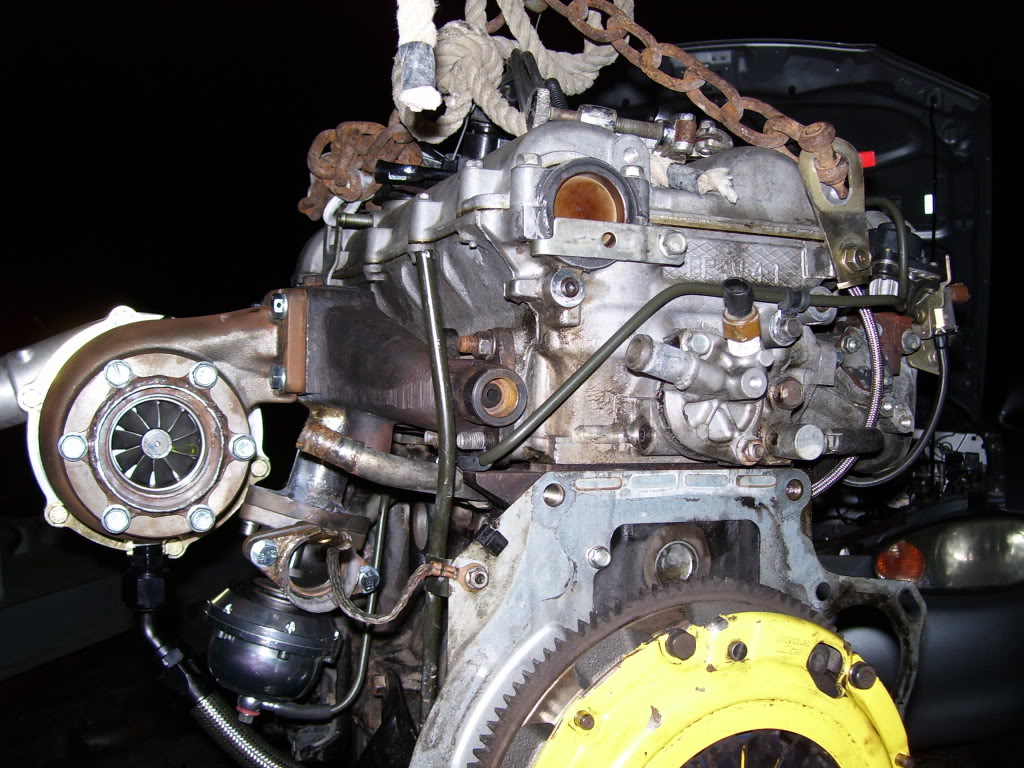
Garrett GT3271 52 trim comp, .78 A/R divided turbine.

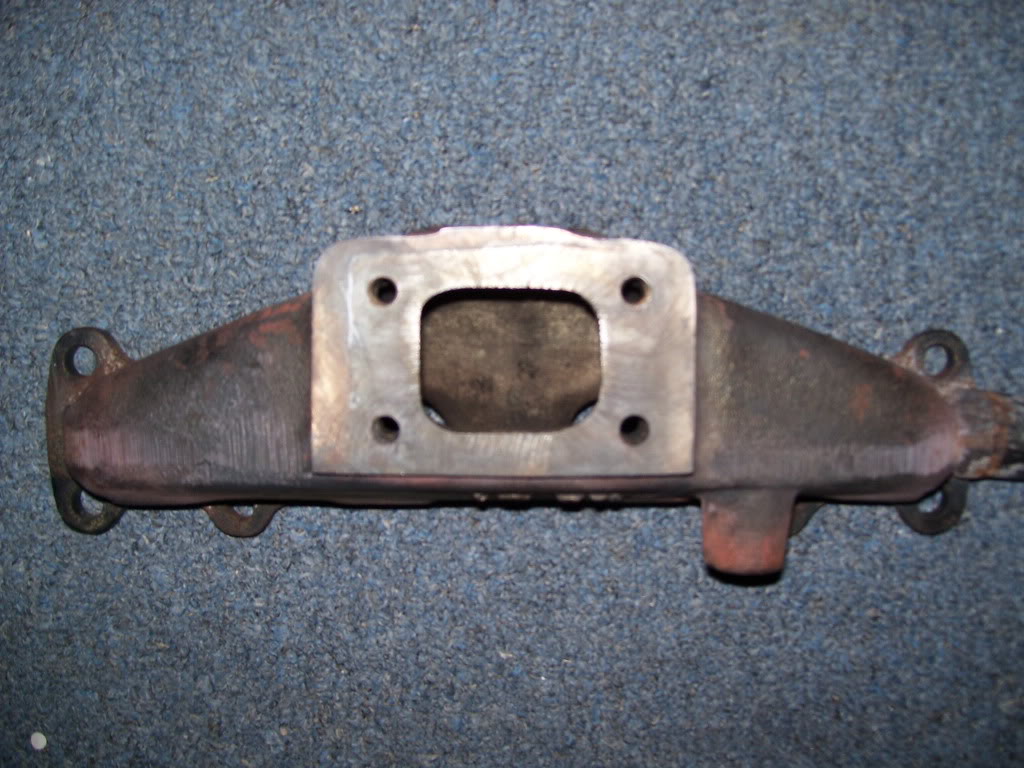
Got a deal on a FM manifold but it was T2 and had stripped threads. And it also didn't have a port for an external wastegate. So I adjusted the manifold a bit�
Before:
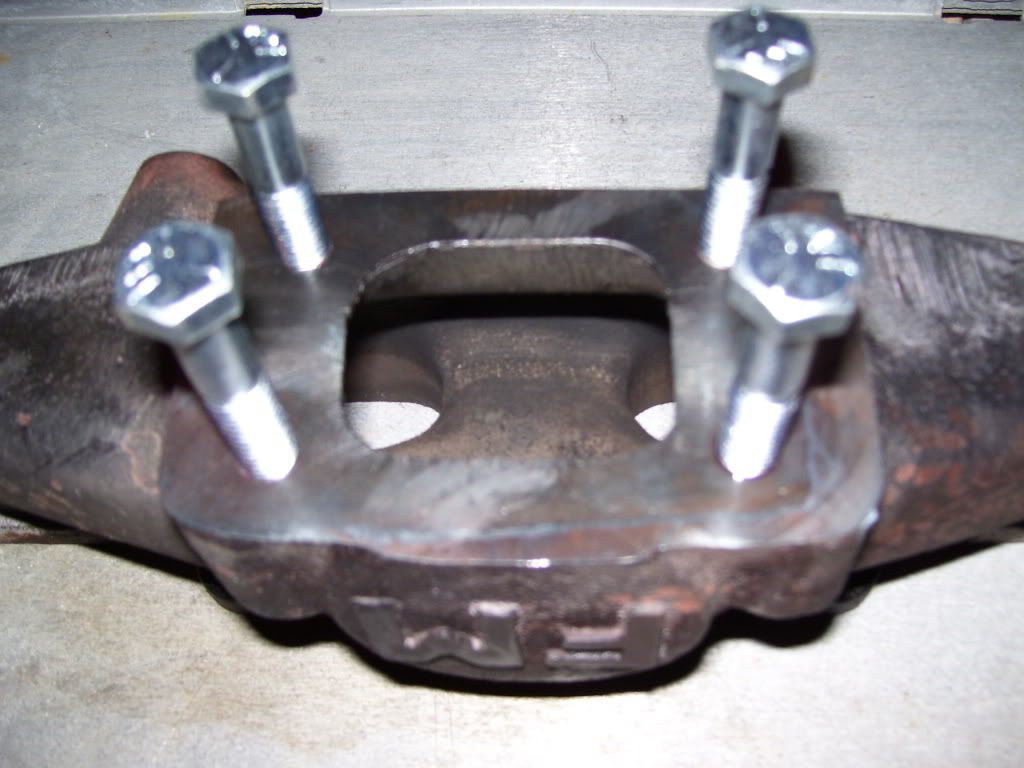
Had to retap the threads bigger then locktite some grade five bolts in there.
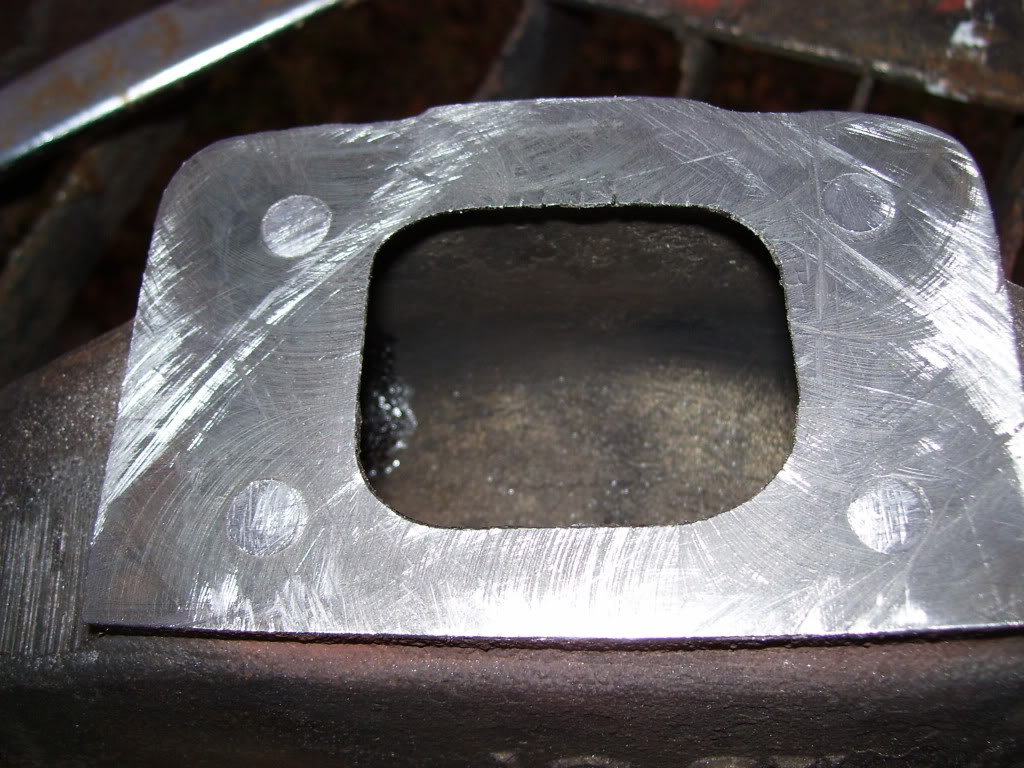
Next day I cut them off and used a file to get it flat.
Then redrill and tap to T3 bolt pattern

Then test fitted it. I drilled the heads of the bolts so I could wire them together.
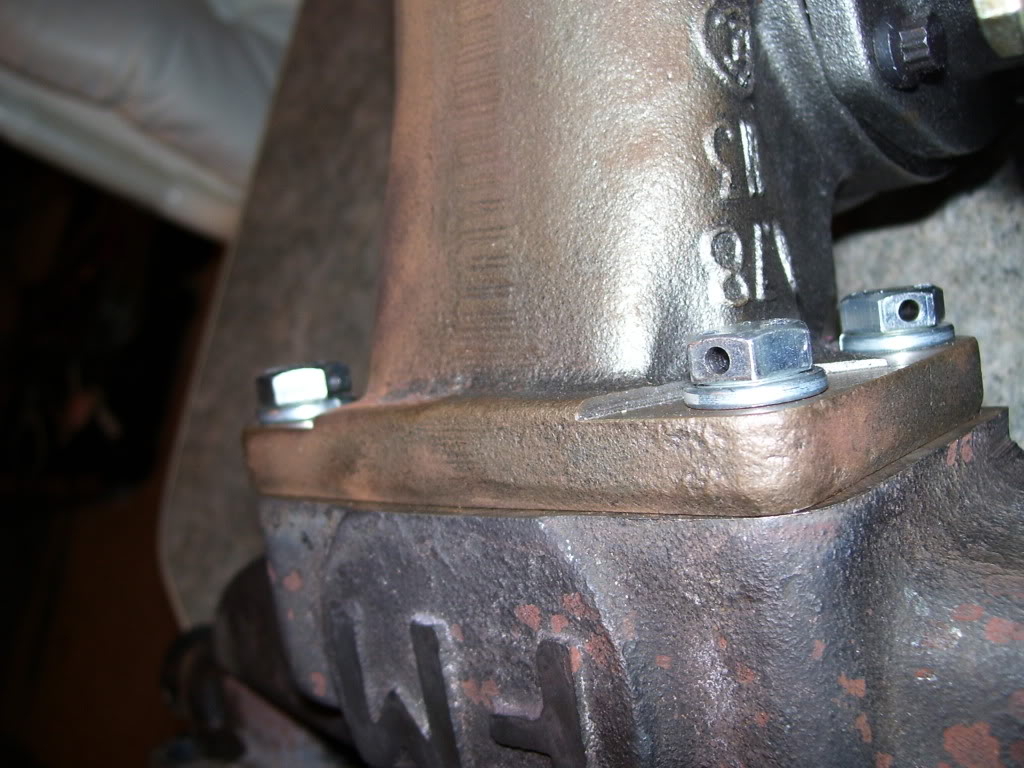
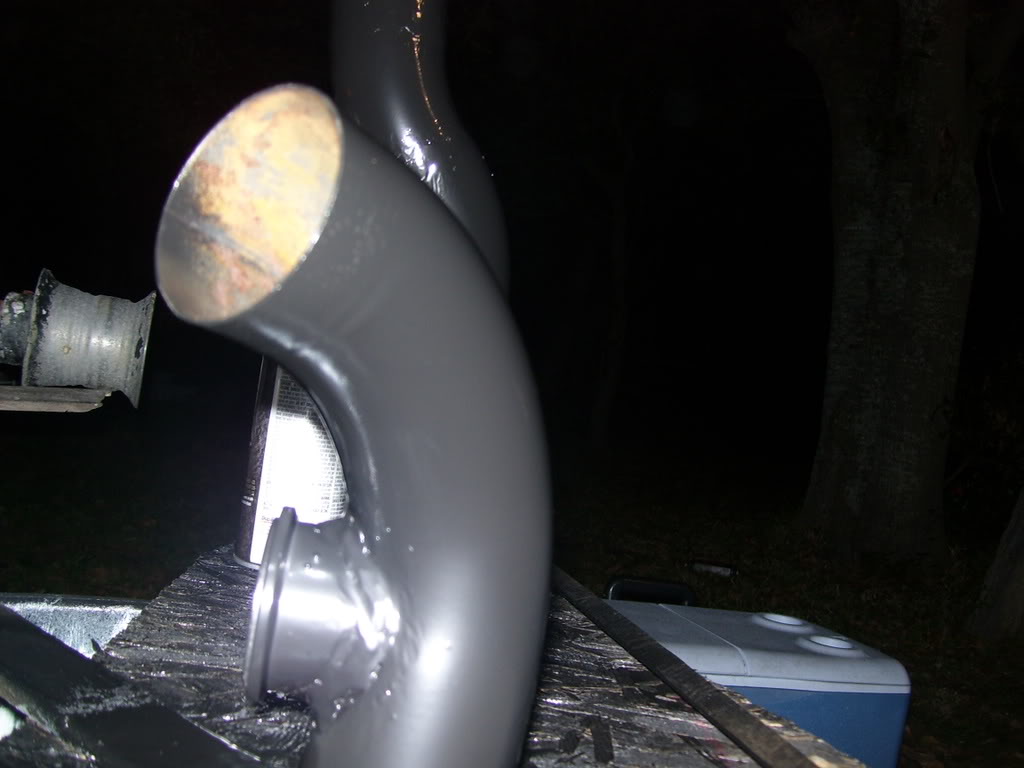
Added an external wastegate port. Had a welder braze it on. I did all the other welds. Works.
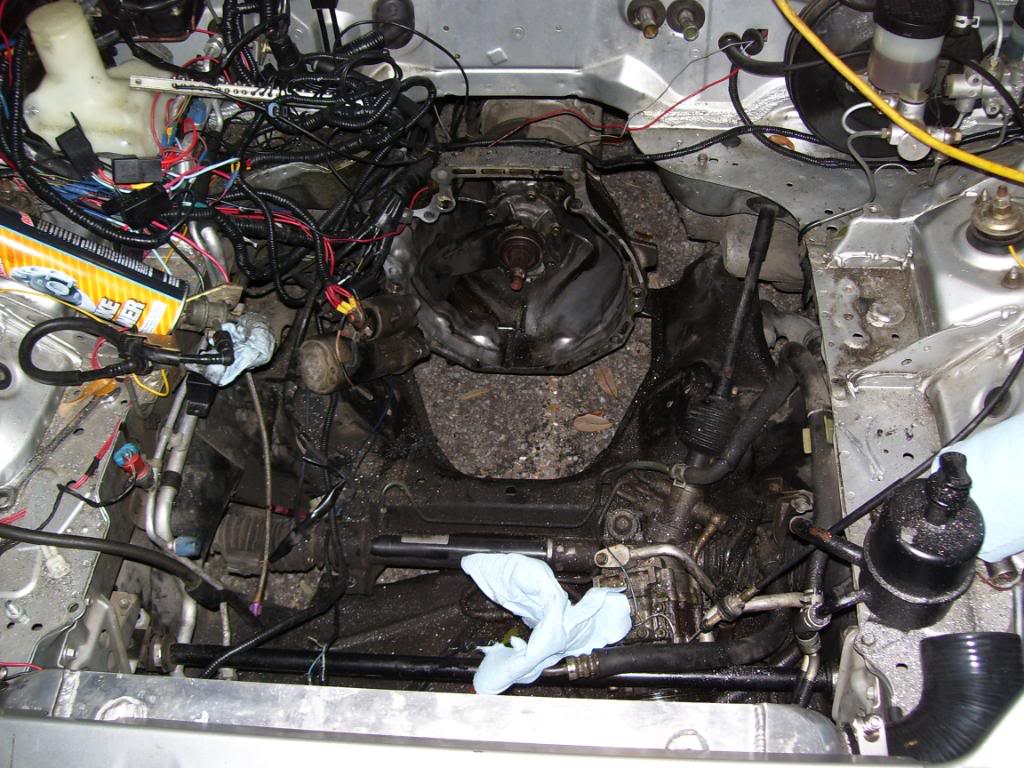
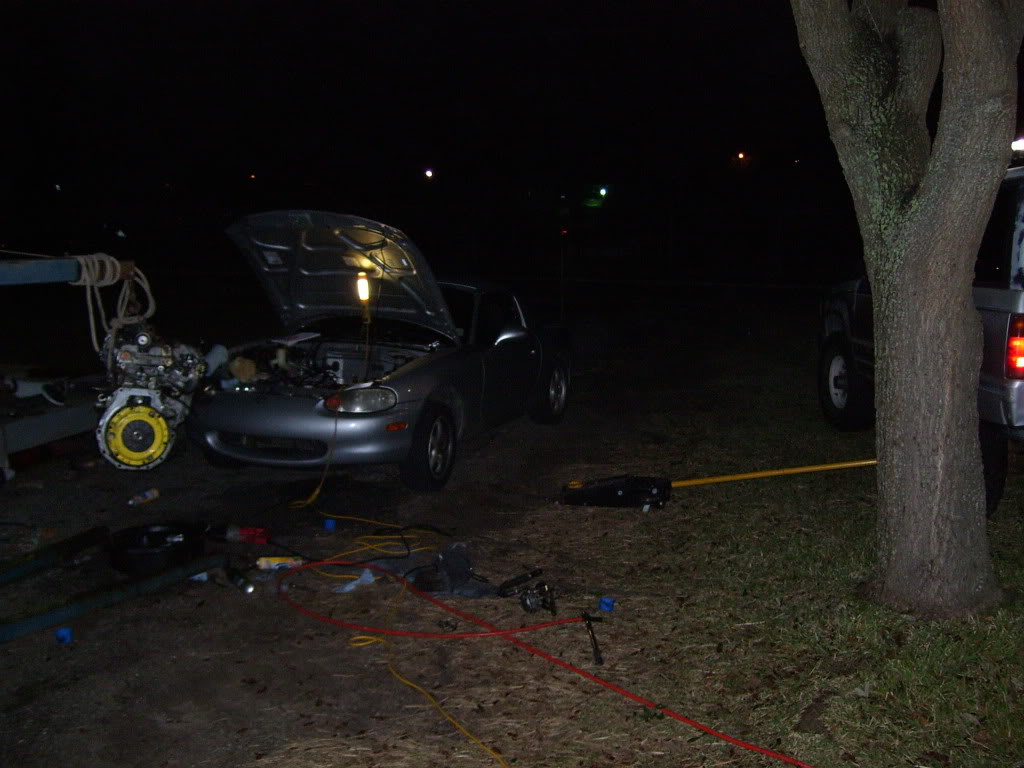
Then I was pretty much ready to turbo it. So out came the motor.
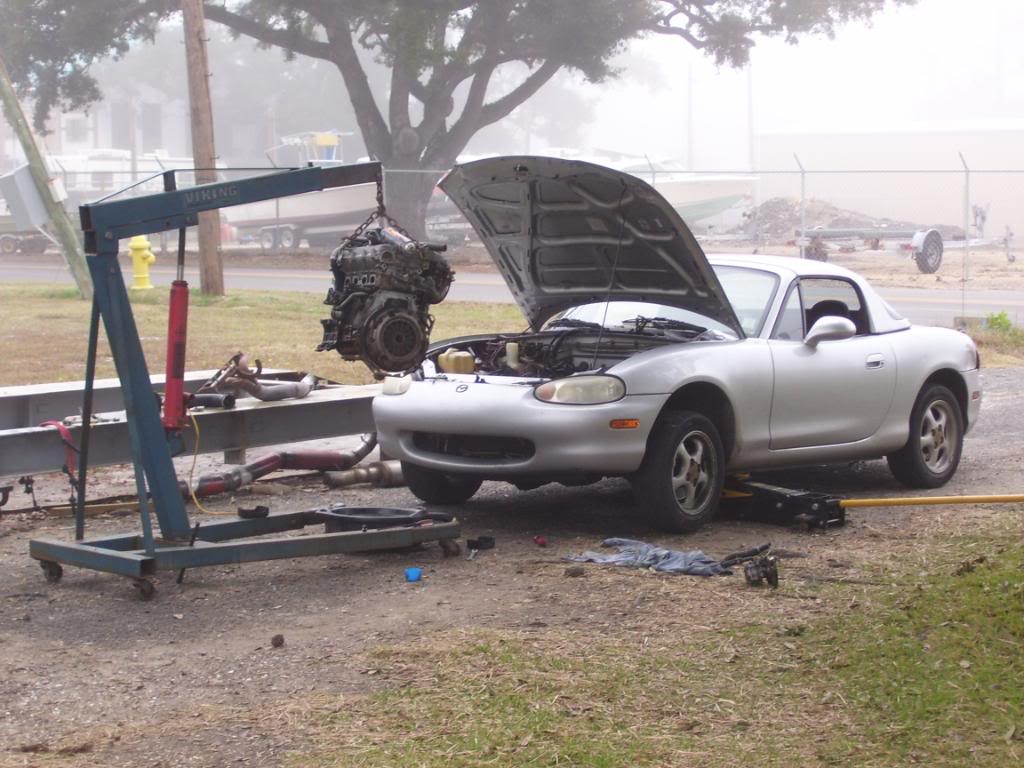
Had to cut some of the car out of the way for my IC install.
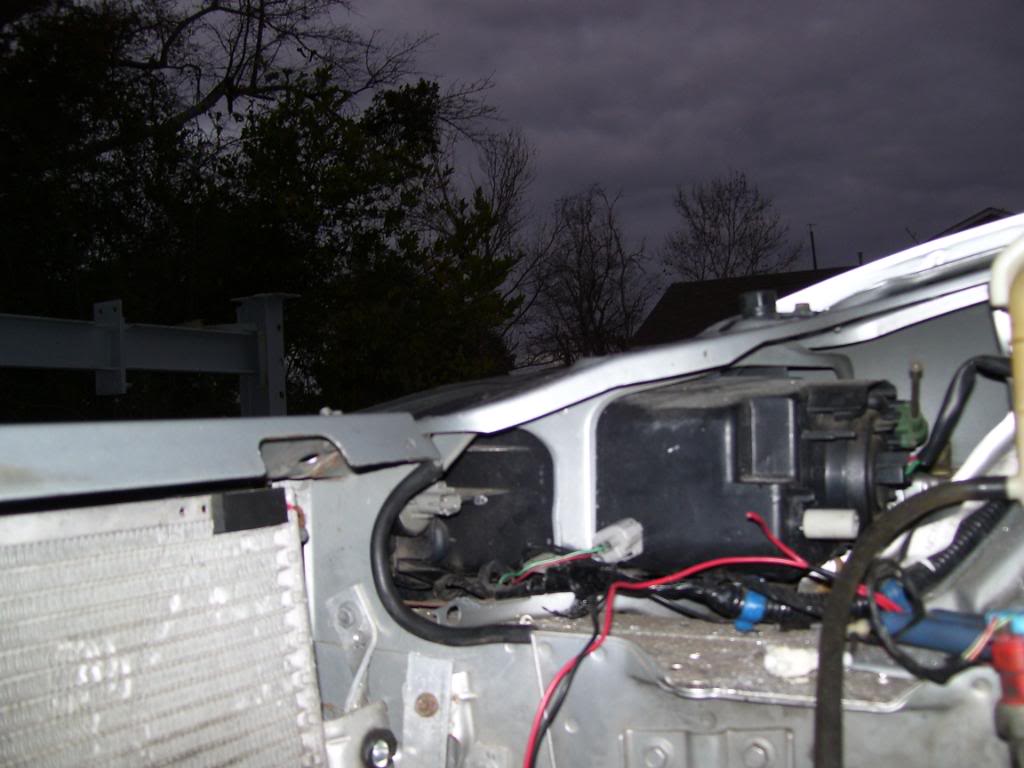
And make some brackets to hold the IC and condenser.

And some 5/16 weather stripping to seal things up and keep the IC from touching the other heat exchangers.
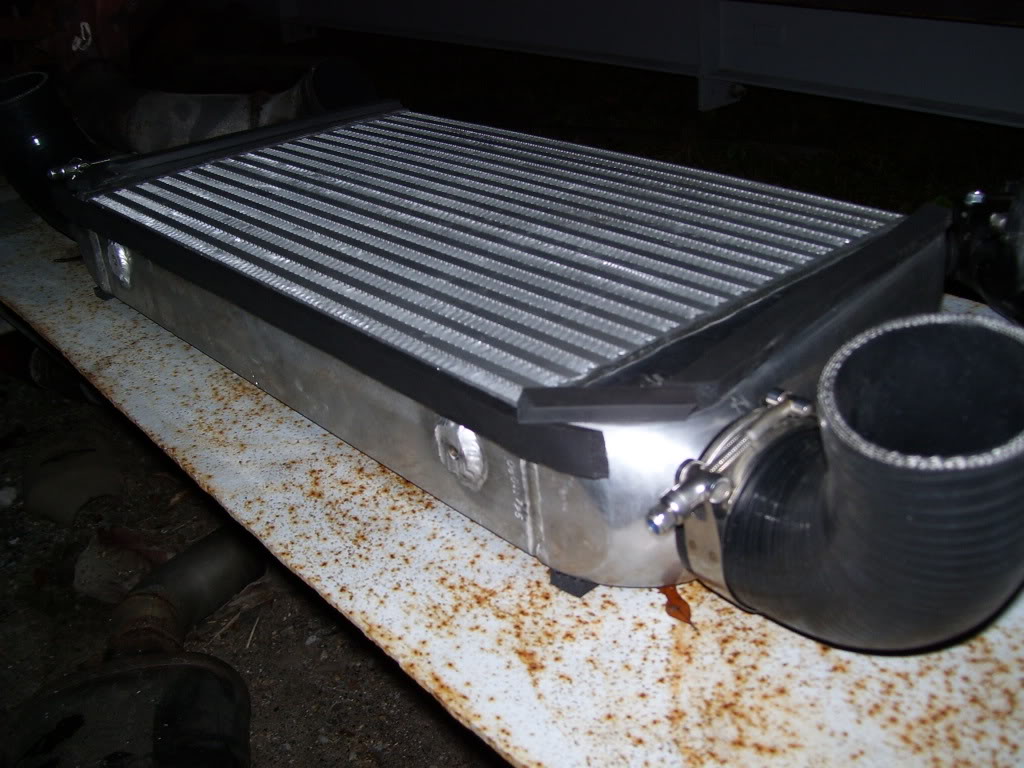
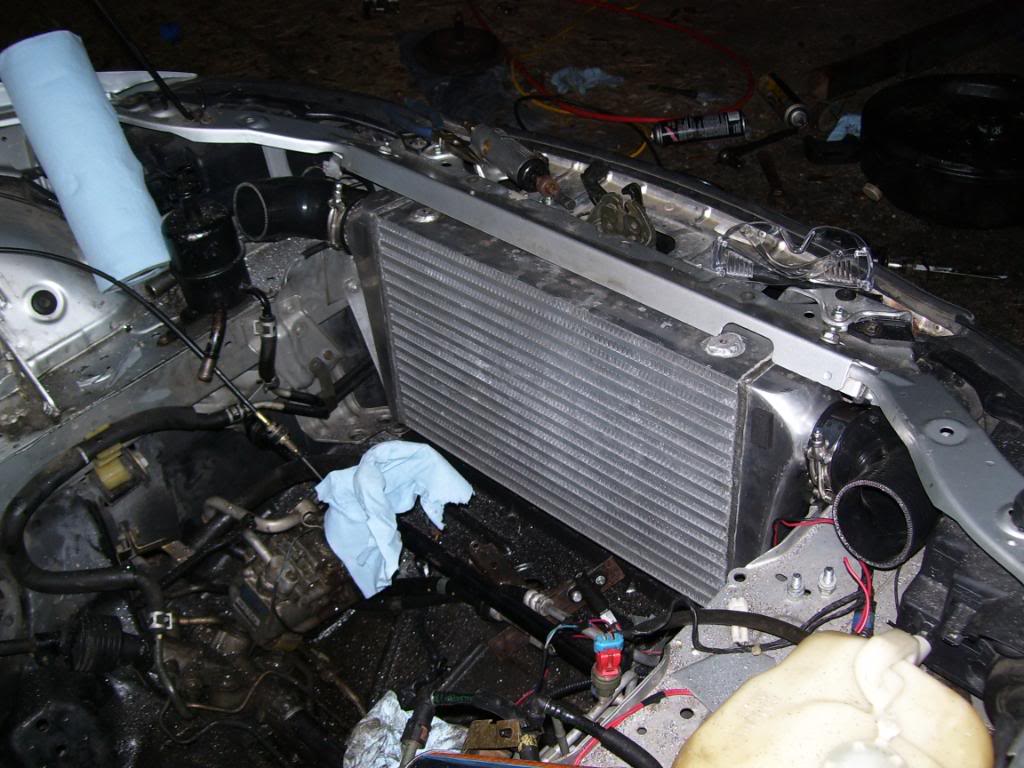
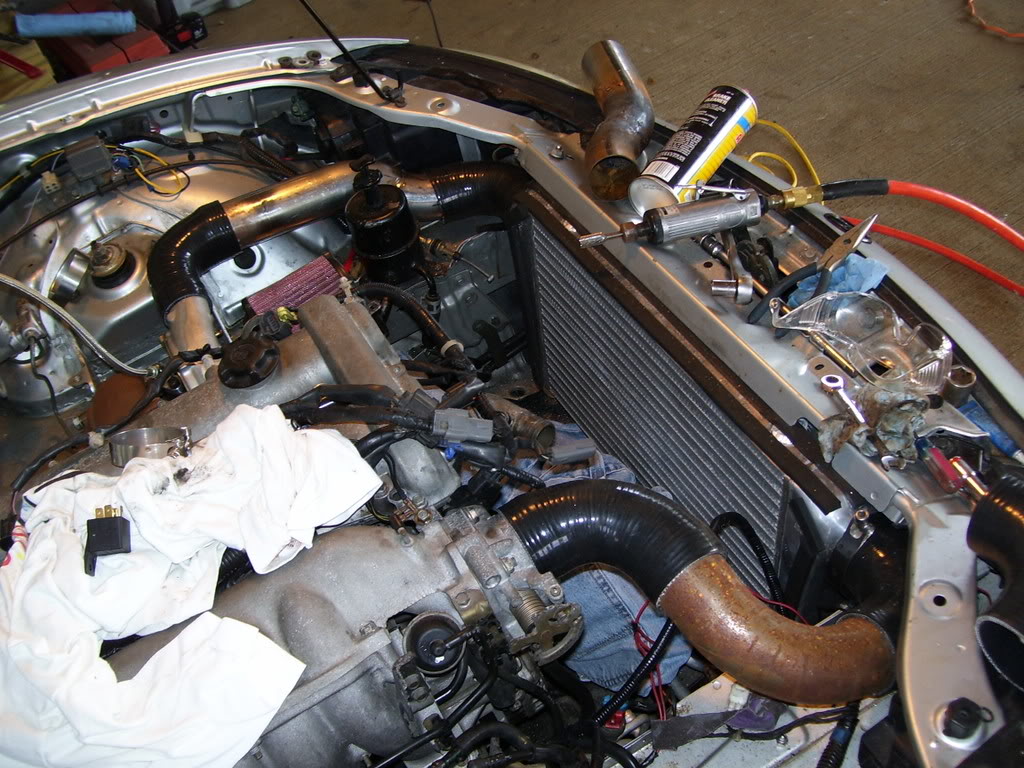
And now it fits. 20x12x3 core IC hidden behind factory condenser.
Working late
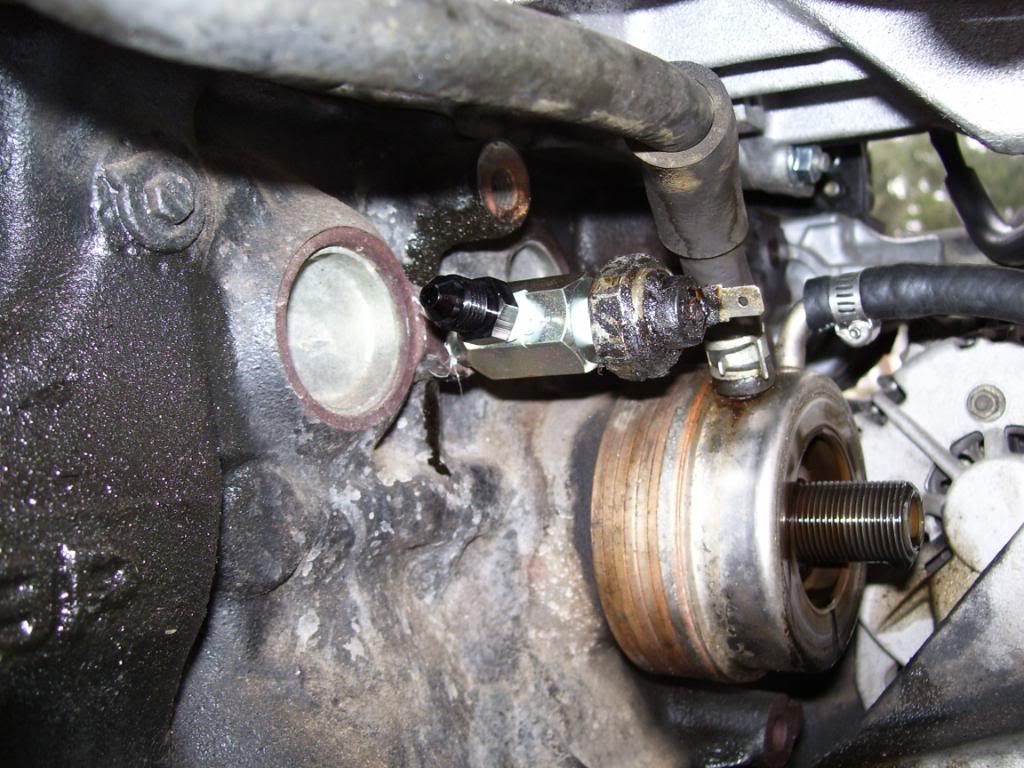
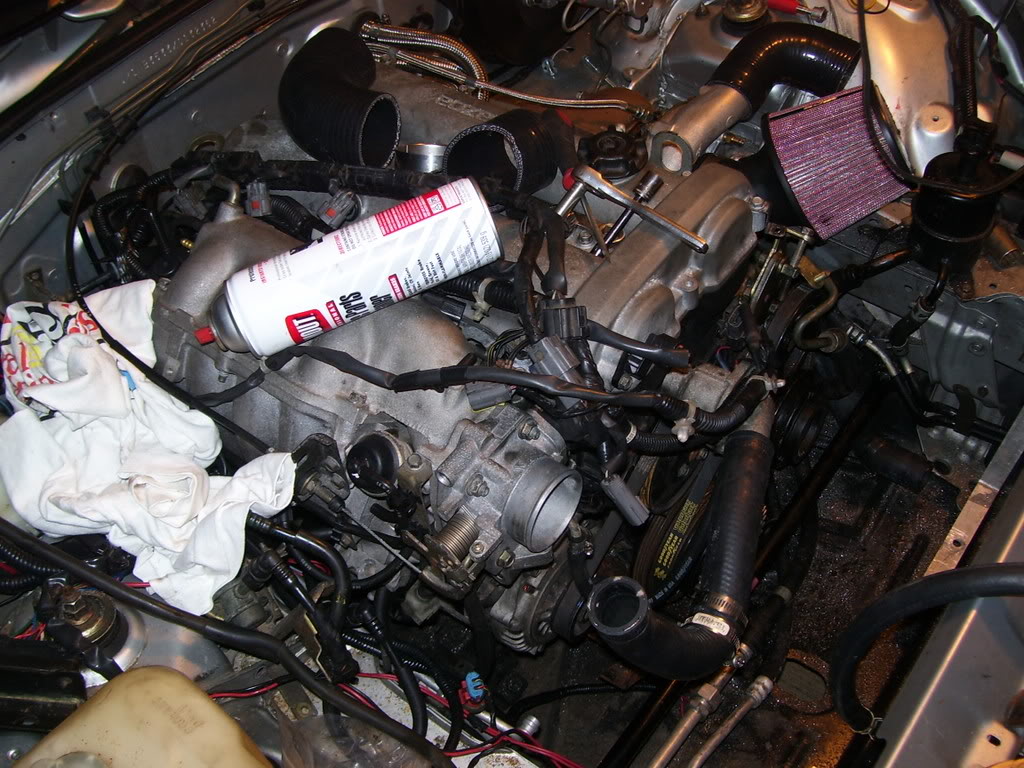
TT oil feed. Worked perfect.
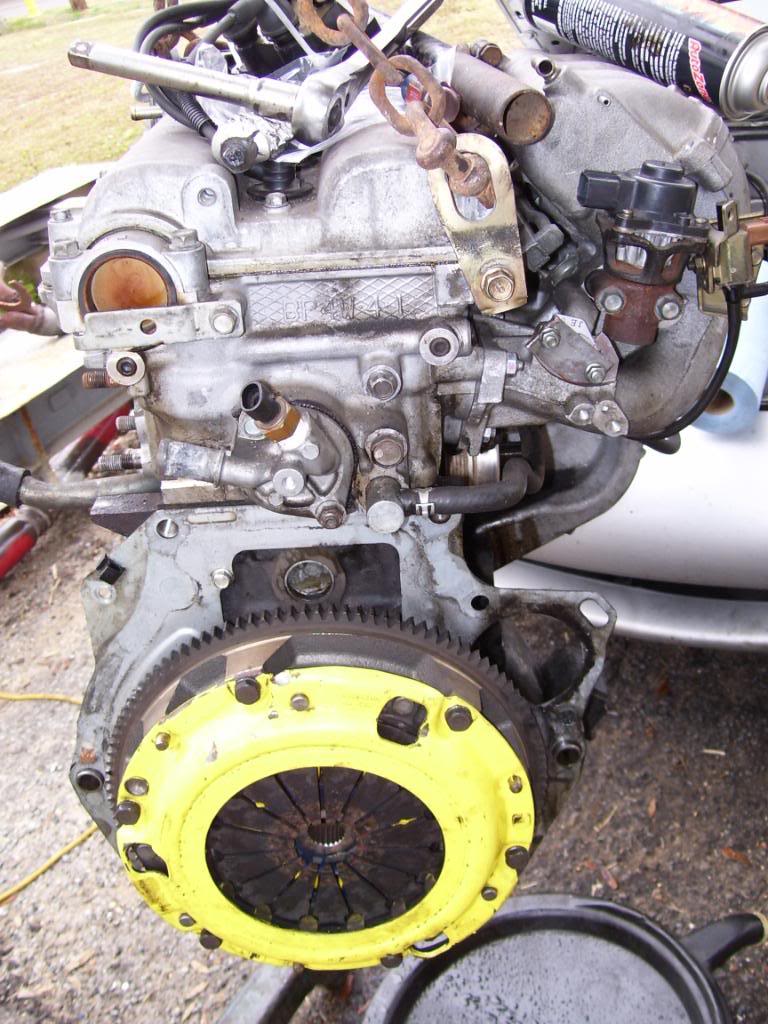
Got the ACT Extreme clutch installed. Locktite'd the bolts.
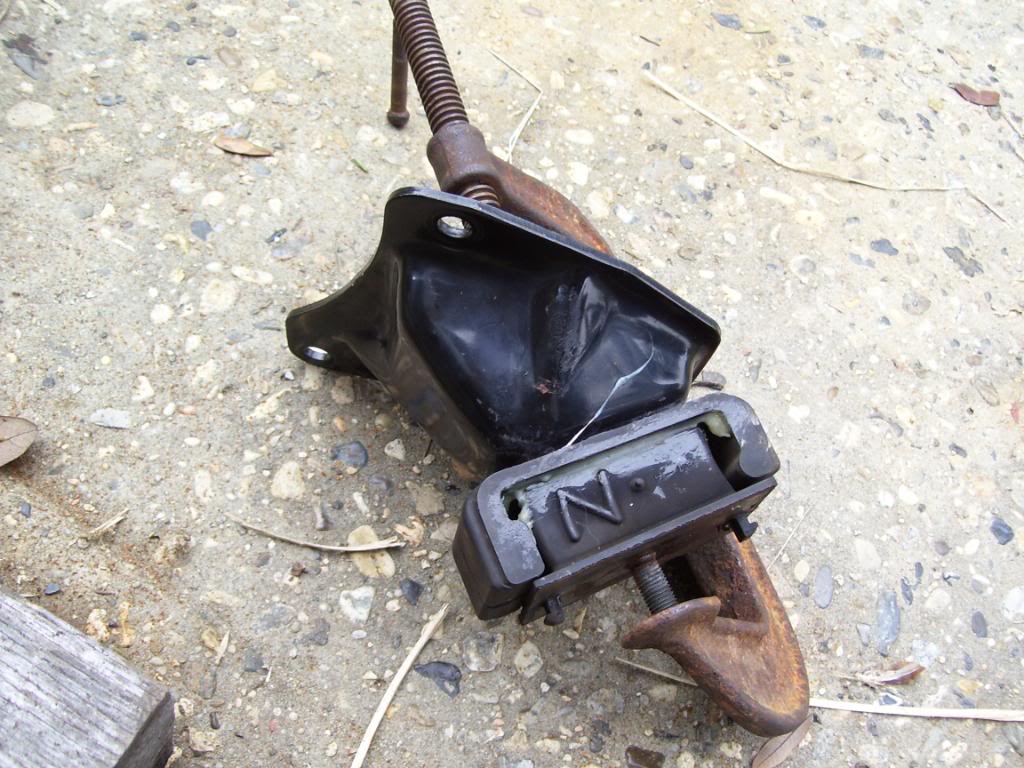
In the spirit of HMT, I tried gluing my broken motor mount back together. Failed.
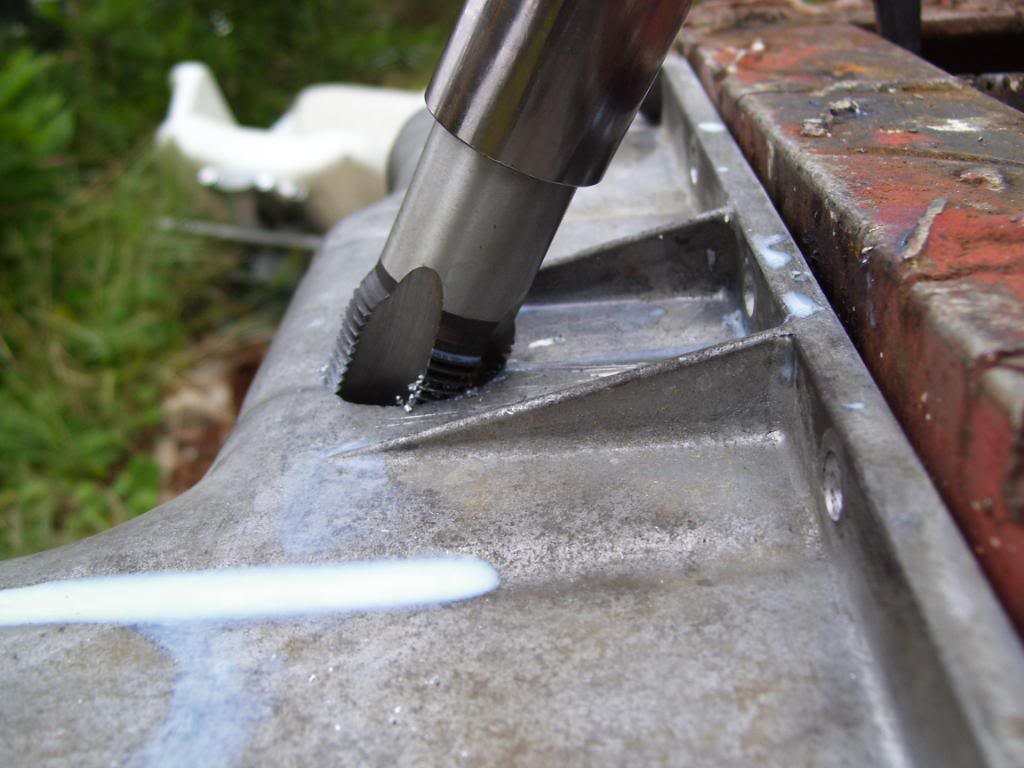
Damn welders were all slacking around Christmas, so I couldn't get my AN fitting welded in and I didn't have one that would screw in and point up. So I tapped it crooked. This was really ------- hard to get right. Ended up using a socket.

Screwed in the 3/4 NPT to -12AN fitting. Not it points up.
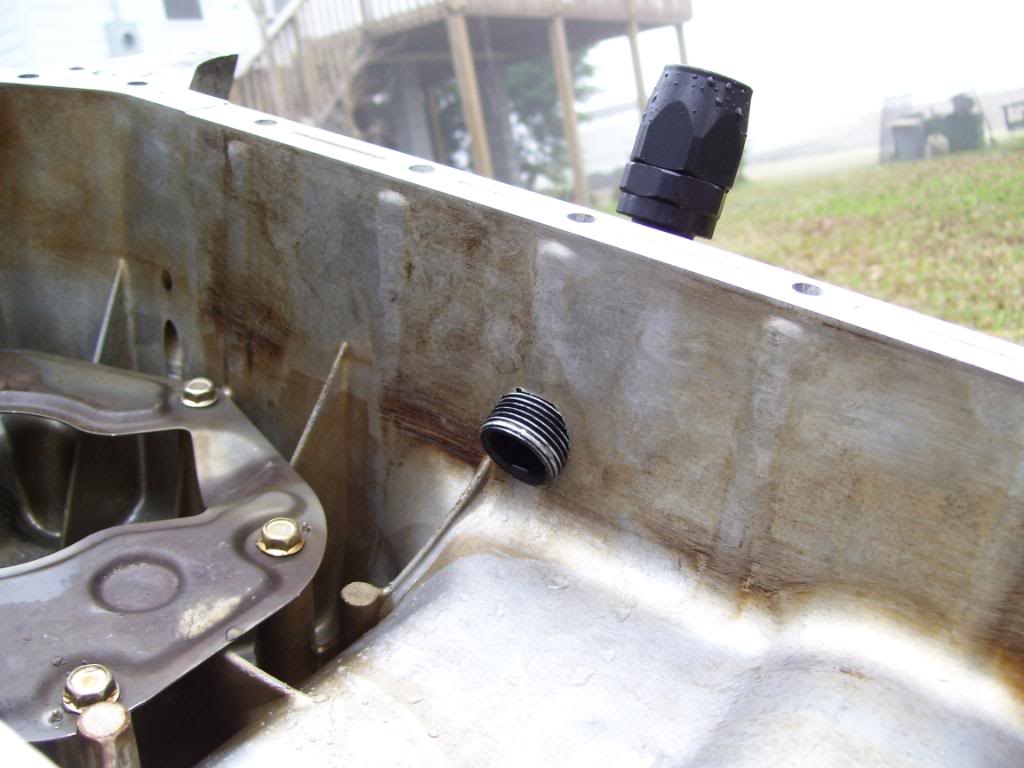
And welded it in.
Ground the inside flat and welded it too.

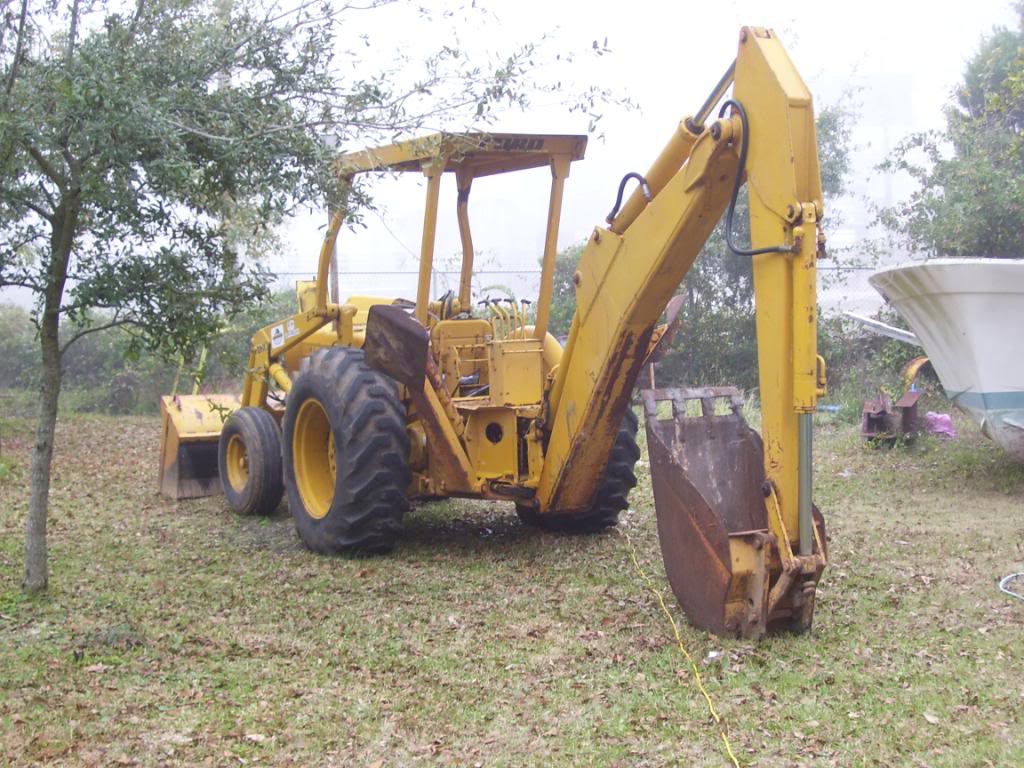
Old backhoe I worked on.
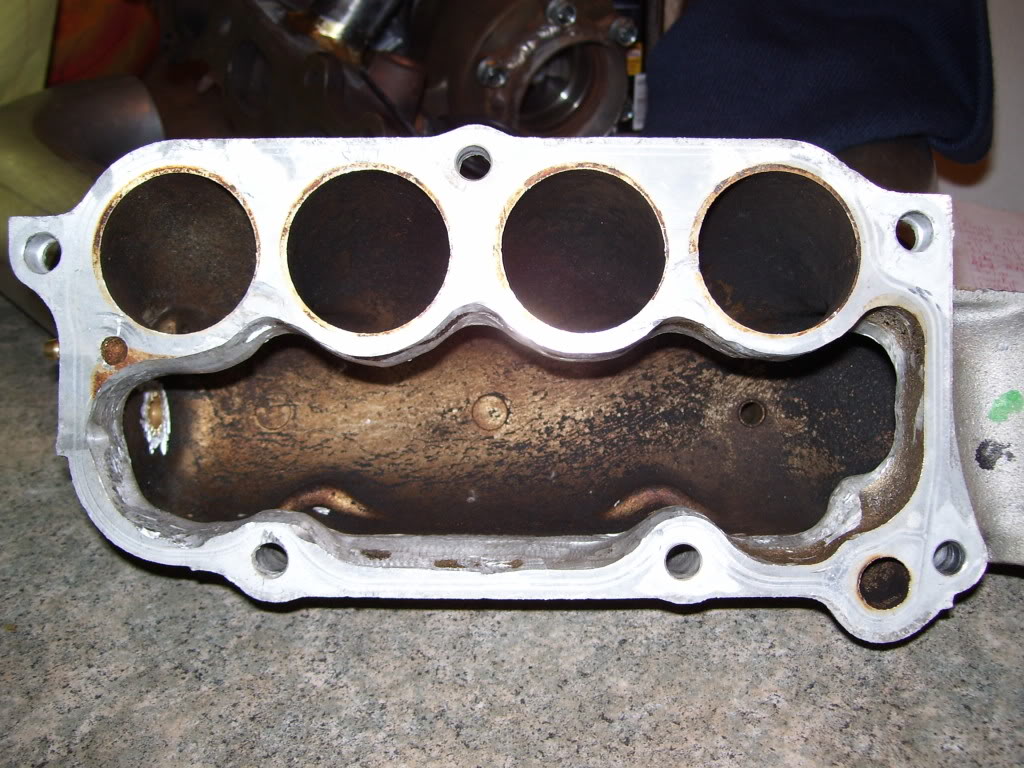
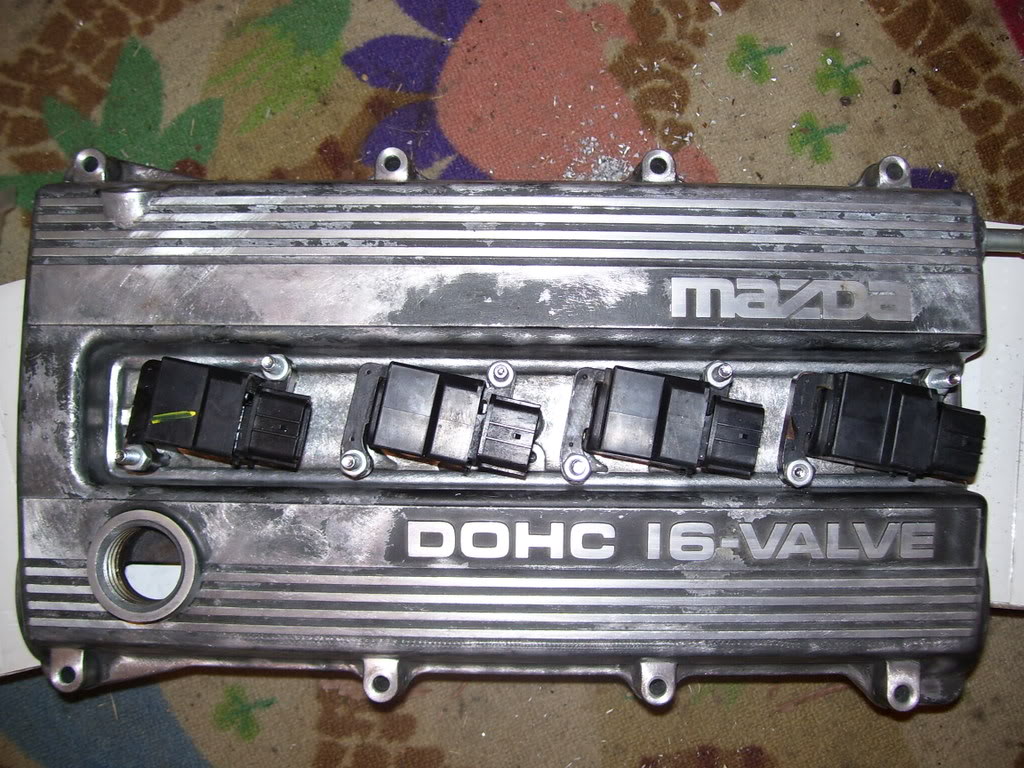
Opened up the stock intake manifold to get rid of a resonace chamber and make the second set of runners actually feed the motor air.

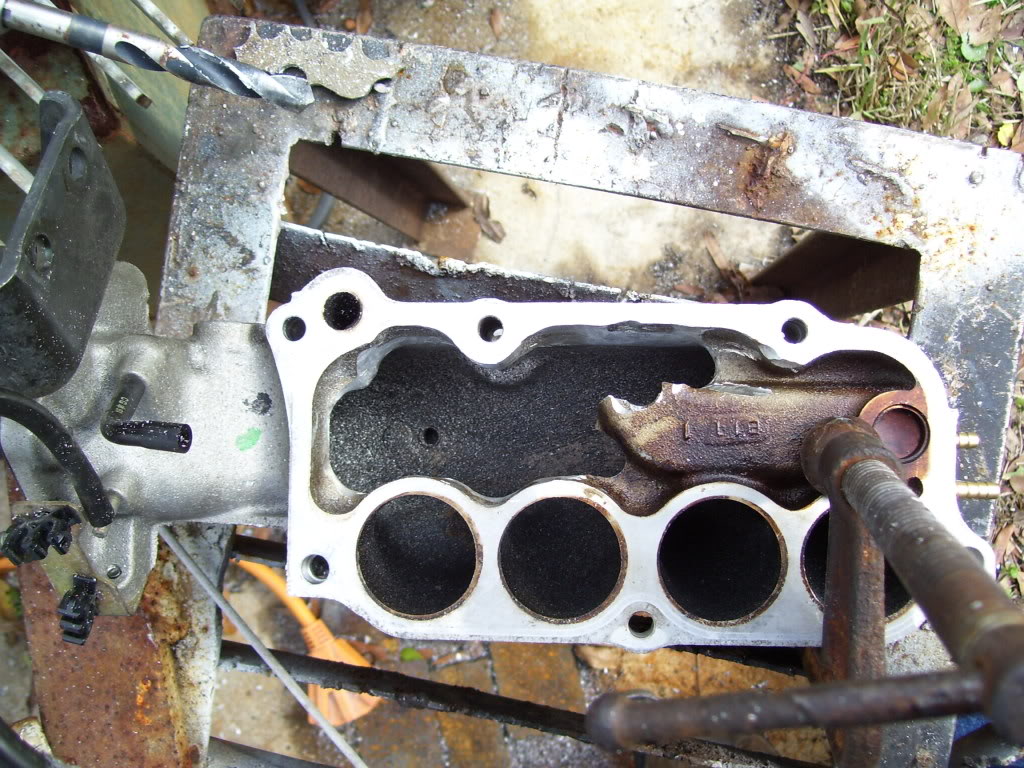
You can barely see in this pic but I added two extra ports to the plenum for the WG and BOV.

And ground the fittings smooth on the inside. Porting done.
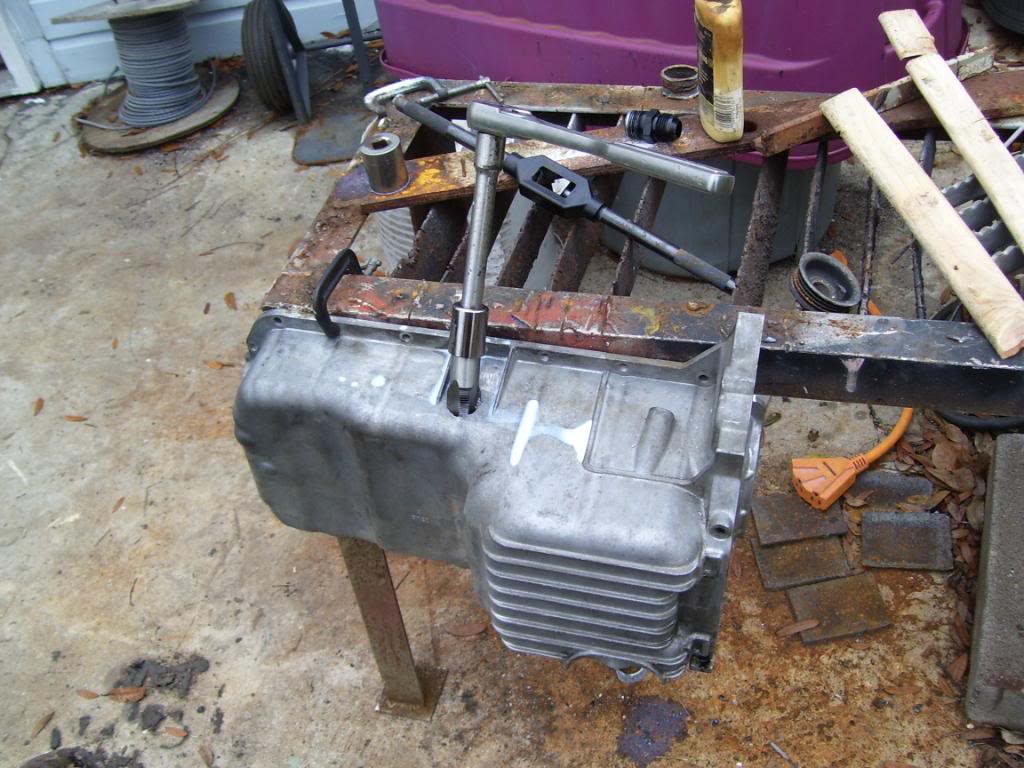
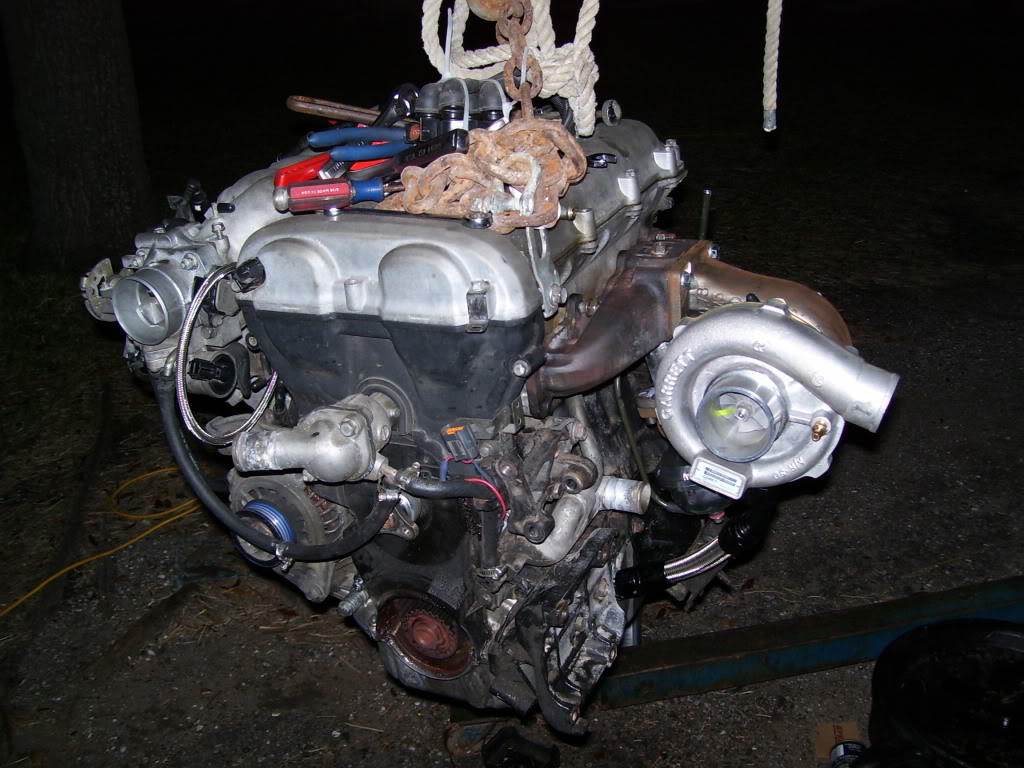
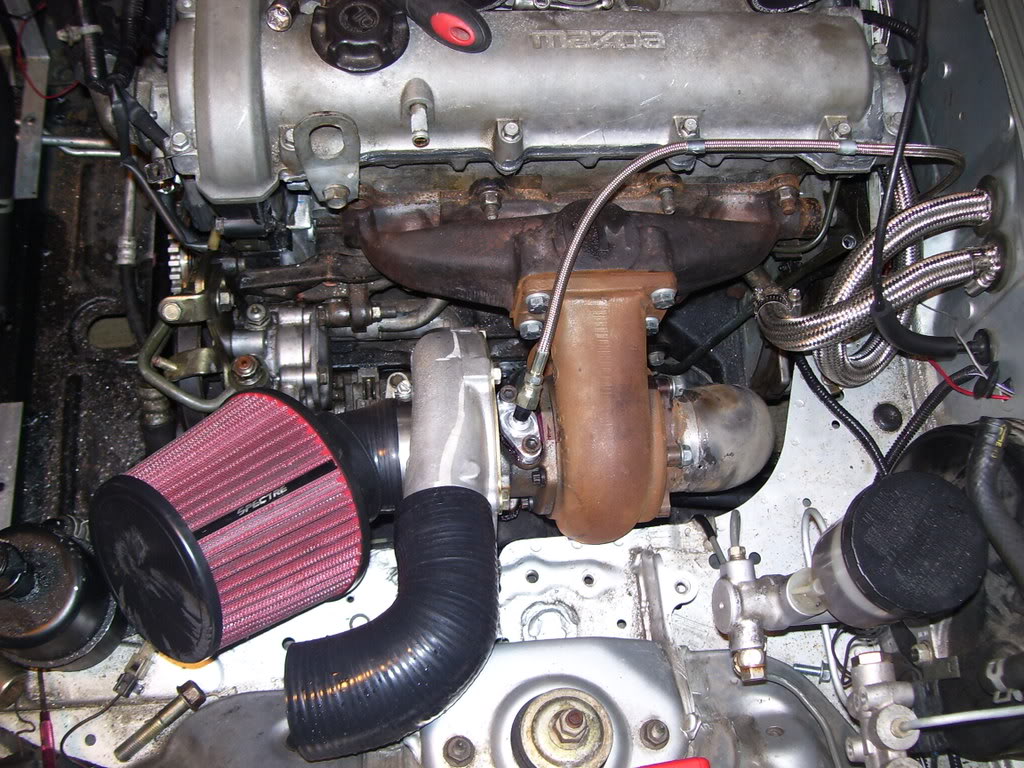
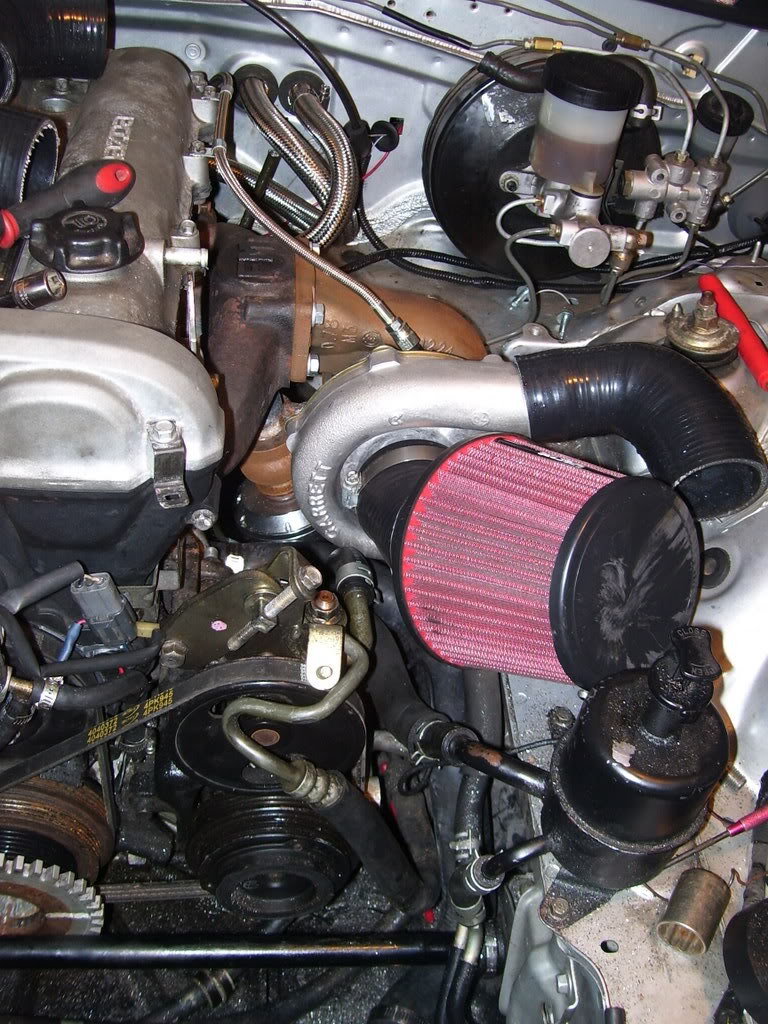
Turbo bolted on.
Made a hardine for the waste gate. Bonus points if you see what's wrong in the pics.
Ready to go back into the car.
Back home
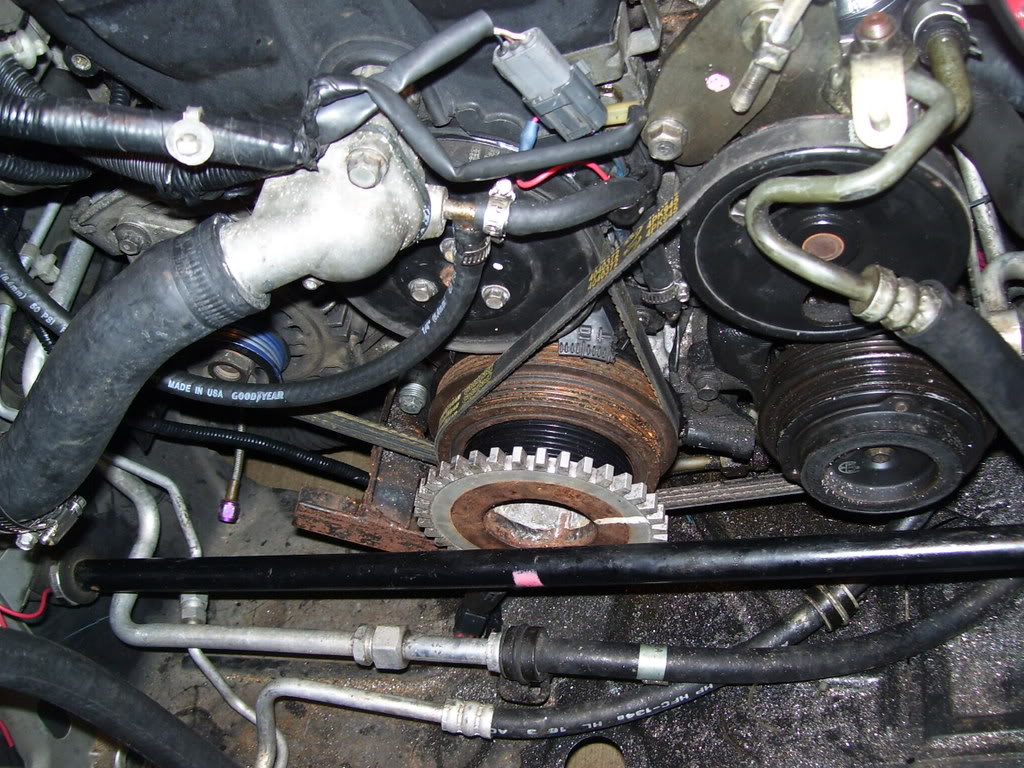
Ghetto trigger wheel setup. Works fine though.
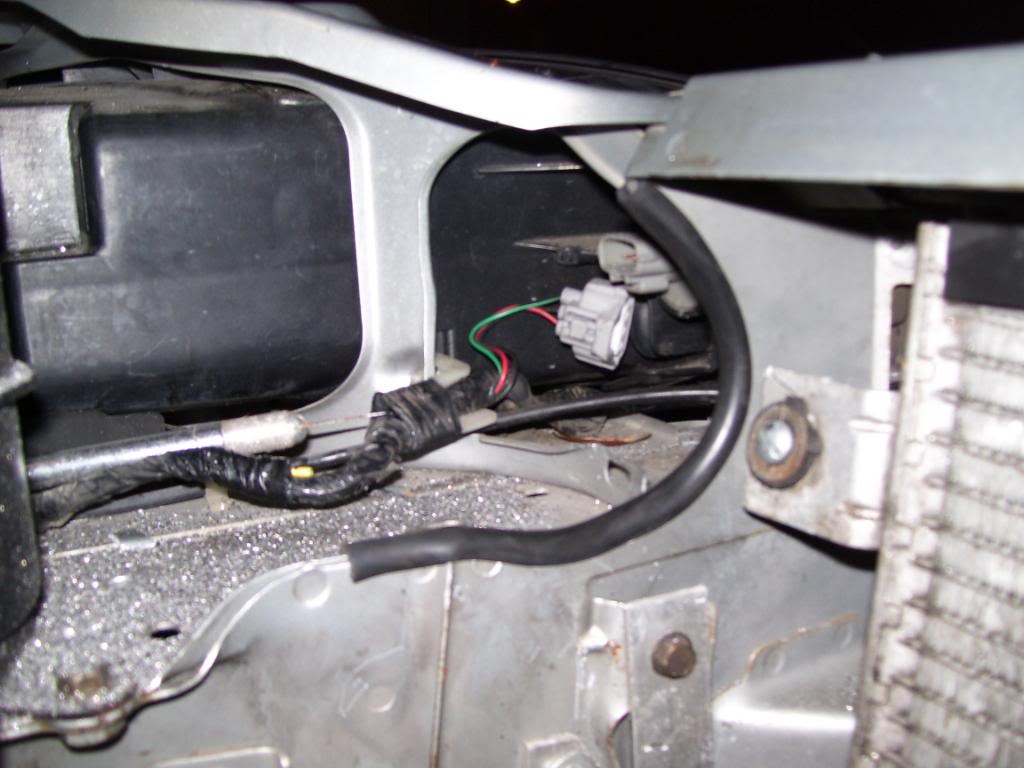
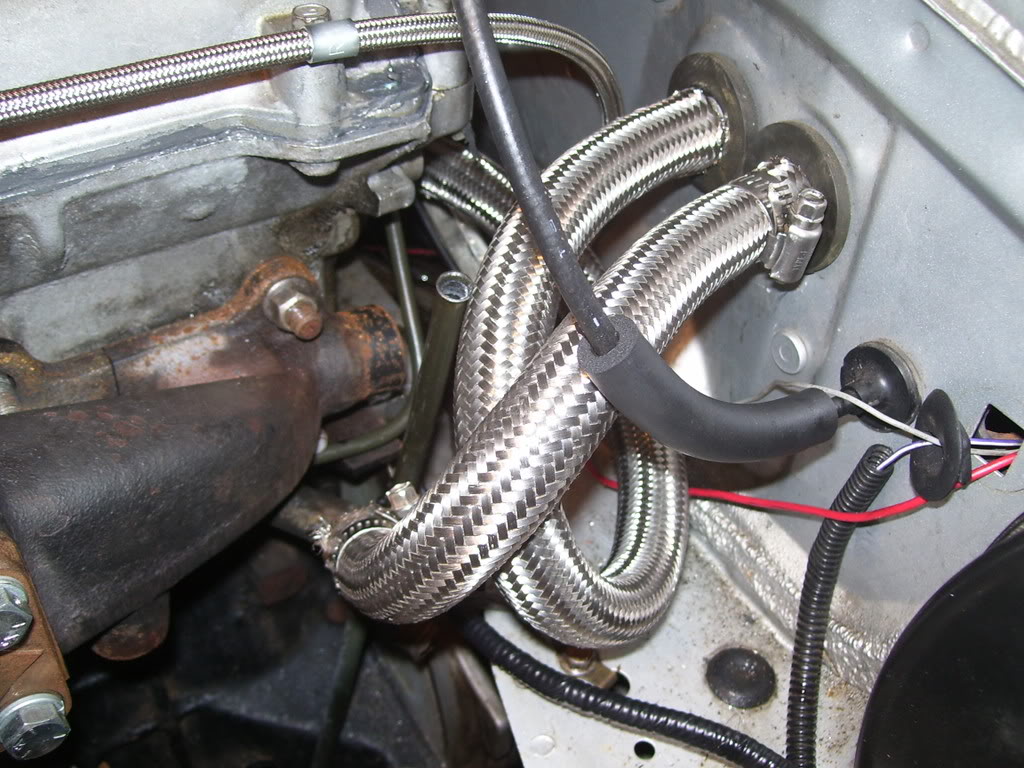
Got the oil feed and drain hooked up. Made some SS coolant lines for the heater core.
Got dark and cold so I turned the heater on.
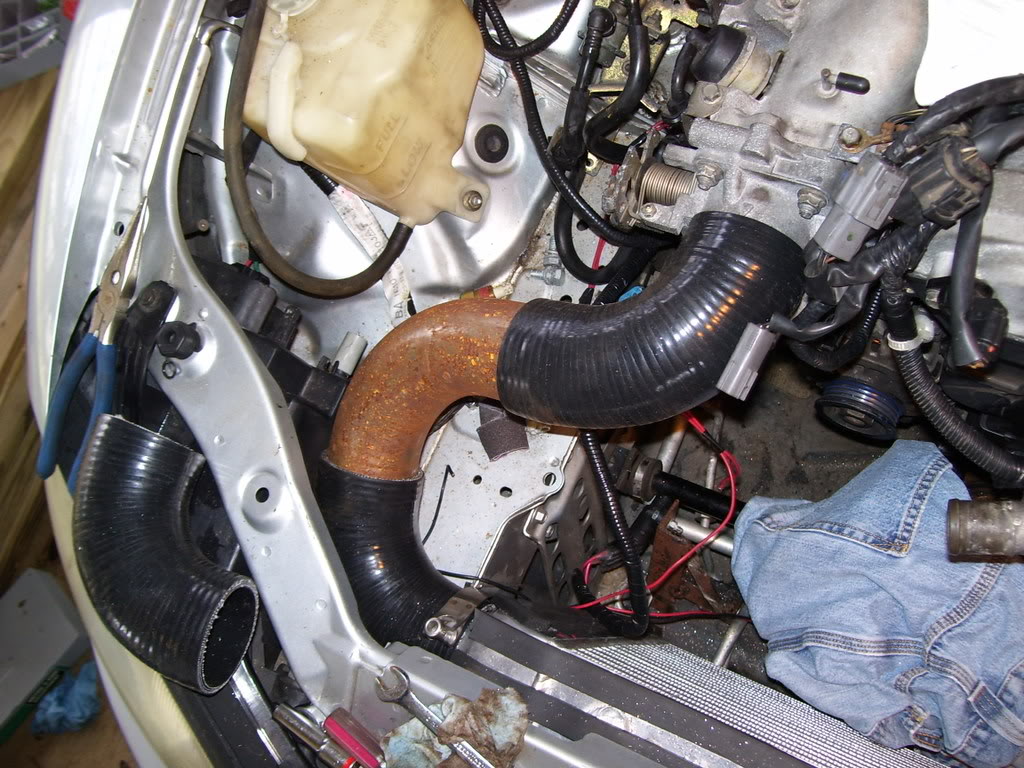
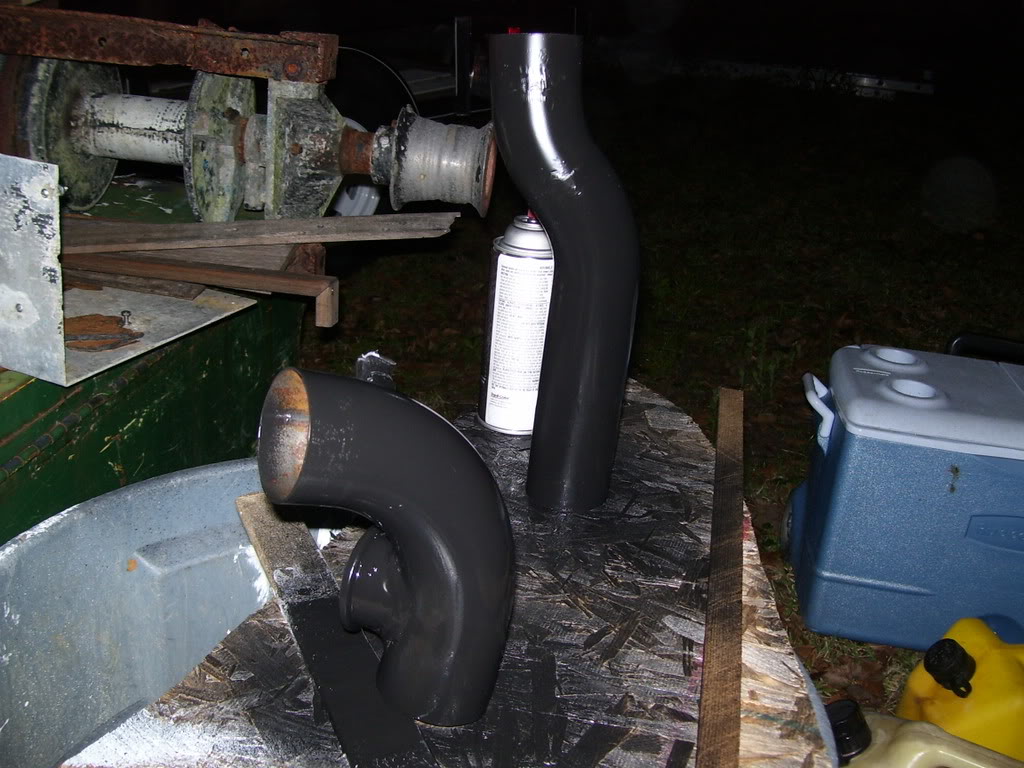
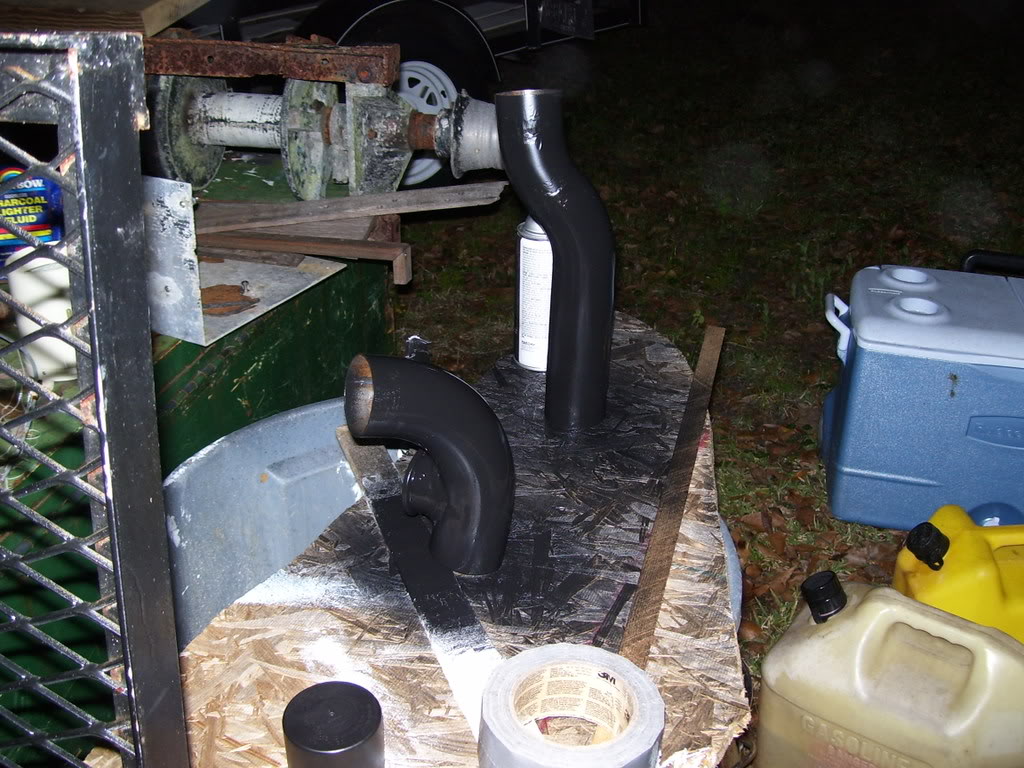
Then made my IC pipes.
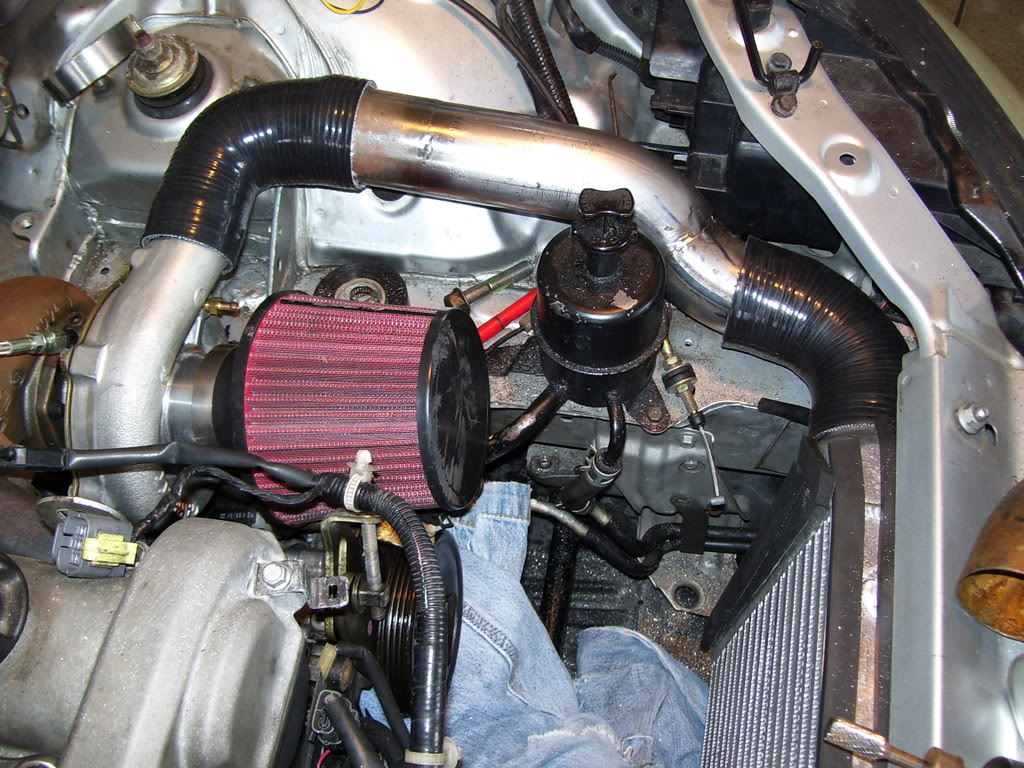
Then painted them in the dark. Don't paint ---- in the dark�.

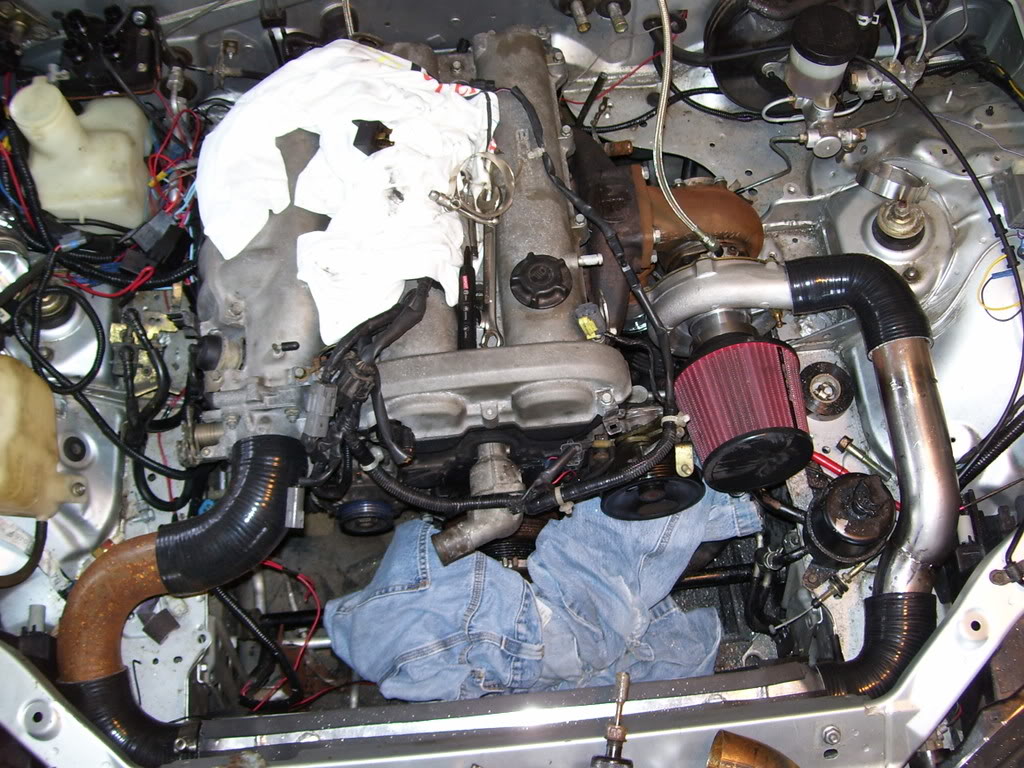
A/C and P/S still fit
Put a new timing belt, tensioner, and idler pulley while it was apart. All mazda ----. No pics.
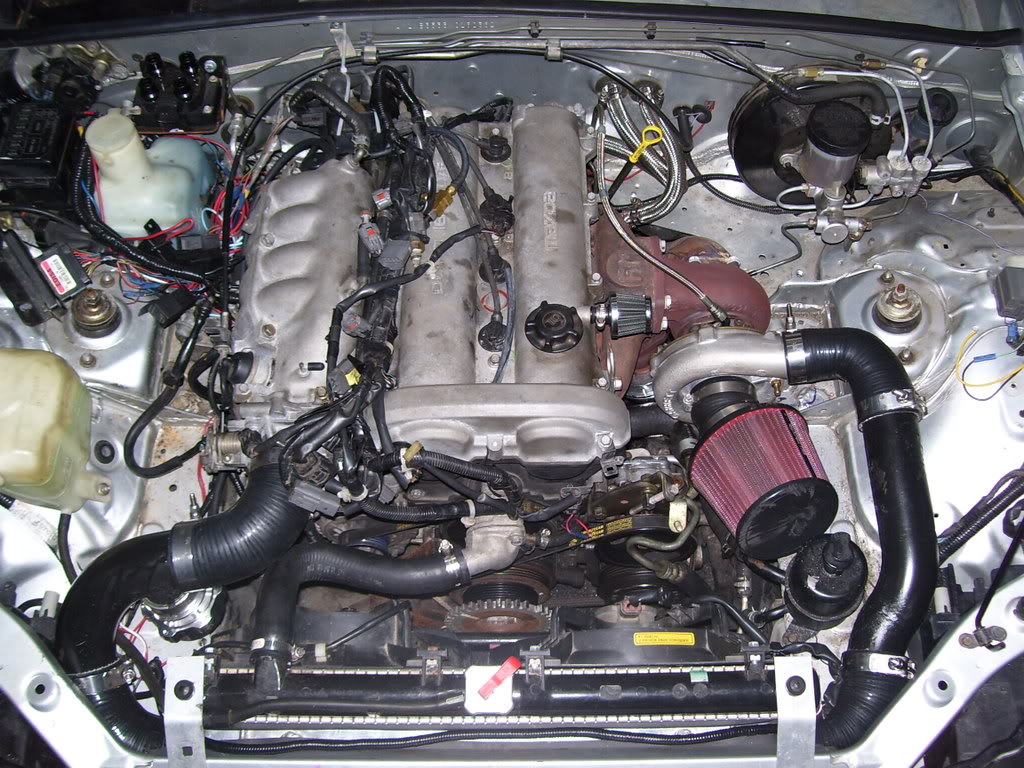
Finished. Need to clean up the wiring one day.
Second startup.
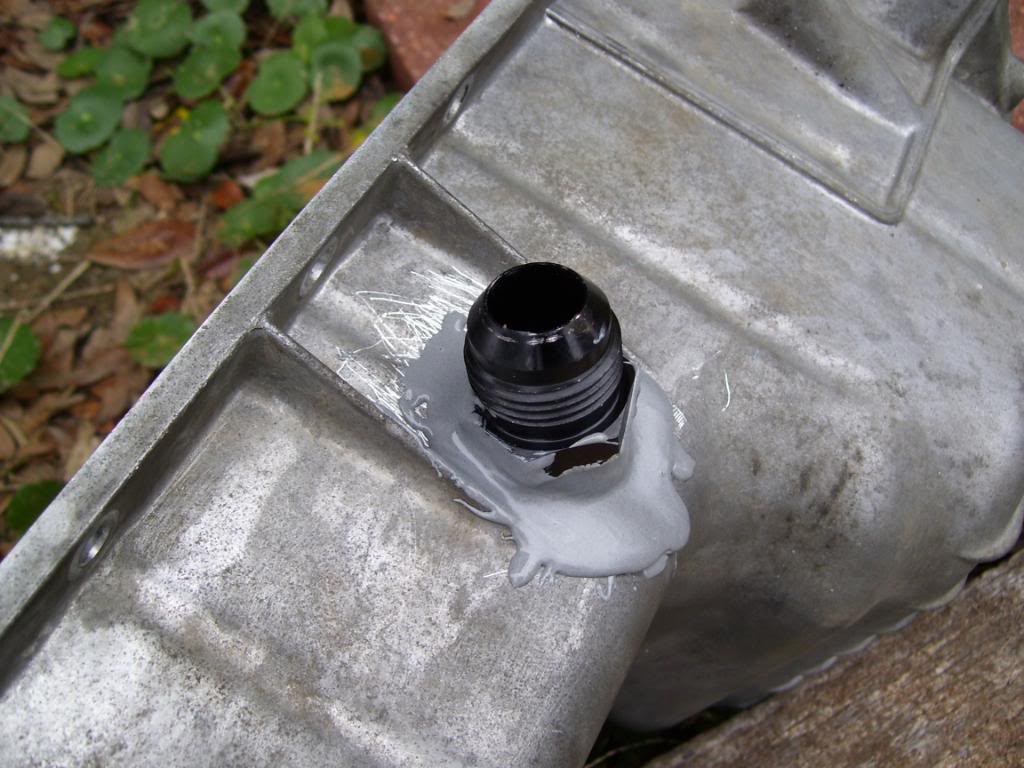
Only problem was the cork oil drain gasket I made leaked. Redid it with some Fel-Pro ---- from a machine shop and it's fine now.
Washed it
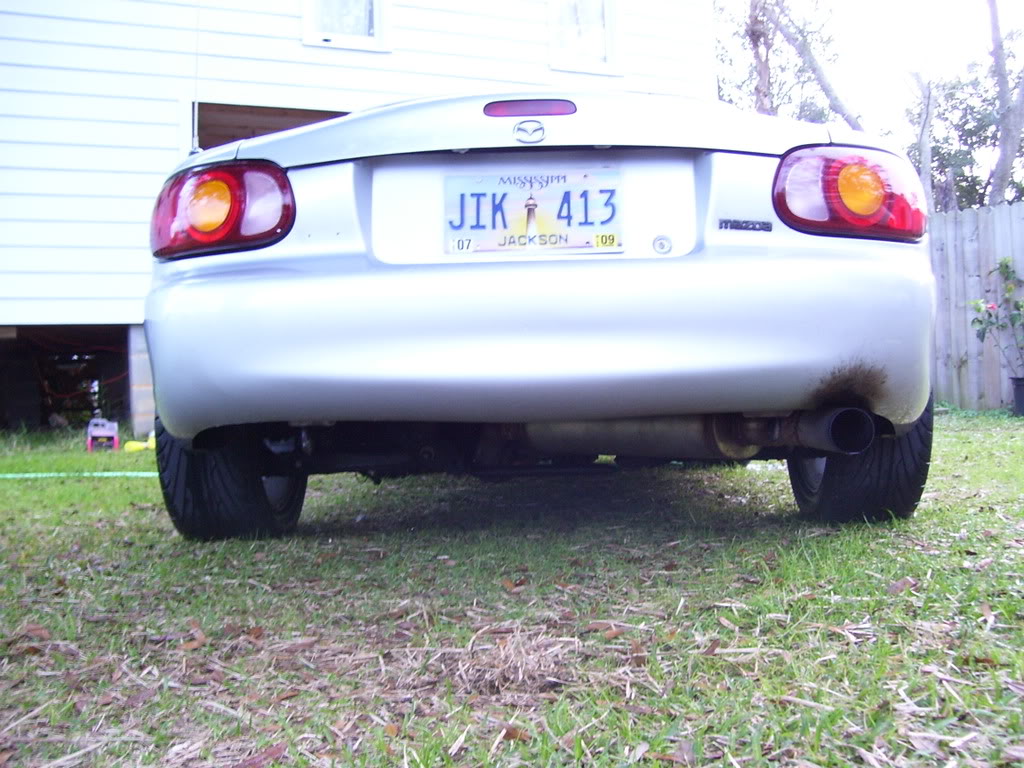
I built the exhaust. Has good ground clearance.
Drove it a few days and had a fuel injector o-ring fail and almost caught the car on fine. (I fail, should have replaced them) $14 dollars at wal-mart later�
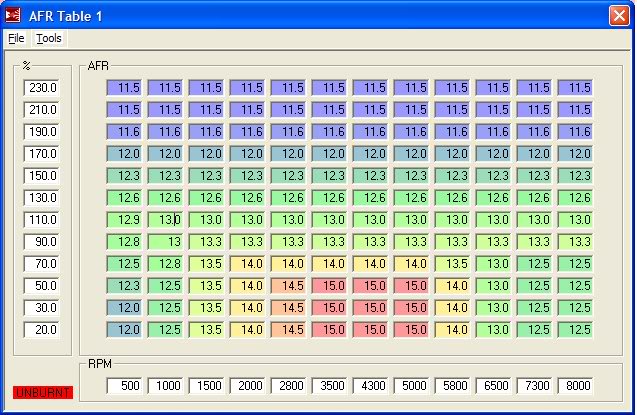
Here's my AFR target table I'm tuned to right now
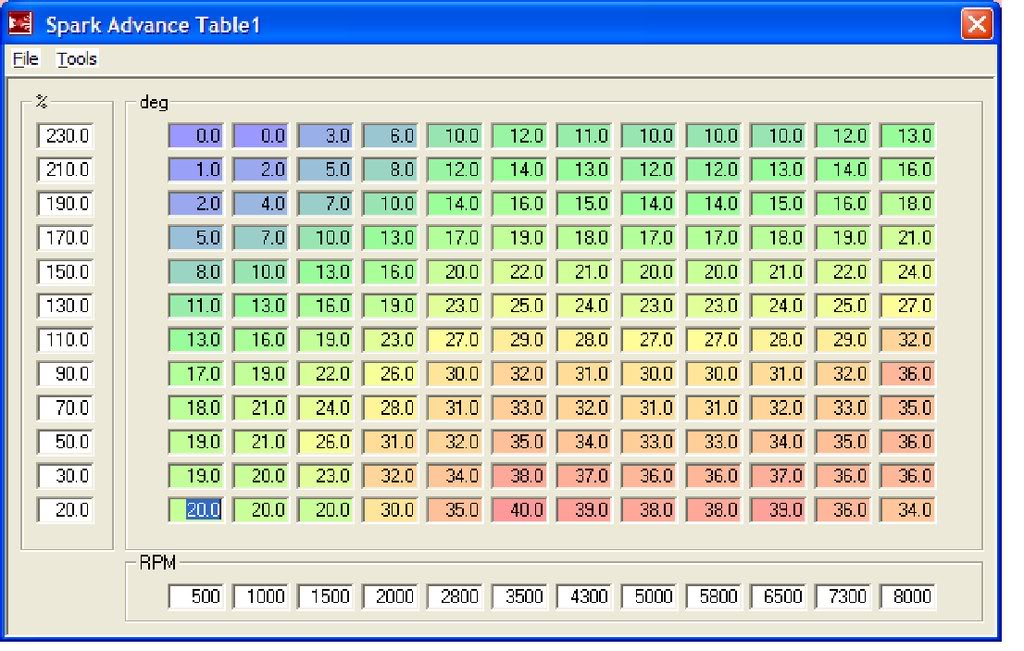
And my spark table I'm running
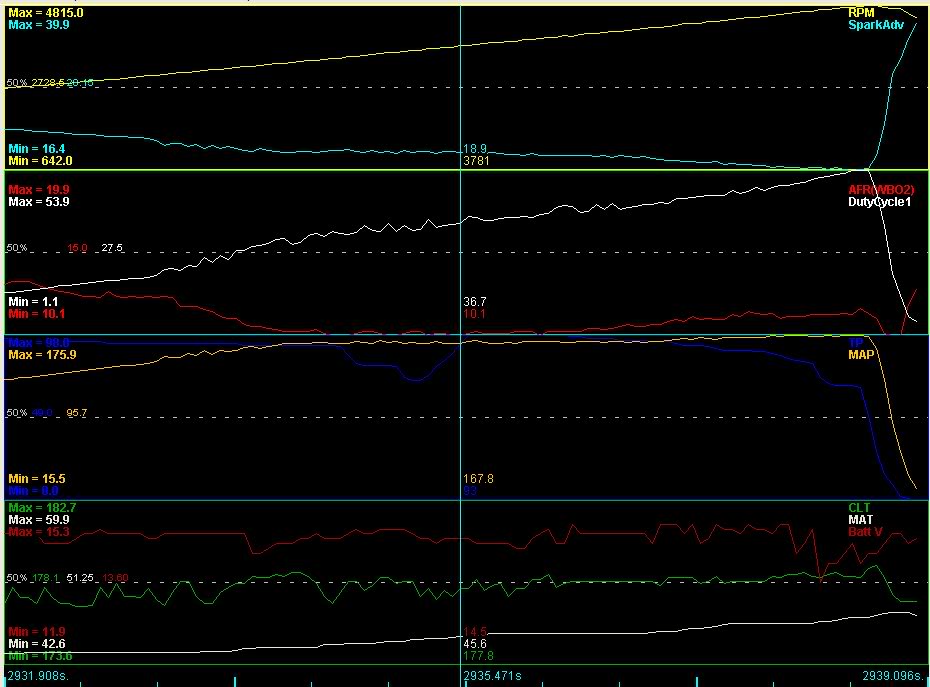
I started out running waste gate pressure of 8 PSI and got it tuned there. Now I'm at 11 PSI and it's wicked. No traction in first or second gear from a roll. I get full boost by 3300 from a 4th gear roll, but in first or second I don't see full boost till after 4K. Overall it's fun to drive. Needs an LSD bad and something to help with wheel hop.
COP project in the works
So yeah that's it. Turbo miata. Put about 1K miles on it and so far everything is working well. I want to turn up the boost but I have no traction as it is.
I tried to buy used ---- to save money.
MS2E, wiring harness stuff, etc. $600
LC-1 w/controller $190
Intercooler(new-second hand) $90
"Tial Style" BOV and 38mm gate, Silicone bends, couplers, and T-bolts, some flanges I didn't use. All from Evans Performance
$330
Autozone air filter 20
New GT3271 bought second hand $350
T2 based Flyin' Miata Manifold(used) $120
2", 2.5", and 3" Mandrel Bend Builder's kit from Racing Solutions $210
Magnaflow muffler, glasspacks, hangers, etc $200
Tools needed to do the job $200
-12AN oil drain ---- from Summit Racing $68
-4AN oil feed stuff from Egay $40
Ebay MBC $20
---- from Autozone to finish the build $150
RC 550's low ohm(used) $150
ACT Extreme Clutch(used) $100
I don't even wanna add that up, but I'm sure it cost a lot more than that in reality.
Box of CDM goodness
Garrett GT3271 52 trim comp, .78 A/R divided turbine.
Got a deal on a FM manifold but it was T2 and had stripped threads. And it also didn't have a port for an external wastegate. So I adjusted the manifold a bit�
Before:
Had to retap the threads bigger then locktite some grade five bolts in there.
Next day I cut them off and used a file to get it flat.
Then redrill and tap to T3 bolt pattern
Then test fitted it. I drilled the heads of the bolts so I could wire them together.
Added an external wastegate port. Had a welder braze it on. I did all the other welds. Works.
Then I was pretty much ready to turbo it. So out came the motor.
Had to cut some of the car out of the way for my IC install.
And make some brackets to hold the IC and condenser.
And some 5/16 weather stripping to seal things up and keep the IC from touching the other heat exchangers.
And now it fits. 20x12x3 core IC hidden behind factory condenser.
Working late
TT oil feed. Worked perfect.
Got the ACT Extreme clutch installed. Locktite'd the bolts.
In the spirit of HMT, I tried gluing my broken motor mount back together. Failed.
Damn welders were all slacking around Christmas, so I couldn't get my AN fitting welded in and I didn't have one that would screw in and point up. So I tapped it crooked. This was really ------- hard to get right. Ended up using a socket.
Screwed in the 3/4 NPT to -12AN fitting. Not it points up.
And welded it in.
Ground the inside flat and welded it too.
Old backhoe I worked on.
Opened up the stock intake manifold to get rid of a resonace chamber and make the second set of runners actually feed the motor air.
You can barely see in this pic but I added two extra ports to the plenum for the WG and BOV.
And ground the fittings smooth on the inside. Porting done.
Turbo bolted on.
Made a hardine for the waste gate. Bonus points if you see what's wrong in the pics.
Ready to go back into the car.
Back home
Ghetto trigger wheel setup. Works fine though.
Got the oil feed and drain hooked up. Made some SS coolant lines for the heater core.
Got dark and cold so I turned the heater on.
Then made my IC pipes.
Then painted them in the dark. Don't paint ---- in the dark�.
A/C and P/S still fit
Put a new timing belt, tensioner, and idler pulley while it was apart. All mazda ----. No pics.
Finished. Need to clean up the wiring one day.
Second startup.
Only problem was the cork oil drain gasket I made leaked. Redid it with some Fel-Pro ---- from a machine shop and it's fine now.
Washed it
I built the exhaust. Has good ground clearance.
Drove it a few days and had a fuel injector o-ring fail and almost caught the car on fine. (I fail, should have replaced them) $14 dollars at wal-mart later�
Here's my AFR target table I'm tuned to right now
And my spark table I'm running
I started out running waste gate pressure of 8 PSI and got it tuned there. Now I'm at 11 PSI and it's wicked. No traction in first or second gear from a roll. I get full boost by 3300 from a 4th gear roll, but in first or second I don't see full boost till after 4K. Overall it's fun to drive. Needs an LSD bad and something to help with wheel hop.
COP project in the works
So yeah that's it. Turbo miata. Put about 1K miles on it and so far everything is working well. I want to turn up the boost but I have no traction as it is.

Thread Starter
0.0 BAR
Joined: Apr 2008
Posts: 0
Originally Posted by heyseemoreh22
Nice setup but THE INTER"HEATER" BEHIND THE RADIATOR AND AC CONDENSOR? YO your sdrawkcab pal

1.0 BAR
Joined: Aug 2005
Posts: 339
Looks good, ---- me thats a huge turbo on a miata. That seems like a lot of retard at wot, 13degrees?? I'm on a different motor, but IIRC im at aroudn 20deg at redline with low 11's for afr. Very brilliant idea with the mani tho, how you filled the holes.
Thread Starter
0.0 BAR
Joined: Apr 2008
Posts: 0
Originally Posted by TTC
Looks good, ---- me thats a huge turbo on a miata. That seems like a lot of retard at wot, 13degrees?? I'm on a different motor, but IIRC im at aroudn 20deg at redline with low 11's for afr. Very brilliant idea with the mani tho, how you filled the holes.
And yeah, the turbo is big because I'm building a motor this summer and will up the boost. I'm around 250-270whp right now. Turbo should get me to 350whp no problem.
1.0 BAR
Joined: Aug 2005
Posts: 339
I havent tuned an undersquare motor, but I should be within the next 6months as i build my stroker. It sounds a bit wonky but I put a car radio noise suppressor on my MS power feed and it really cleaned up my 12v signal, you have quite a bit of fluctuation. You can also put a capacitor on the alternator if their isnt one.
Im surprised you went with EDIS by the looks of it for your crank trigger, if you are indeed using edis then It will be easy to do COP. I'm planning on using sr20det cops.
Im surprised you went with EDIS by the looks of it for your crank trigger, if you are indeed using edis then It will be easy to do COP. I'm planning on using sr20det cops.
Thread Starter
0.0 BAR
Joined: Apr 2008
Posts: 0
Originally Posted by carkrazed2005
Nice work!!! I like how you filled the holes in the manifold. Very inginuitive. I'm also workin on a BPT build. Doesn't the miata block have coolant and oil feeds on the front of the block?
Thread Starter
0.0 BAR
Joined: Apr 2008
Posts: 0
Originally Posted by TTC
I havent tuned an undersquare motor, but I should be within the next 6months as i build my stroker. It sounds a bit wonky but I put a car radio noise suppressor on my MS power feed and it really cleaned up my 12v signal, you have quite a bit of fluctuation. You can also put a capacitor on the alternator if their isnt one.
Im surprised you went with EDIS by the looks of it for your crank trigger, if you are indeed using edis then It will be easy to do COP. I'm planning on using sr20det cops.
Im surprised you went with EDIS by the looks of it for your crank trigger, if you are indeed using edis then It will be easy to do COP. I'm planning on using sr20det cops.
Yeah, that's an EDIS setup. So how is it easy to do a COP setup with EDIS? All ears. These COPs have built in ignitors where the stock EDIS coil is just a coil. Or would that not matter? Any info one how to hook these COPs up would be great. I've got the stock sparkplug wires zip tied to the EDIS coilpack right now and that sucks...
1.0 BAR
Joined: Aug 2005
Posts: 339
---- isn't it soooo annoying, i would get resets and ---- loads of disconnects. The one thing that really solved it was this like 3" 12 dollar radio noise suppressor i got from some electronics store. Put it on the power feed to your MS, I then put the capacitor from the EDIS on my coil pack. If you look on the diagram youll see the cap, goto the junkyard youll see the cap attached the the coil pack, get it. You can also put one of those on your alternator but i found I didnt have to, the one on the Ecu was enough. You can also put noise suppressor on your wideband, looking at your graphs tho it seems fine.
For the coilpacks, i havent done it yet but if you think of it we have 3 wires going into the Edis coil pack. 2 are power and 1 is ground, so 1 power is for half the coil which is 1/4 and the other power is for the coil half for 2/3. So my my car runs batch fire IIRC its been a looooong time since i wired it, just take the 2 power wires for the banks and wire the coil packs. Coil pack 1/4 together on the same power feed, and 2/3 and tie the ground in with a 25uf cap for good measure! I havent tested it yet, but I can't see any reason at all why it wouldnt work. Make sense?
While your wiring you should rewire edis so you can use antilag and spark rev limit.


