
Made a little progress on my turbo A20 setup!


Thread Starter
0.5 BAR
Joined: Mar 2003
Posts: 147

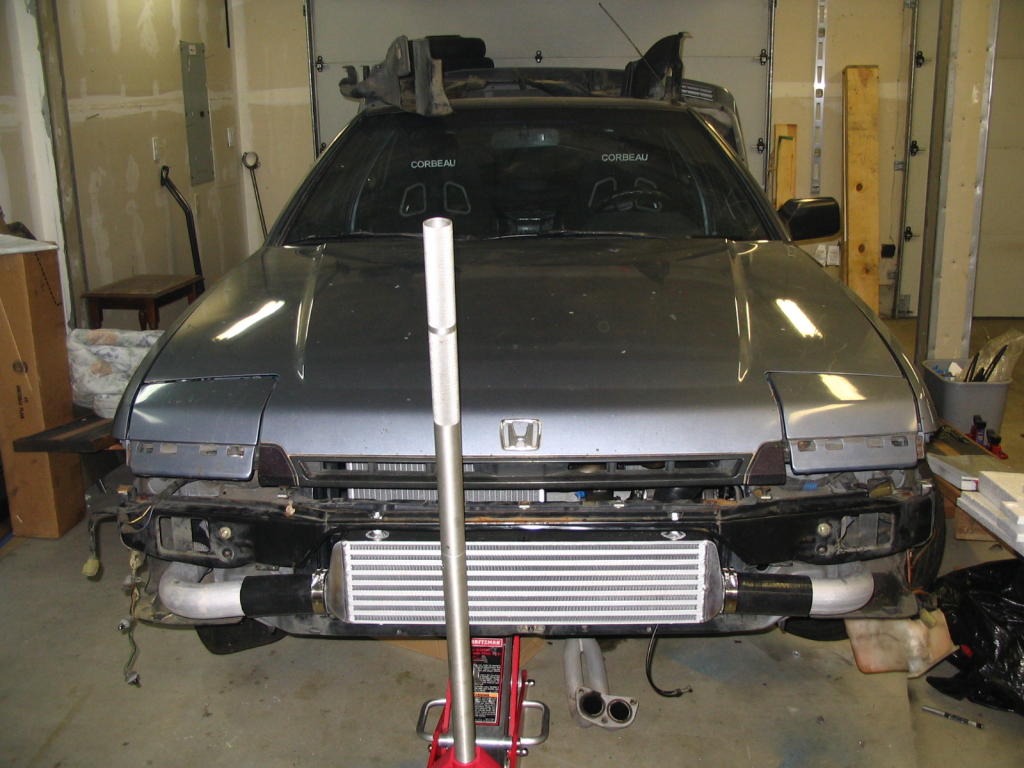
Got a little bit of work done on the accord this weekend!
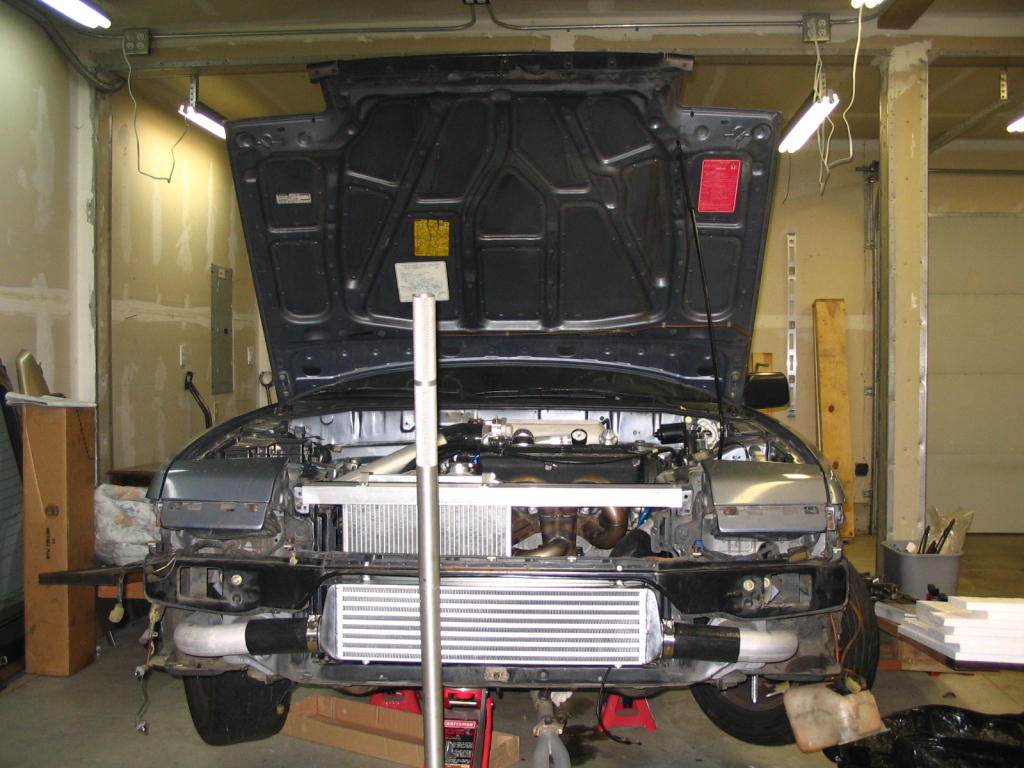
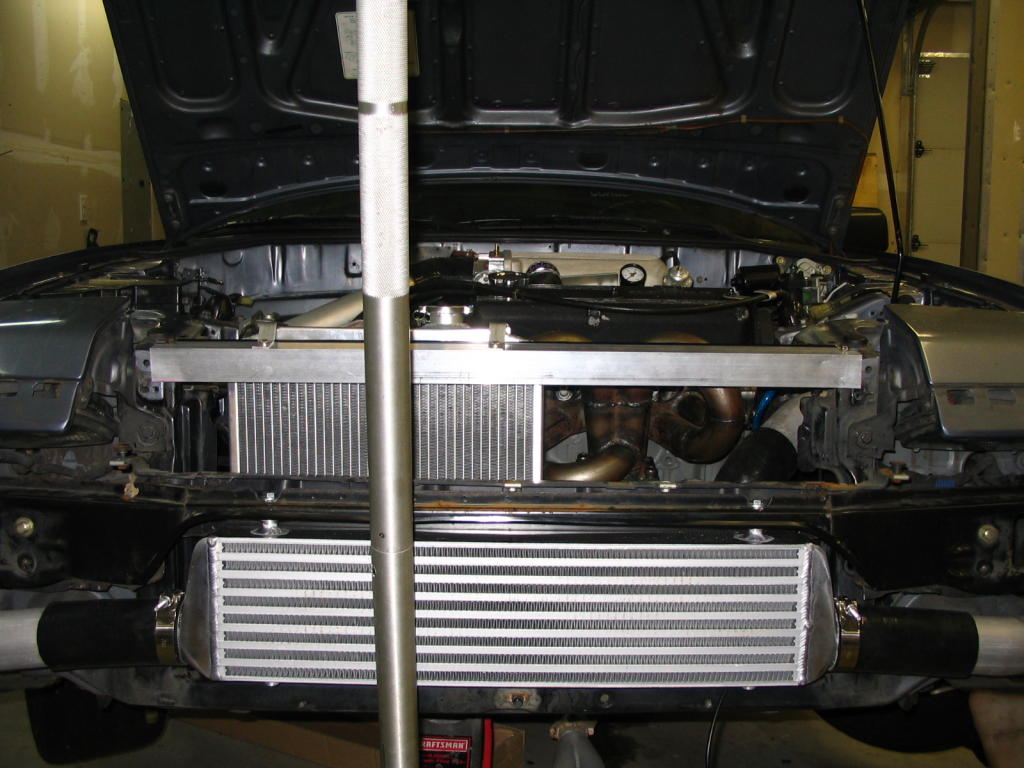
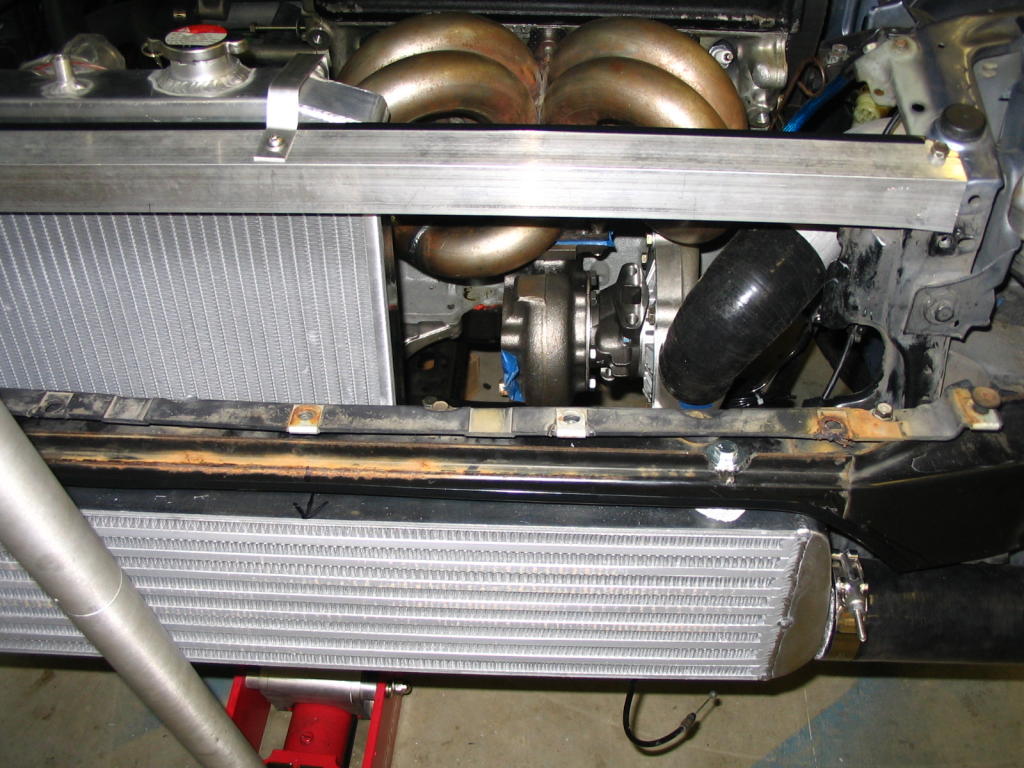
My buddy cut the ---- out of my stock bumper beam with a cut off wheel in a 4" makita grinder until we could hang my intercooler up there. I am using a 29" x 6" x 2.5" bar and plate intercooler from www.siliconeintakes.com
Once we had a few attempts at getting enough material cut out and cut off all the lips and tabs that were going to be in the way of intercooler piping we cleaned it up a bit and tried to make it less dangerous. It probably needs some rustoleum paint but I added some door trim molding to keep my from cuting myself when working around it. You can see the little black trim peice around the edge of where we cut.
We drilled two holes in the top of my bumper support beam to mount directly into the M8 x 1.25 pegs on the top of the intercooler. We used several washers in between the intercooler and the bottom side of the top of the bumper support, in order to push the intercooler far enough down. It lines up pretty well but we will need to trim the bumper more in order to slide the bumper all the way on. It is about an inch off right now.
-----
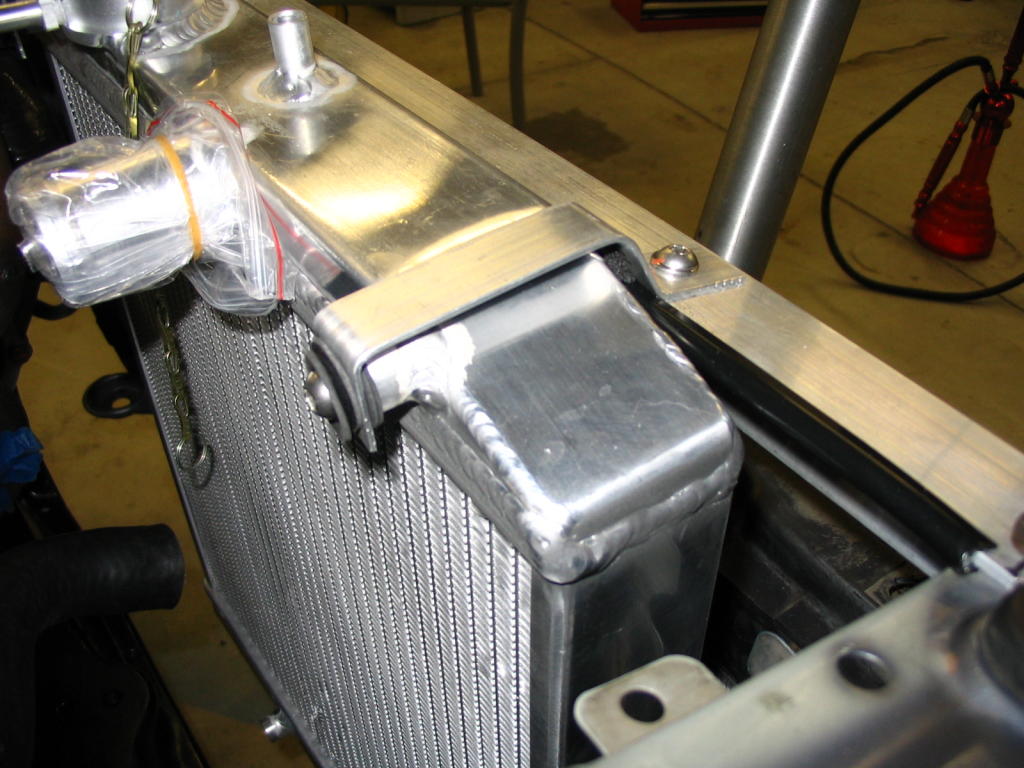
The civic radiator project was pretty fun. We started off reusing the stock lower passenger side mount and bushing. This puts the radiator in almost the perfect position, but we still needed to smack the hood with a hammer a couple times in order to allow the radiator cap and the upper mounting stud room to breath.
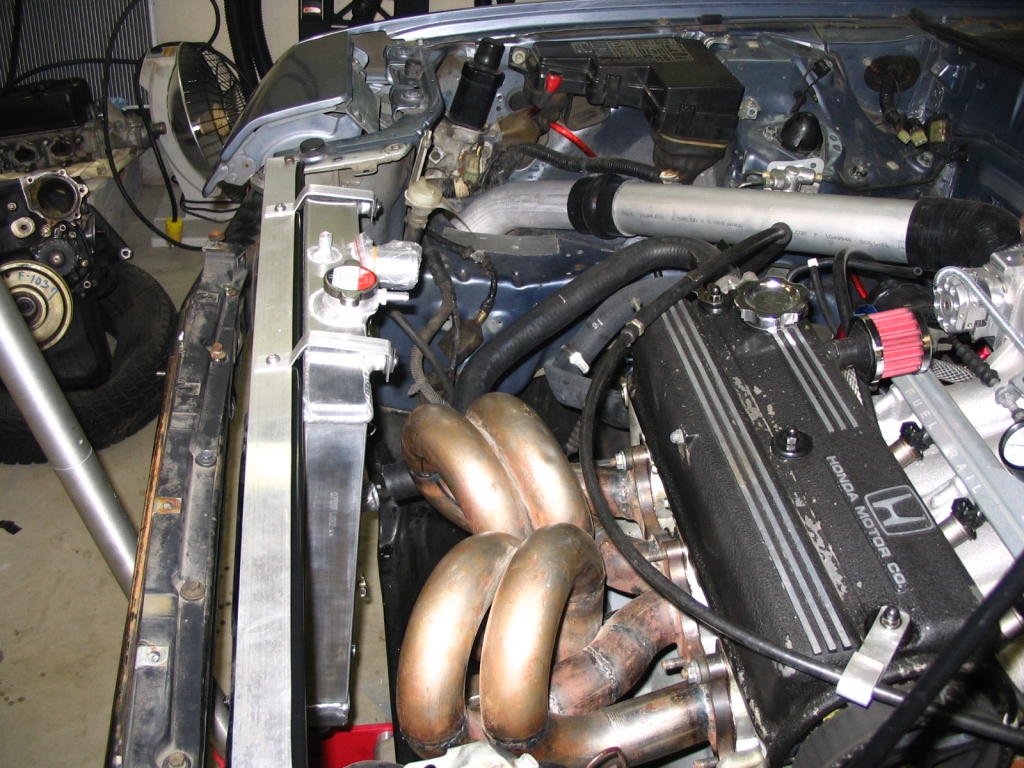
As you might notice, my upper radiator support is gone. I replaced it with a 1/8" thick piece of 1.5" angle aluminum. This allowed me to keep the radiator more vertical and not have to hack the ---- out of the stock upper support. I just built some mounting tabs that went from the new upper radiator support to the front of the radiator, and bolted in where the stock upper fan mounts are located. I am using a 10" low profile aftermarket fan, so I do not need the stock fan mounting holes. It is really sturdy in there right now, and even with out lower drivers side support it is held in place very well by my upper supports. That being said I still plan on building a small aluminum tab with a grommet fitted to it to support the other post on the bottom of the radiator.
Because of the new upper support I will not be able to run the stock hood latch (my release was starting to get sketchy so no biggie) but I am happy to just run hood pins to make all that more simple.
-----
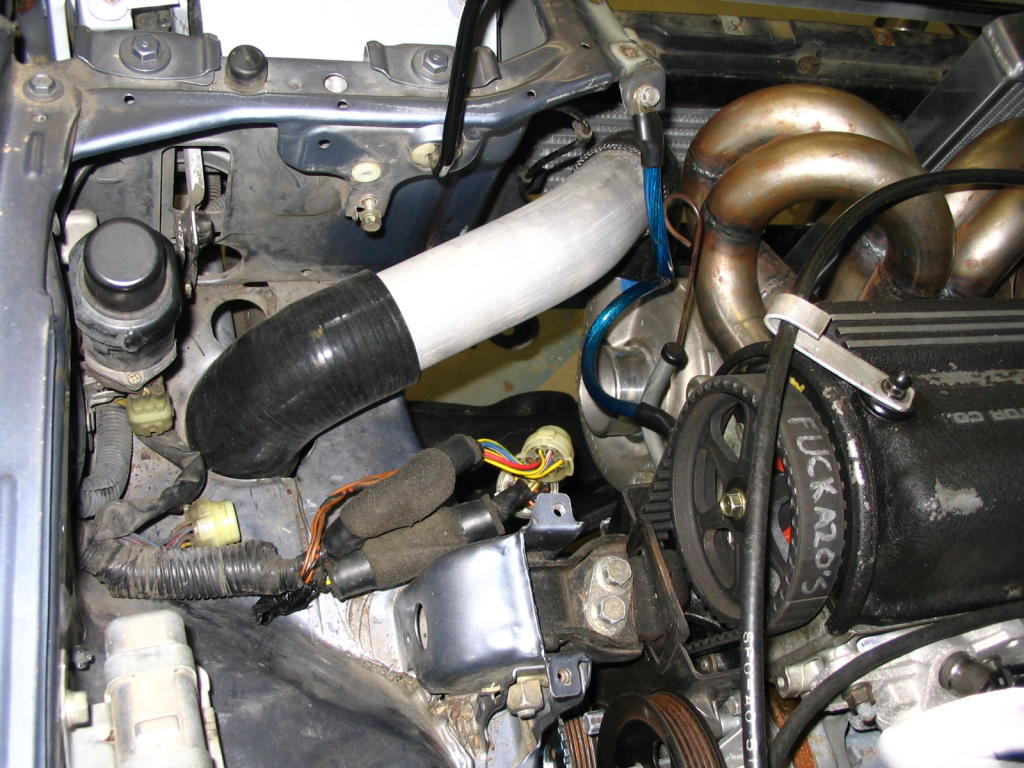
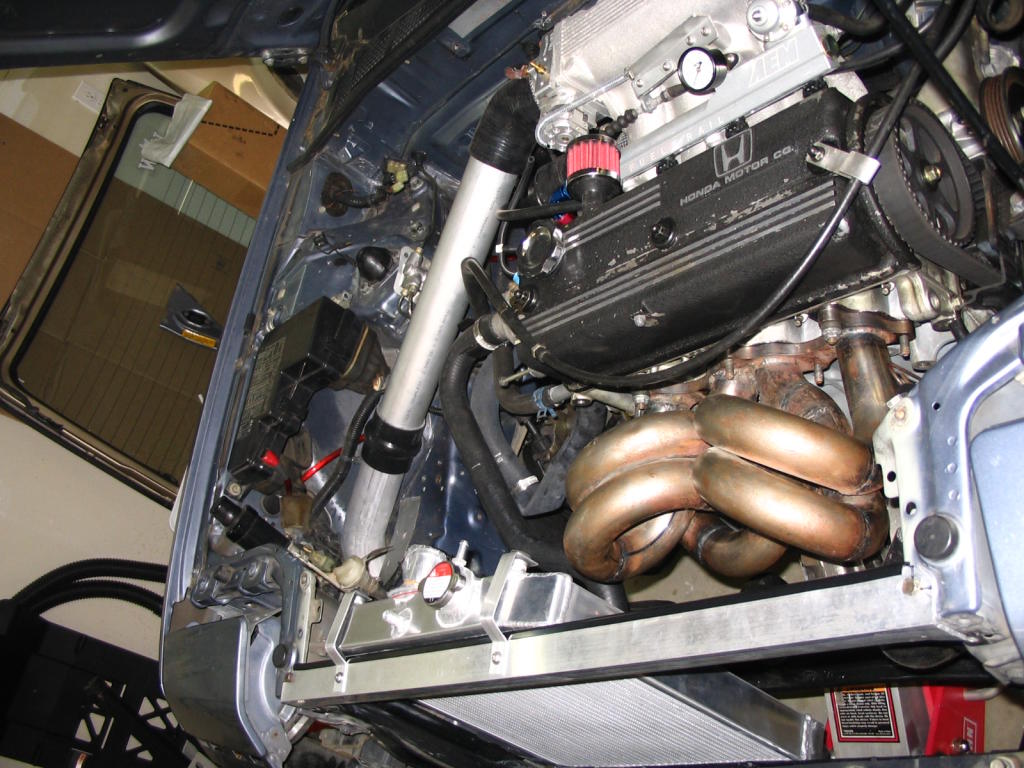
The charge pipe installation just sort of fell into place. We only used 2 45 degree couplers, 2 90 degree couplers, and 2.5 feet of straight tubing, the rest was silicone couplers. We used a couple of reducers for the throttle body and turbo outlet connections, but with the exception of one hump hose the rest were either 90 degree couplers or straight couplers.
It doesn't have all the clamps on it because we assumed we would need to modify the bends and cut a little bit. We did not have to cut ANYTHING except for the straight tube we needed in about 3 spots. Since it all came together so well we just left it on for now, but it could be all clamped up real quick and ready to run.
-----
I have some major concerns on whether or not it will be possible to fit a downpipe on this setup, because the turbo placement will make that really tricky. But we got some 3" flexible ducting to try to mockup some bends to see if it is physically possible. We got it to work with the flexible ducting, so I believe that we can probably fit some sort of 2.5" downpipe in there if we get a really tight set of bends going.
I am going to look into building a custom crossmember to give me a bit more room to route a downpipe, and see if that makes my situation any better. If I use 2.5" piping for the DP it looks like I need to build a compound angle that is 180 degrees with a 1.75" CLR to get the exhaust pointing towards the drivers side again, and another 90 degree sharp angle to get it pointed towards the back of the car. Turbo placement on my manifold is ridiculous.
-----
We made some good headway today, and there isn't a whole hell of a lot left to do.
I need to pick my injector size, get a downpipe and exhaust built, setup hood pins, and get my engine management solution in my hands. I can't think of a heck of a lot left to do beyond those steps. It will just be a matter of fine tuning the little issues and getting the car broken in the rest of the way and then tuned.
I can't wait!


Thread Starter
0.5 BAR
Joined: Mar 2003
Posts: 147
It is an A20, which is the motor that came in the car.. but it is anything but stock...
Block:
* Bored .050 (2047cc now)
* Diamond Custom pistons 8.46:1 CR and Total Seal ring set with chrome steel top rings
* Eagle H-Beam Rods (from LS Integra)
* ARP rod bolts, and main studs
* Baffled oil pan (modified to keep oil in the bottom)
* High flow Toga oil pump
* King tri-metal bearings all around
* Balanced bottom end (from crank pully to clutch - to 8000RPM safe)
* Lightened OEM flywheel (16.5 lbs)
* Spec Stage 3 Clutch (6 puck, sprung, 259 ft/lbs)
Head:
* 70mm > 68mm tapered BBK throttle body
* AEBS B16 intake manifold (bored from 65mm to 68mm to mate to TB)
* Ported head to intake manifold
* OEM sized forged valves
* Titanium valve retainers
* Titanium locks
* High compression valve springs (8500 rpm capable)
* Delta 282 Cam - not going to be used on the turbo setup
* 5-angle valve grind
* Ported and polished head
* Polished exhaust ports
* DC Sports header (for now, until I'm boosted)
* Golden Eagle 440 Adjust-tru adjustable cam gear
* Cometic custom .050 thick copper head gasket
* ARP head studs
Misc:
* AEM adjustable fuel pressure regulator
* AEM fuel rail
* Walbro 255 lph fuel pump
Turbo Parts:
* Garret T3/T4 57 trim, stage 3 wheel. .63 turbine, .60 compressor
* Custom Ram Horn Turbo Manifold
* HKS SSQV BOV
* Tial 38mm external wastegate
* Stealthmode oil feed and return lines
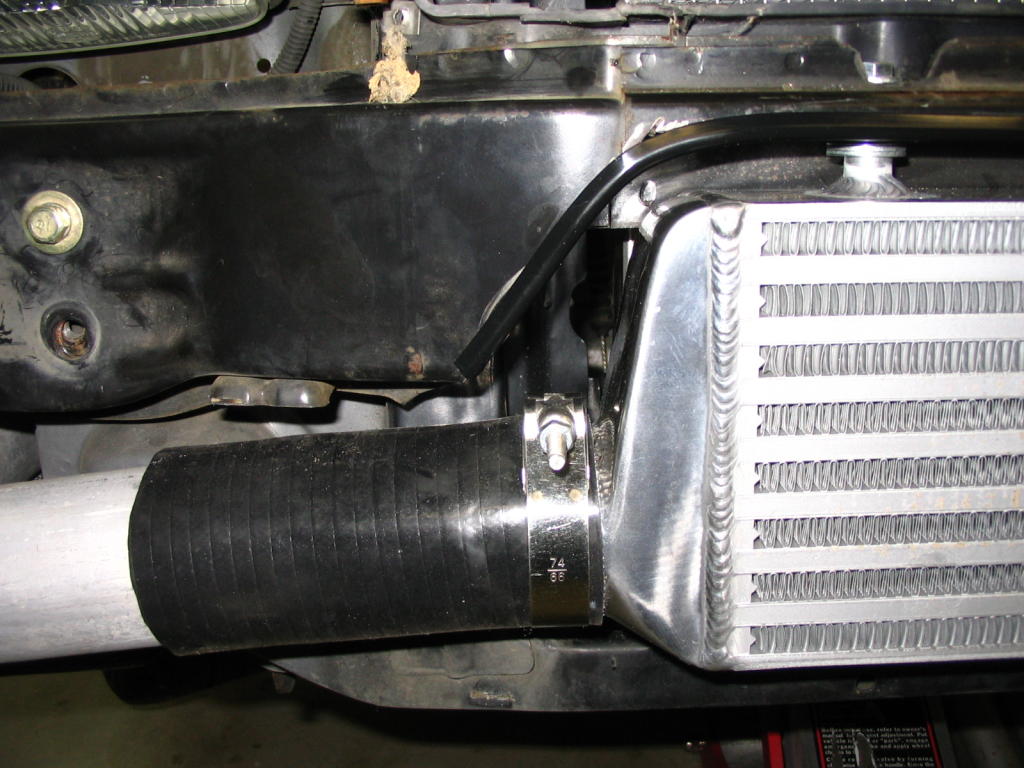
* 29x6x2.5 bar and plate FMIC
* 2.5" charge pipes
I still need to figure out injector sizing, but I am leaning towards 800cc/
Engine management will be a full standalone Electromotive TEC-GT setup, using a 60-2 crank trigger wheel mounted to my crank pulley, and uses their 'DFU' coilpacks for ignition. VERY VERY accurate and it should work out really well. The intake manifold is just a b16/b18c5 AEBS manifold, all you need to do is shave off the top of the flange so it clears the valve cover, and drill like 3 new holes in the flange. The ports themselves line up almost perfectly, but its port matched anyway now.
I was going to go with odb1 setup, but decided I wanted to try something different and go standalone.
Block:
* Bored .050 (2047cc now)
* Diamond Custom pistons 8.46:1 CR and Total Seal ring set with chrome steel top rings
* Eagle H-Beam Rods (from LS Integra)
* ARP rod bolts, and main studs
* Baffled oil pan (modified to keep oil in the bottom)
* High flow Toga oil pump
* King tri-metal bearings all around
* Balanced bottom end (from crank pully to clutch - to 8000RPM safe)
* Lightened OEM flywheel (16.5 lbs)
* Spec Stage 3 Clutch (6 puck, sprung, 259 ft/lbs)
Head:
* 70mm > 68mm tapered BBK throttle body
* AEBS B16 intake manifold (bored from 65mm to 68mm to mate to TB)
* Ported head to intake manifold
* OEM sized forged valves
* Titanium valve retainers
* Titanium locks
* High compression valve springs (8500 rpm capable)
* Delta 282 Cam - not going to be used on the turbo setup
* 5-angle valve grind
* Ported and polished head
* Polished exhaust ports
* DC Sports header (for now, until I'm boosted)
* Golden Eagle 440 Adjust-tru adjustable cam gear
* Cometic custom .050 thick copper head gasket
* ARP head studs
Misc:
* AEM adjustable fuel pressure regulator
* AEM fuel rail
* Walbro 255 lph fuel pump
Turbo Parts:
* Garret T3/T4 57 trim, stage 3 wheel. .63 turbine, .60 compressor
* Custom Ram Horn Turbo Manifold
* HKS SSQV BOV
* Tial 38mm external wastegate
* Stealthmode oil feed and return lines
* 29x6x2.5 bar and plate FMIC
* 2.5" charge pipes
I still need to figure out injector sizing, but I am leaning towards 800cc/
Engine management will be a full standalone Electromotive TEC-GT setup, using a 60-2 crank trigger wheel mounted to my crank pulley, and uses their 'DFU' coilpacks for ignition.
VERY VERY accurate and it should work out really well. The intake manifold is just a b16/b18c5 AEBS manifold, all you need to do is shave off the top of the flange so it clears the valve cover, and drill like 3 new holes in the flange. The ports themselves line up almost perfectly, but its port matched anyway now.I was going to go with odb1 setup, but decided I wanted to try something different and go standalone.


