
Greddy Turbo Timer Install on 95 civic OBD1~~~ PICTURES!


Thread Starter
1.0 BAR
Joined: Jan 2006
Posts: 328
This is a write-up on How to install a GReddy Full Auto Turbo Timer in an OBD-1 1995 honda civic ex.
The tools you'll need:
Wire stippers
Electrical taps (t-taps, parallel taps, etc) -i prefer these... they're fast, and re-usable.
Electrical tape
10 mm socket and extention
solder - recommended... i took the cheasy-easy way out.
philips head screw driver.
razor blade.
AND A GREDDY TURBO TIMER~!
Note: this is for a full auto turbo timer. For a simple turbo timer... simply ignore the speed sensor wire (purple)
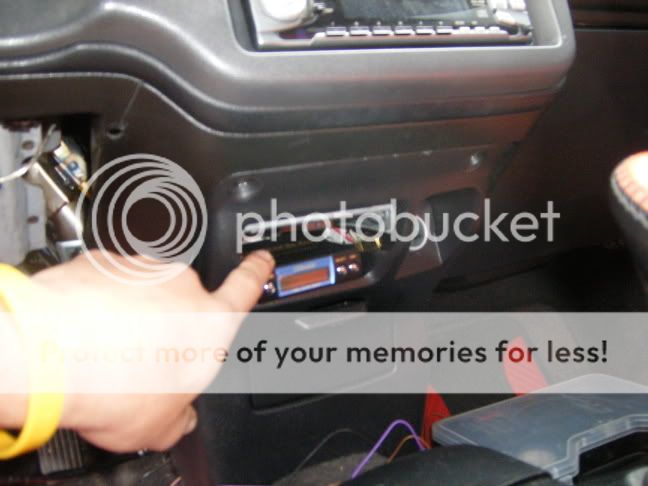
Step one~ unplug neg. battery terminal~! Next...Find a good location for the Unit. I chose the pocket here, because it was slightly concealed, and i dont like bright blue and red LED lights in my face when drivin at night... Plus it made wiring very easy.
Step two~ feed the wires through the back of the dash so you can work w/ them.
Every electrical job goes alot easier when you have a wire stipper~! ol:
ol:
(Radio shack: $10)
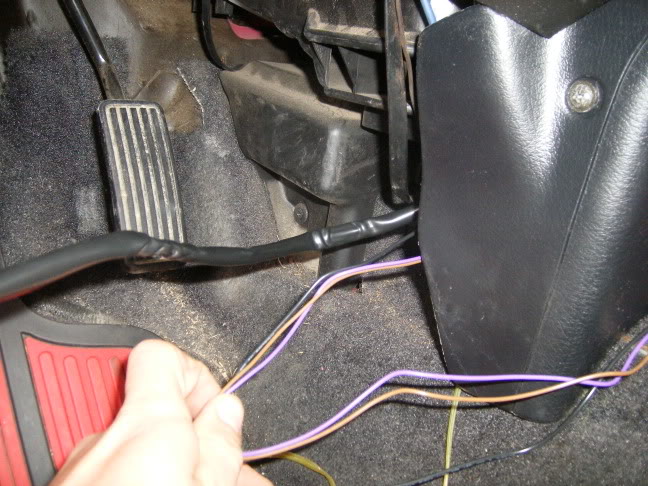
First task is to hook up the Parking brake wire. This is the Brown wire from the Timer to a green wire w/ a red stripe.
You'll have to remove your center console to feed the brown Timer wire underneath. This consits of two philips screws on either side of the cup holder, and two larger philips screws under the access panel under the parking brake. If you dont know how to take the console out... stop, and have someone who knows how to wire do this project for you~!
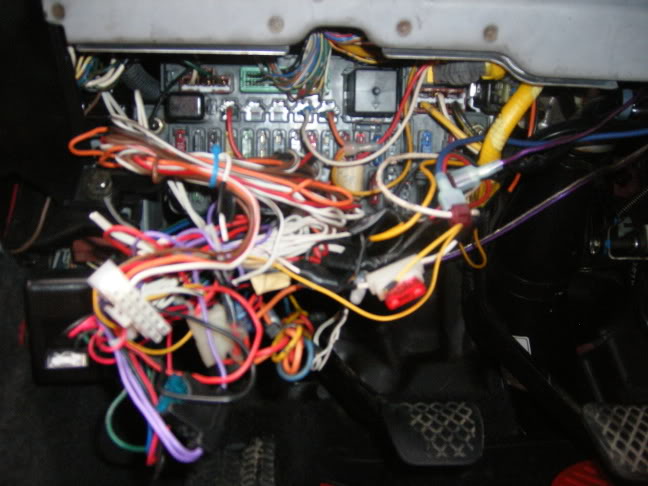
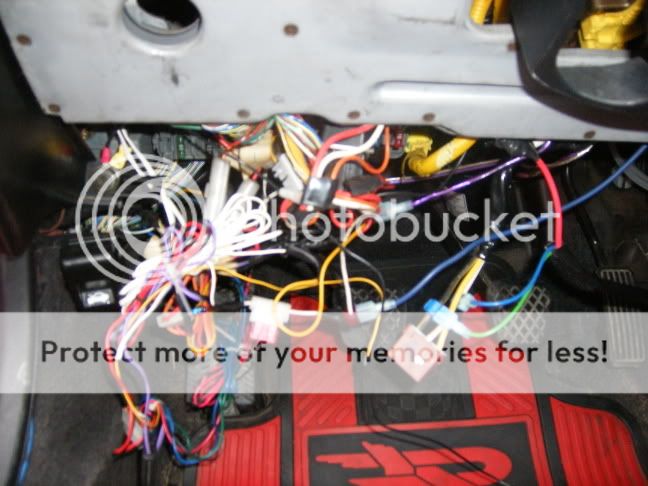
I think i have a rat infestation under my dash.. look at this nest~!
haha, anyway... Next job is to locate the ignition wires. We're looking too hook up the timer's blue, green, and red wires.... Lets go find that ignition harness...
To get to this: there are three phillips screws to take out. Two on the left side of the steering wheel, and one on the right. If you dont know how to take this panel off... stop, and have someone who knows how to wire do this project for you~!

Here it is~! this brown one here. This is the ignition harness under your dash that is plugged into the Fuse Box. It has a yellow wire, a black w/ yellow stripe wire, and a white wire w/ black stripe... Time to T-tap into them...
Unplug the harness from the fuse box. It makes everything easier.
If you dont have a rats nest like me, you may even want to remove the whole fuse box, and drop it down some, and then unplug the brown ignition harness. Its just two 10mm bolts to drop the fuse box down.
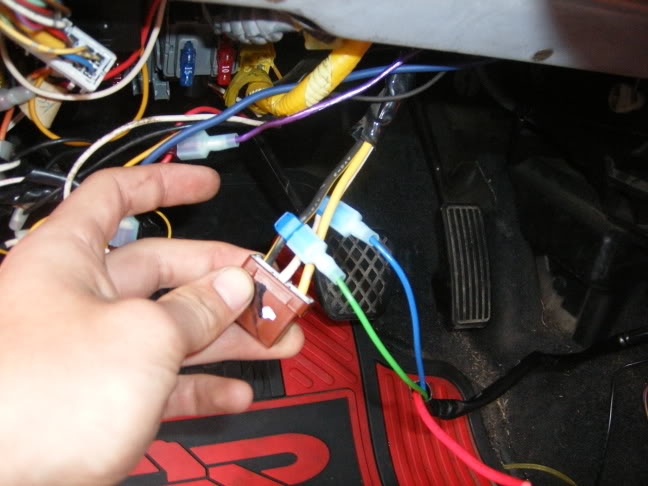
The blue wire from the Timer is hooked up to the accessory ( ACC ) from the ignition. that would be the White one w/ black stripe.
The Green wire from the timer is hooked up to the ignition ( ON ) from the ign. harness. That's the Black wire w/ yellow stripe.
but uh-oh... where is the 12 volt source wire? ...time to go digging...
The fat solid white wire is the 12 volt source. It is pretty tricky to find. If you have a flashlight, shine it up under the dash, and look above where the fuse box was. You'll see a brown harness w/ a fat white wire coming out of it. You wont see it coming down, because it is wrapped in black wire wrap. An easier way to explain it is this... look for about 4 wire bunches (4 black wraps) going up into the steering column. One is for wipers/cruise control, one if for blinkers/horn, one's for ignition wires, and ones for the Air bags. The wrap your looking for contains two wires... A solid fat white wire, and a black wire w/ a white stripe thats just a gauge smaller. (its the ground)
What i did is this:
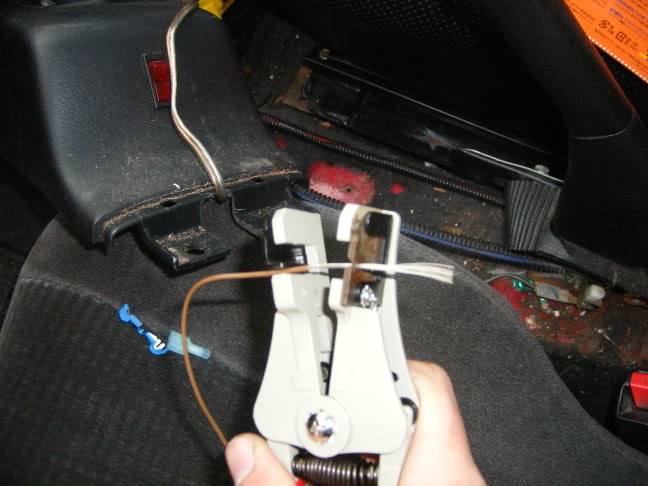
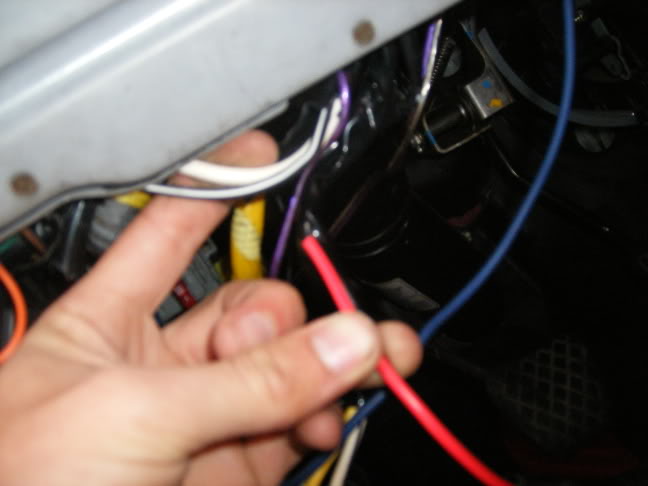
Take a razor blade, or scissors, and cut about 3 inches off of this black wrap to make your wire taping easier... Now strip the white wire. This is a large wire, so i spliced the Turbo Timer's Red wire into this, intstead of T-Tapping it. There is a better connection this way.
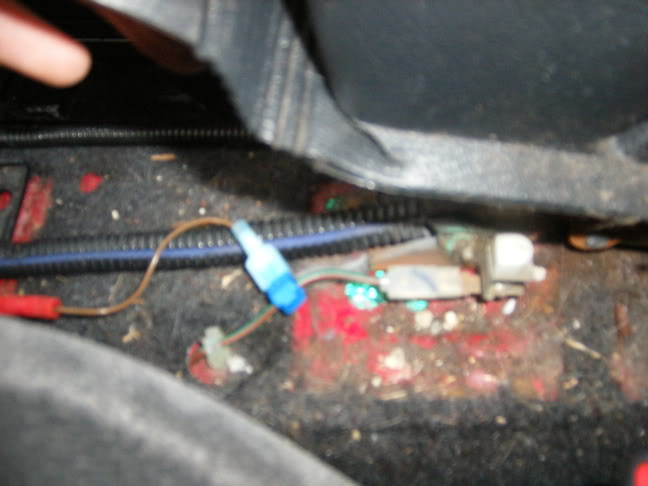
Here is a picture of the 12 volt source spliced in. You can see the white wire was just pulled down, instead of unplugged~ i thought it was easier this way. My large hands couldnt get up under the dash to unplug it anyway... (remember, i had a rats nest) afterwards, i re-wrapped it in electrical tape.
So, everything's wired up, except for the speed sensor wire (purple) from the turbo timer. Time to tuck this ---- back up w/ some zip ties~!
(in case your wondering... the mess includes the following: Keyless entry, alarm, lights for guages, electrical mess, wires from the "stock cell phone" from "Bell Atlantic", and an alarm system that i took out when i bought the car, cuz i never got the remote for it.)
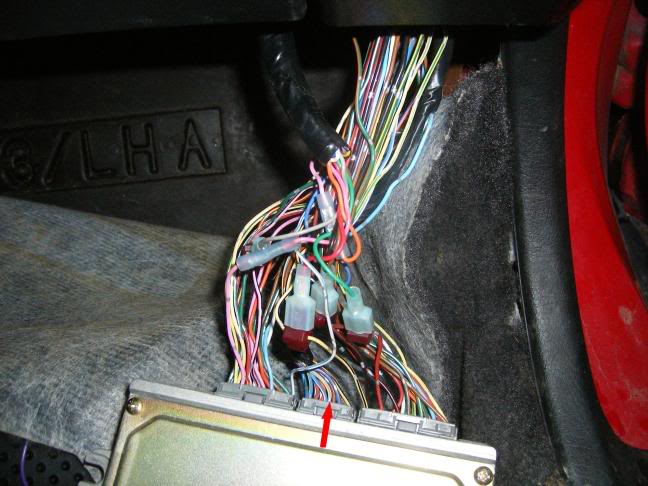
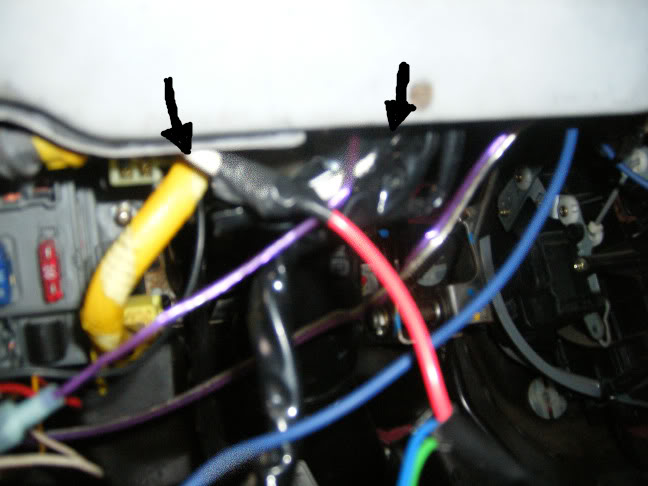
This one is fairly easy... The tap for the speed sensor (purple wire). Remove your ECU (located under the pass. side kick panel... just pull the rug back, and its 4 10mm bolts) In OBD-1 cars, there should be 3 harnesses plugged into your ECU. The speed sensor wire will be in the center harness. Specifically, slot B10... or simply... the yellow wire with the baby blue stripe. I pointed it out in the picture w/ the arrow. Its hard to see.
I didnt have it tapped yet in this picture, cuz my camera battery died, and the thunder storm was comin...
THE VERY LAST PART... is to find any bolt under or around your dash to bolt up the ground wire too... From the turbo timer, its the small black wire. I used a bolt close to the fuse box. (sorry, no picture)
But thats it~! Now put your lower dash back together... put your center console back together, put your pass. side rug and ECU back... and your all set~!
Go here to get English instructions on how to operate your GReddy turbo timer. (most come with japanese instructions)
http://www.greddy.com/tech/FATURBO_TIMER.pdf
drum roll please.... YOUR DONE!
The tools you'll need:
Wire stippers
Electrical taps (t-taps, parallel taps, etc) -i prefer these... they're fast, and re-usable.
Electrical tape
10 mm socket and extention
solder - recommended... i took the cheasy-easy way out.
philips head screw driver.
razor blade.
AND A GREDDY TURBO TIMER~!
Note: this is for a full auto turbo timer. For a simple turbo timer... simply ignore the speed sensor wire (purple)
Step one~ unplug neg. battery terminal~! Next...Find a good location for the Unit. I chose the pocket here, because it was slightly concealed, and i dont like bright blue and red LED lights in my face when drivin at night... Plus it made wiring very easy.
Step two~ feed the wires through the back of the dash so you can work w/ them.
Every electrical job goes alot easier when you have a wire stipper~!
ol: (Radio shack: $10)
First task is to hook up the Parking brake wire. This is the Brown wire from the Timer to a green wire w/ a red stripe.
You'll have to remove your center console to feed the brown Timer wire underneath. This consits of two philips screws on either side of the cup holder, and two larger philips screws under the access panel under the parking brake. If you dont know how to take the console out... stop, and have someone who knows how to wire do this project for you~!
I think i have a rat infestation under my dash.. look at this nest~!
haha, anyway... Next job is to locate the ignition wires. We're looking too hook up the timer's blue, green, and red wires.... Lets go find that ignition harness...
To get to this: there are three phillips screws to take out. Two on the left side of the steering wheel, and one on the right. If you dont know how to take this panel off... stop, and have someone who knows how to wire do this project for you~!
Here it is~! this brown one here. This is the ignition harness under your dash that is plugged into the Fuse Box. It has a yellow wire, a black w/ yellow stripe wire, and a white wire w/ black stripe... Time to T-tap into them...
Unplug the harness from the fuse box. It makes everything easier.
If you dont have a rats nest like me, you may even want to remove the whole fuse box, and drop it down some, and then unplug the brown ignition harness. Its just two 10mm bolts to drop the fuse box down.
The blue wire from the Timer is hooked up to the accessory ( ACC ) from the ignition. that would be the White one w/ black stripe.
The Green wire from the timer is hooked up to the ignition ( ON ) from the ign. harness. That's the Black wire w/ yellow stripe.
but uh-oh... where is the 12 volt source wire? ...time to go digging...
The fat solid white wire is the 12 volt source. It is pretty tricky to find. If you have a flashlight, shine it up under the dash, and look above where the fuse box was. You'll see a brown harness w/ a fat white wire coming out of it. You wont see it coming down, because it is wrapped in black wire wrap. An easier way to explain it is this... look for about 4 wire bunches (4 black wraps) going up into the steering column. One is for wipers/cruise control, one if for blinkers/horn, one's for ignition wires, and ones for the Air bags. The wrap your looking for contains two wires... A solid fat white wire, and a black wire w/ a white stripe thats just a gauge smaller. (its the ground)
What i did is this:
Take a razor blade, or scissors, and cut about 3 inches off of this black wrap to make your wire taping easier... Now strip the white wire. This is a large wire, so i spliced the Turbo Timer's Red wire into this, intstead of T-Tapping it. There is a better connection this way.
Here is a picture of the 12 volt source spliced in. You can see the white wire was just pulled down, instead of unplugged~ i thought it was easier this way. My large hands couldnt get up under the dash to unplug it anyway... (remember, i had a rats nest) afterwards, i re-wrapped it in electrical tape.
So, everything's wired up, except for the speed sensor wire (purple) from the turbo timer. Time to tuck this ---- back up w/ some zip ties~!
(in case your wondering... the mess includes the following: Keyless entry, alarm, lights for guages, electrical mess, wires from the "stock cell phone" from "Bell Atlantic", and an alarm system that i took out when i bought the car, cuz i never got the remote for it.)
This one is fairly easy... The tap for the speed sensor (purple wire). Remove your ECU (located under the pass. side kick panel... just pull the rug back, and its 4 10mm bolts) In OBD-1 cars, there should be 3 harnesses plugged into your ECU. The speed sensor wire will be in the center harness. Specifically, slot B10... or simply... the yellow wire with the baby blue stripe. I pointed it out in the picture w/ the arrow. Its hard to see.
I didnt have it tapped yet in this picture, cuz my camera battery died, and the thunder storm was comin...
THE VERY LAST PART... is to find any bolt under or around your dash to bolt up the ground wire too... From the turbo timer, its the small black wire. I used a bolt close to the fuse box. (sorry, no picture)
But thats it~! Now put your lower dash back together... put your center console back together, put your pass. side rug and ECU back... and your all set~!
Go here to get English instructions on how to operate your GReddy turbo timer. (most come with japanese instructions)
http://www.greddy.com/tech/FATURBO_TIMER.pdf
drum roll please.... YOUR DONE!


Thread
Thread Starter
Forum
Replies
Last Post


