My mad TyTe JDM Ford Escort header... Now with install pics!!


 02-10-2007, 09:17 AM
#43
1.0 BAR
Thread Starter

Join Date: Feb 2003
Location: Wisconsin
Posts: 461
thanks guy. Im happy with it. The welds coulda been a little better, but theyre not bad. I didnt burn through anywhere, but I still got good penetration, so I think It'll do fine. 
02-13-2007, 10:03 PM
#44
1.5 BAR

Join Date: Jul 2003
Location: Minnesota
Posts: 1,122
Noice! Good to see you used a piece of steel as a heat sink for the head flange.
Personally, I'd clean up the inside of the collector, a few mins w/a die grinder and you'd be set.
Personally, I'd clean up the inside of the collector, a few mins w/a die grinder and you'd be set.
02-16-2007, 12:45 PM
#45
3.0 BAR

Join Date: Apr 2005
Posts: 1,521
good job, i'm gonna have to make my buddy a mani for his f22b this spring not lookin forward to the collector, but my design (in my head) will only need to merge 2 runners right before the turbo flange.
03-30-2007, 12:26 AM
#46
1.0 BAR
Thread Starter
Join Date: Feb 2003
Location: Wisconsin
Posts: 461
major bumpage. This thing has been sitting in the closet for way too long. I finally got around to installing it, along with some other ----.
I've been a VERY busy boy lately. School has finally calmed down enough that I can get around to installing the last of my parts for the year. Things are going together VERY well, and I hope to have it up and running by the end of the weekend.
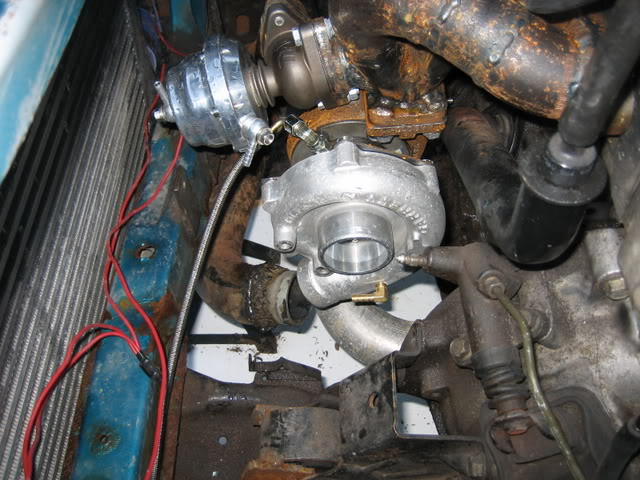
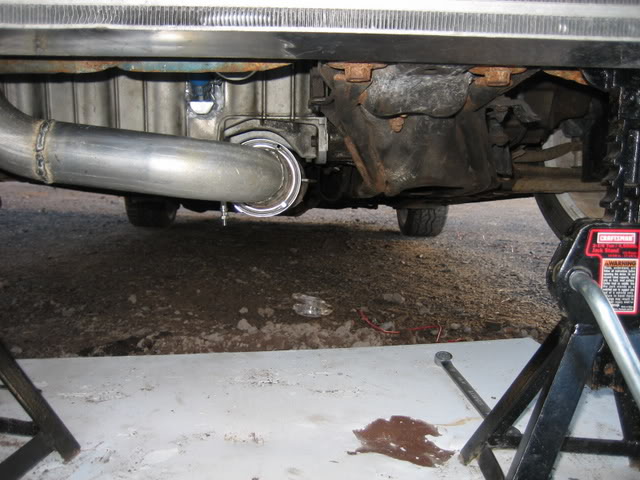
To start it off, I installed my hand built header. As you can see, it fits damned good:
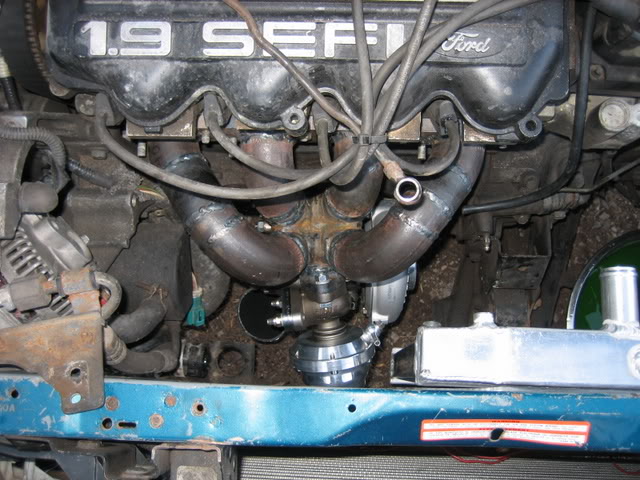
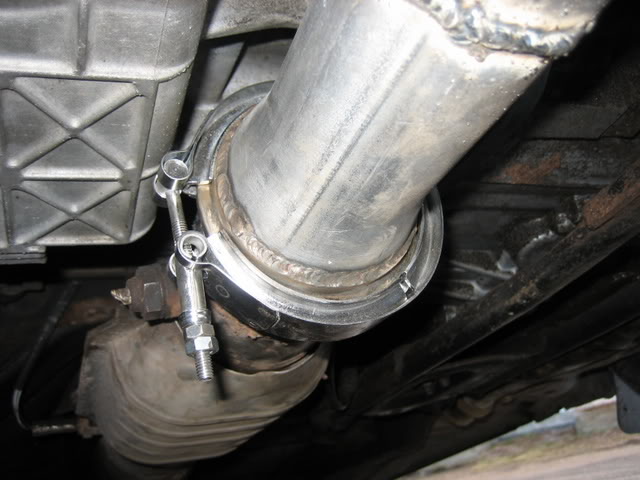
Next, I built an exaust. I found out the hard way on my last setup that a joint is VERY nice to have after the donwpipe, so I used a 3" V band, with a Cometic Gasket in the middle to make a nice, leak free seal, here is the complete mockup:
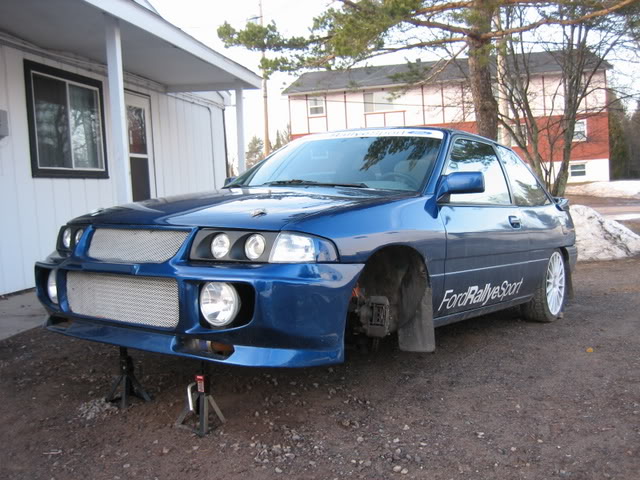
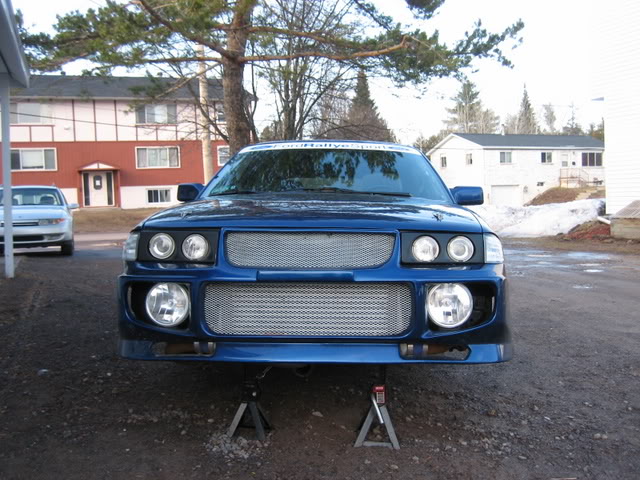
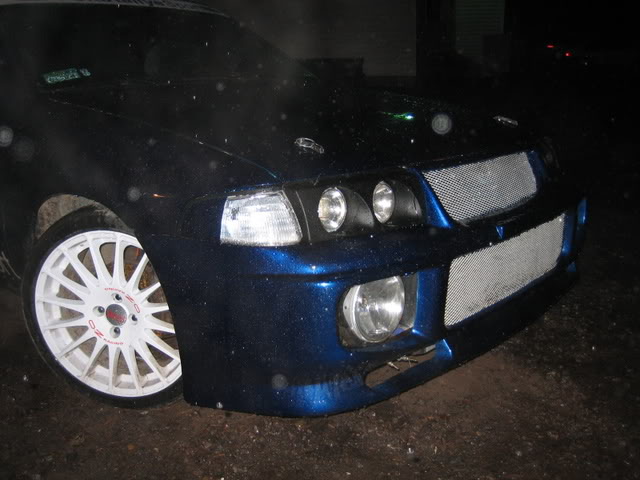
Next up, projector headlights. I orginally painted them blue to match the car, and it ended up being WAY off, since they were painted 4 months apart. So, I decided to rock them WRC rally style, and go flat black. I like the look. They are shielded projectors, so I can run HID without too much glare. I might pick up a cheap HID kit to throw in them later.
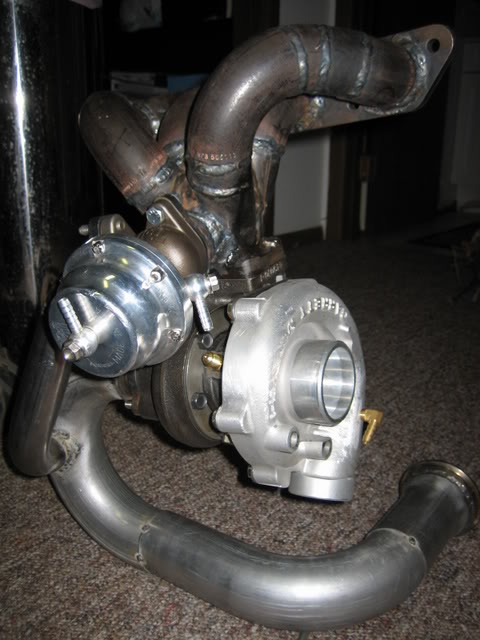
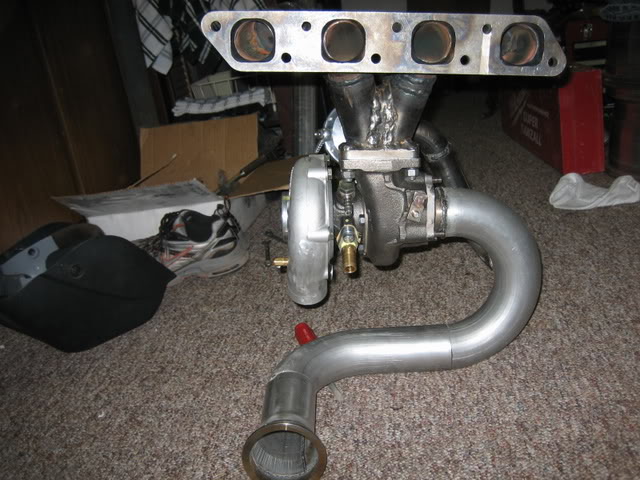
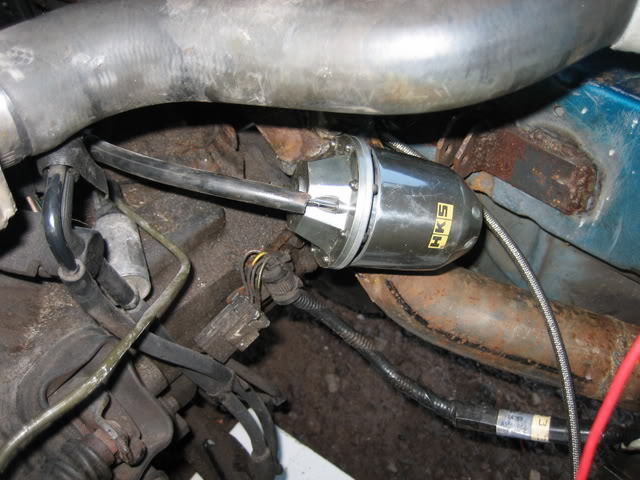
Finally ponied up and bought a GOOD BOV. A genuine HKS SSQV. I scored the beast for $75 shipped.
The best part about my new setup... The stock PCV fits!!
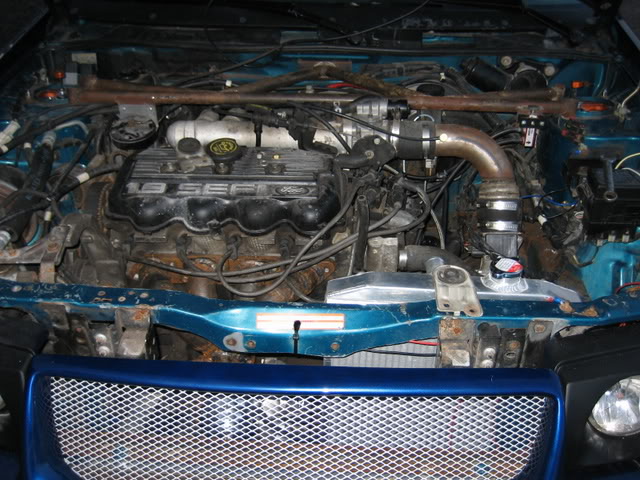
And for all of you who swore I was going to have oiling problems, she looks just fine to me:

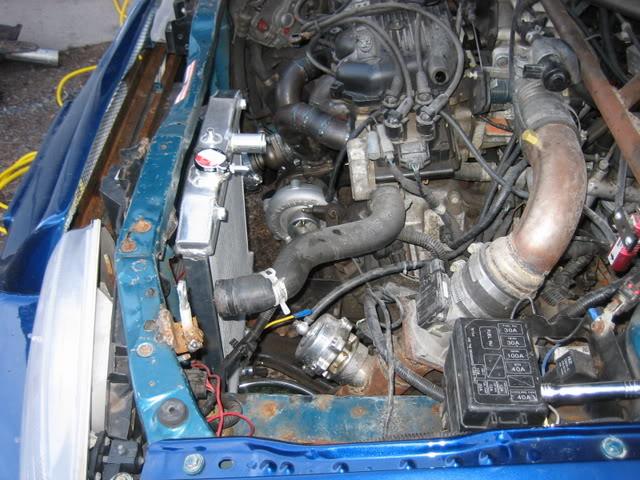
Exhaust installed, along with that nice SS V band clamp:
A civic radiator gives me all the clearance I need to make the tial wastegate fit good. However, it does require some pretty basic mods to fit perfect. First off, I reversed the flow through the radiator. The drivers side flows in the bottom, and the passengers side goes in the top. I did this for plumbing reasons. AS you can see, I used all the stock escort hardware. I reused the drivers side lower mount, and then moved the passengers side one over, and welded it to the core support. I then redrilled new holes in the top, and then cut off the spout on the bottom, and welded in a new one on the left, since the stocker hit the motor mount, and was only 1.125" in diameter, while the escort coolant lines are 1.5". I also cut out the top one, and welded in 1.5" tube in the top, only in the stock location.
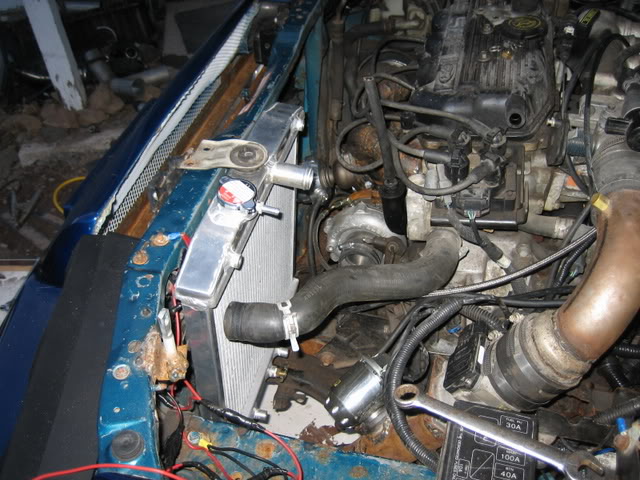


Next up, my catch can. I mounted it in the front for the best central location, making the lines as short as possible.


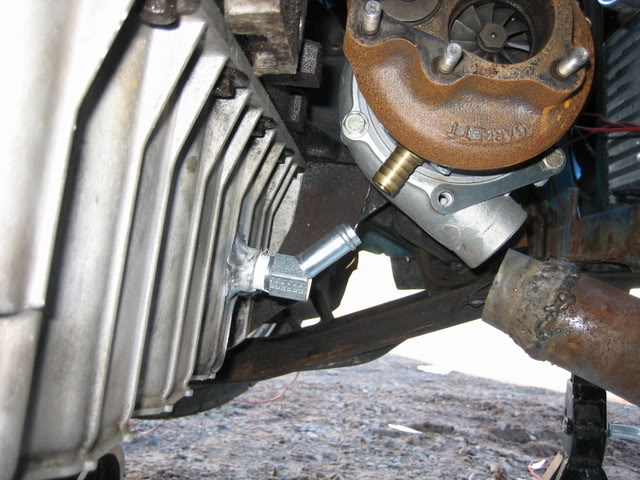
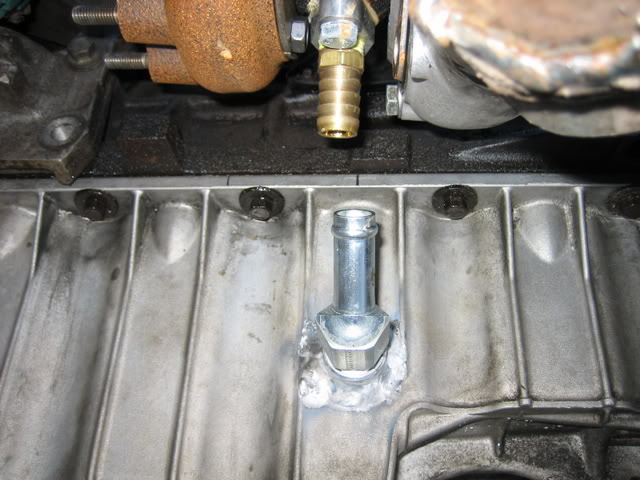
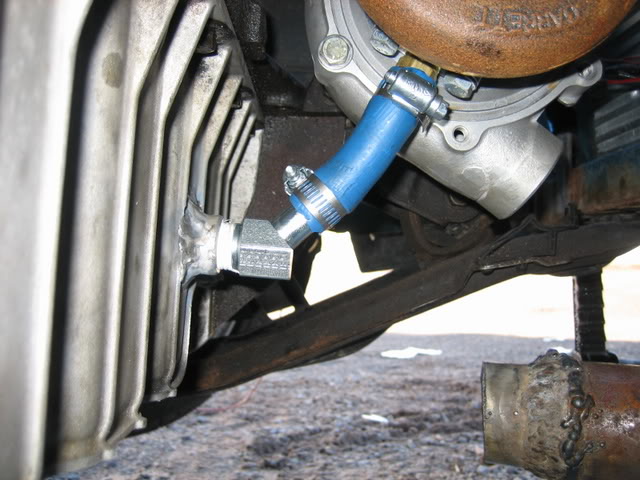
After that, I fabed up my turbo inlet. Since the turbo cam damned close to the motor mount, I had to use two elbows. The pipe is 2.5", and I welded in a nut to screw the PCV fitting into. I welded it on the outside of the radius in an effort to generate maximum vacuum, since air intake speed *Should* be greatest at that point.

Next up came the headlight mounting brackets, which were cake. The lights are easily removable, rigidly mounted, and adjustments are easily made by bending the bracket. The 4 individual light units are also spring loaded on 4 studs, enabling each one to be aimed separately.

More cooling madness. As you can see, the PCV and the intake fit nicely, and it was time to tackle the passengers side coolant line. I decided to reverse coolant flow through the radiator, since getting this line back down to the bottom of the radiator without hitting any of the exhaust would have been difficult, to put it mildly. so, I cut off the stock escort radiator host at the first 45* bend, that brings it out past the PS pump, and then this 304 stainless steel lines takes it from there. I chose 304 SS so that I should never have any problems with this line.


Next up was to finish the PCV system. I found that under boost, the stock PCV was inadiquate, and that blow by and oil consumption was still a problem, so Ive been running dual lines, one from the valve cover, and one from the stock pcv and that seems to eliminate the problems of blowby under boost. I still need to pack the can with steel wool to help the oil condense out of the crankcase vapors.


After all that, I started in on my brakes. For those of you who remember my rear full sized disc conversion, you will probably also remember the biasing was all FUBAR. Well, to remedy the problem, Im splitting the circuits front/rear, and using a biasing valve and hydraulic hand brake in cabin.


And finally, last but not least. The revamped intake manifold. I started crunching numbers, and found that a stock escort TB has a nominal Cross Sectional Area (CSA) of 1.97 inches. This does not discount the throttle shaft, which I estimate at .35 in square, for a net area of approximately 1.62 in square per TB. Now, 4 ITBs gives you 6.48 inches of net flow area at WOT... this is a 400% increase (Duh, 4 times stock) over stock flow area. Now, the problem with ITB's is that they are finicky, time consuming, hard to tune, need special vacuum lines and routing, etc. So, I started looking around and found that a mustang 4.6L TB is 65 MM nominal, for a gross flow area of 5 inches square, and a net of around 4.65. Now, NO, this is not as good as ITB's, but, Im running out of time to finish this intake, and it will still flow 325% more then the stock TB at WOT. Not to mention, it has an IAC valve, and the TPS will hopefully be plug and play. I scored a 4.6L TB for $20 shipped,and will be finishing this beast next week.


I've been a VERY busy boy lately. School has finally calmed down enough that I can get around to installing the last of my parts for the year. Things are going together VERY well, and I hope to have it up and running by the end of the weekend.
To start it off, I installed my hand built header. As you can see, it fits damned good:
Next, I built an exaust. I found out the hard way on my last setup that a joint is VERY nice to have after the donwpipe, so I used a 3" V band, with a Cometic Gasket in the middle to make a nice, leak free seal, here is the complete mockup:
Next up, projector headlights. I orginally painted them blue to match the car, and it ended up being WAY off, since they were painted 4 months apart. So, I decided to rock them WRC rally style, and go flat black. I like the look. They are shielded projectors, so I can run HID without too much glare. I might pick up a cheap HID kit to throw in them later.
Finally ponied up and bought a GOOD BOV. A genuine HKS SSQV. I scored the beast for $75 shipped.
The best part about my new setup... The stock PCV fits!!
And for all of you who swore I was going to have oiling problems, she looks just fine to me:
Exhaust installed, along with that nice SS V band clamp:
A civic radiator gives me all the clearance I need to make the tial wastegate fit good. However, it does require some pretty basic mods to fit perfect. First off, I reversed the flow through the radiator. The drivers side flows in the bottom, and the passengers side goes in the top. I did this for plumbing reasons. AS you can see, I used all the stock escort hardware. I reused the drivers side lower mount, and then moved the passengers side one over, and welded it to the core support. I then redrilled new holes in the top, and then cut off the spout on the bottom, and welded in a new one on the left, since the stocker hit the motor mount, and was only 1.125" in diameter, while the escort coolant lines are 1.5". I also cut out the top one, and welded in 1.5" tube in the top, only in the stock location.
Next up, my catch can. I mounted it in the front for the best central location, making the lines as short as possible.
After that, I fabed up my turbo inlet. Since the turbo cam damned close to the motor mount, I had to use two elbows. The pipe is 2.5", and I welded in a nut to screw the PCV fitting into. I welded it on the outside of the radius in an effort to generate maximum vacuum, since air intake speed *Should* be greatest at that point.
Next up came the headlight mounting brackets, which were cake. The lights are easily removable, rigidly mounted, and adjustments are easily made by bending the bracket. The 4 individual light units are also spring loaded on 4 studs, enabling each one to be aimed separately.
More cooling madness. As you can see, the PCV and the intake fit nicely, and it was time to tackle the passengers side coolant line. I decided to reverse coolant flow through the radiator, since getting this line back down to the bottom of the radiator without hitting any of the exhaust would have been difficult, to put it mildly. so, I cut off the stock escort radiator host at the first 45* bend, that brings it out past the PS pump, and then this 304 stainless steel lines takes it from there. I chose 304 SS so that I should never have any problems with this line.
Next up was to finish the PCV system. I found that under boost, the stock PCV was inadiquate, and that blow by and oil consumption was still a problem, so Ive been running dual lines, one from the valve cover, and one from the stock pcv and that seems to eliminate the problems of blowby under boost. I still need to pack the can with steel wool to help the oil condense out of the crankcase vapors.
After all that, I started in on my brakes. For those of you who remember my rear full sized disc conversion, you will probably also remember the biasing was all FUBAR. Well, to remedy the problem, Im splitting the circuits front/rear, and using a biasing valve and hydraulic hand brake in cabin.
And finally, last but not least. The revamped intake manifold. I started crunching numbers, and found that a stock escort TB has a nominal Cross Sectional Area (CSA) of 1.97 inches. This does not discount the throttle shaft, which I estimate at .35 in square, for a net area of approximately 1.62 in square per TB. Now, 4 ITBs gives you 6.48 inches of net flow area at WOT... this is a 400% increase (Duh, 4 times stock) over stock flow area. Now, the problem with ITB's is that they are finicky, time consuming, hard to tune, need special vacuum lines and routing, etc. So, I started looking around and found that a mustang 4.6L TB is 65 MM nominal, for a gross flow area of 5 inches square, and a net of around 4.65. Now, NO, this is not as good as ITB's, but, Im running out of time to finish this intake, and it will still flow 325% more then the stock TB at WOT. Not to mention, it has an IAC valve, and the TPS will hopefully be plug and play. I scored a 4.6L TB for $20 shipped,and will be finishing this beast next week.
03-30-2007, 12:39 AM
#47
0.0 BAR

Join Date: Dec 2003
Posts: 0
Damn... thats all I can say, damn. You did a lot of work. Whats going to be the barrier between the charge piping and the manifold? Thats awfully close. IM looks friggin pimp.
 03-30-2007, 12:47 AM
#49
1.0 BAR
Thread Starter
Join Date: Feb 2003
Location: Wisconsin
Posts: 461
lol, the elctrical tape is to hold the coolant pipe together till I can tig it tomorrow at work. The charge pipe is about 2 1/2" from the DP, it just looks close in the pictures.
03-30-2007, 01:05 AM
#50
0.0 BAR

Join Date: May 2005
Posts: 0
I nominate this as HMT build of the year.
The whole setup is HMT ballin status. The IM and ExM are awesome. The wheels really make the car look good.
I like the looks of the car too. Total rally look. What kind of suspension are going to use?


