16 gauge manifold pics
 01-02-2009, 05:40 AM
#1
0.5 BAR
Thread Starter

Join Date: Jul 2008
Posts: 132
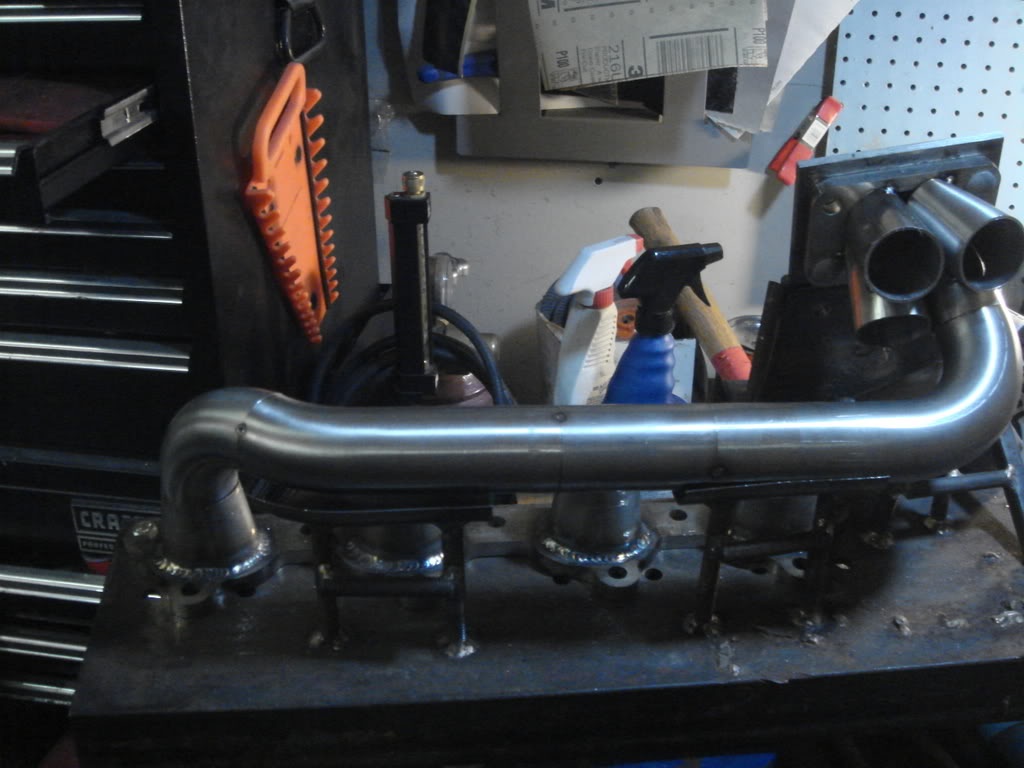
I'm building some manifolds for another shop- they've had some issues on the fab end so I am helping them out.
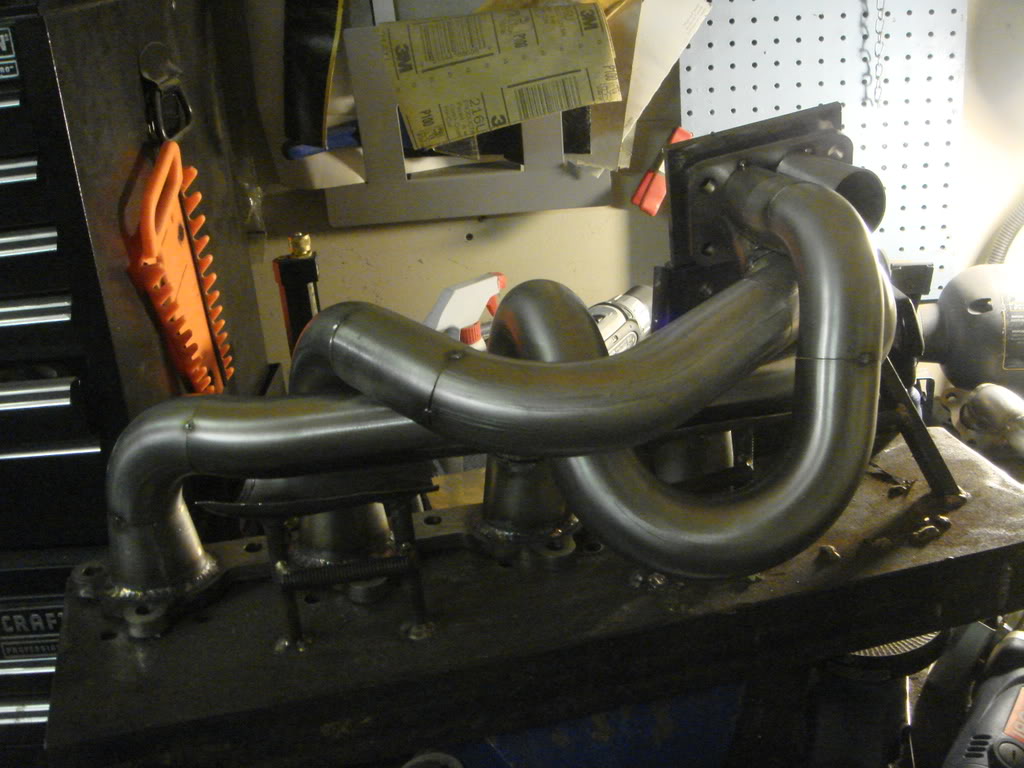
They're 1.5" 16gauge runners. Kinda weird but hey I'll try anything once.
The 16v headers are based on their design, the 8v ones will be basically my top mount design.
Anyways I don't have much to say other than that it's challenging working within the constraints of someone else's design, but I thinkI'll get things ironed out ok.
Bits for the collector:
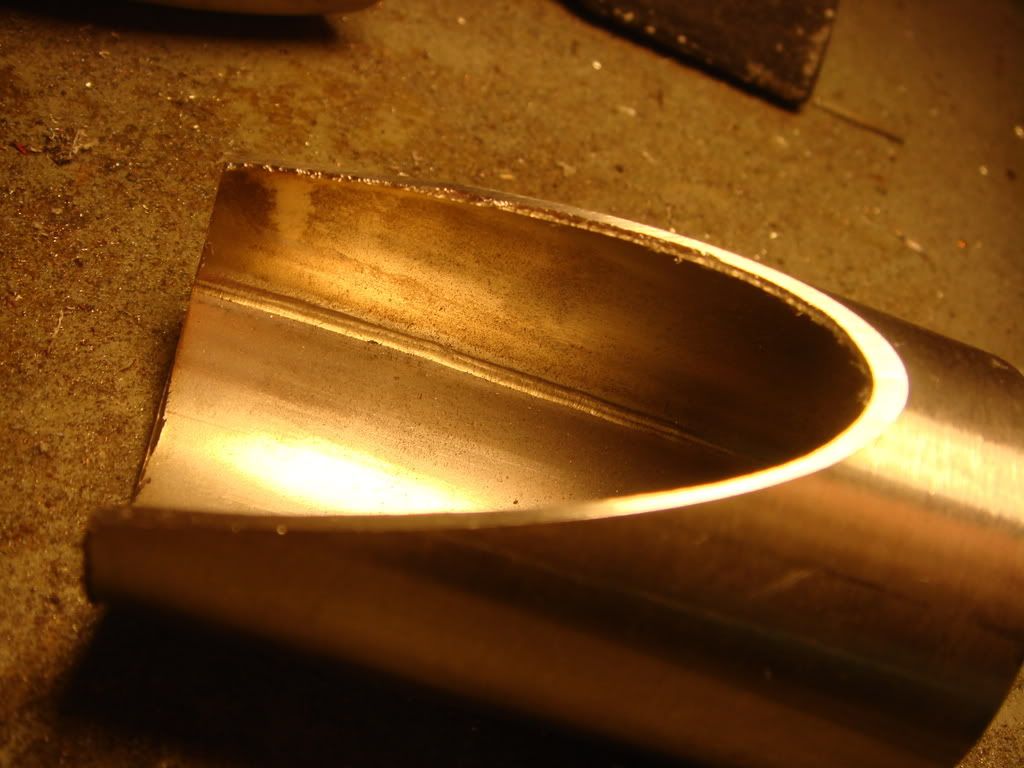
I like this one:
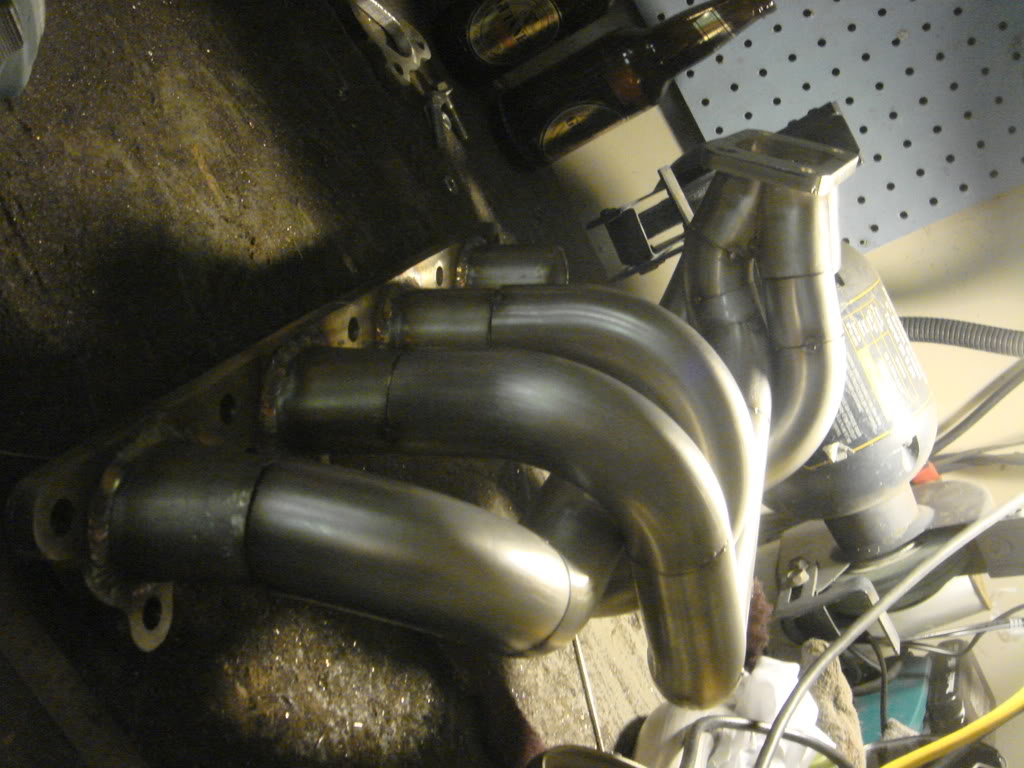
First runner tacked:
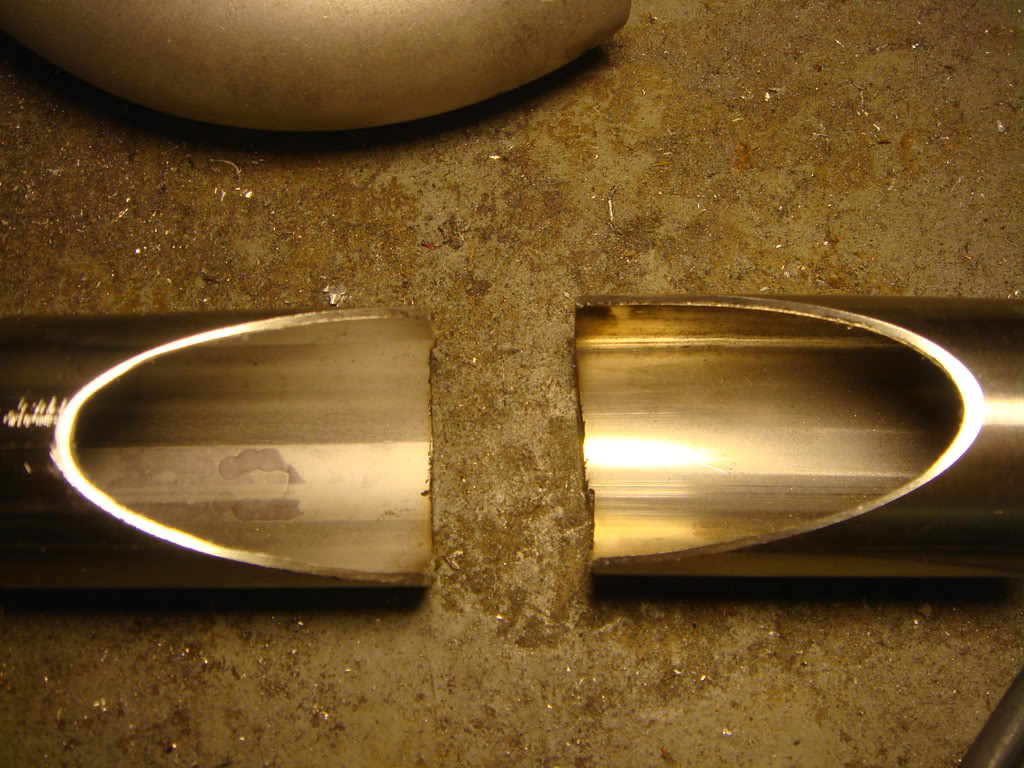
Basically I like to try to get the fitups air tight on 16ga. You mostly see sched 10 manifold on the net, and the 16ga stuff you see looks like hell. This is largely due to it being less tolerant of poor/lazy fitups.
Backpurge is a necessity IMO on 16ga and I think a lot of guys skip it, or use solarflux which pretty much blows for headers.
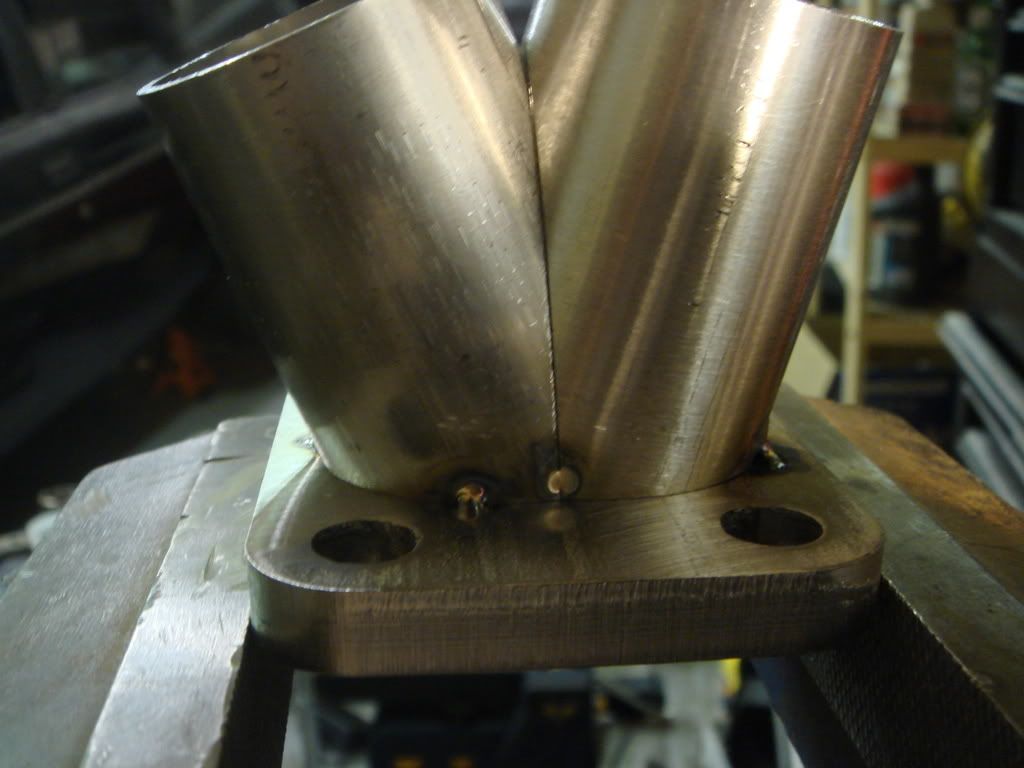
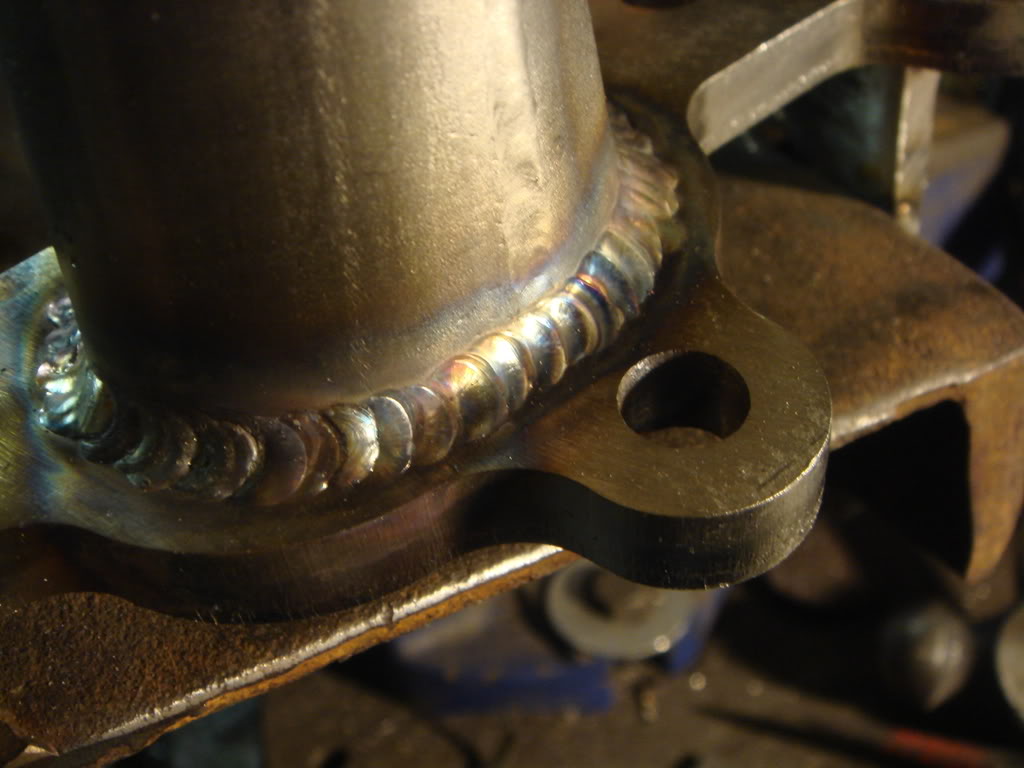
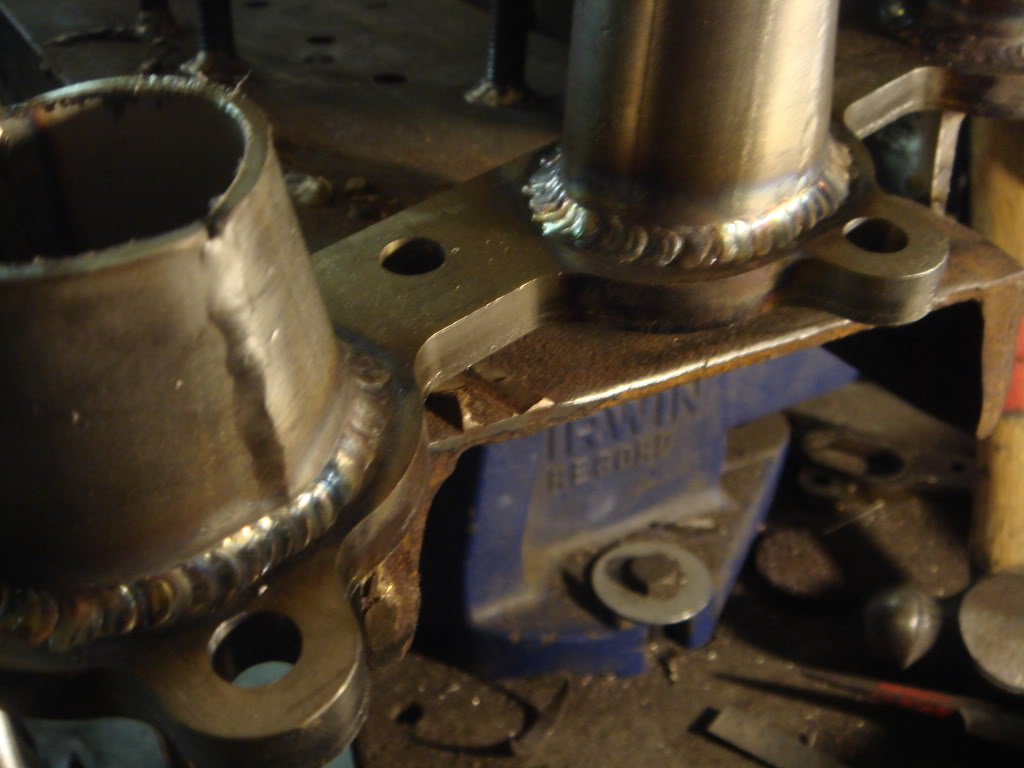
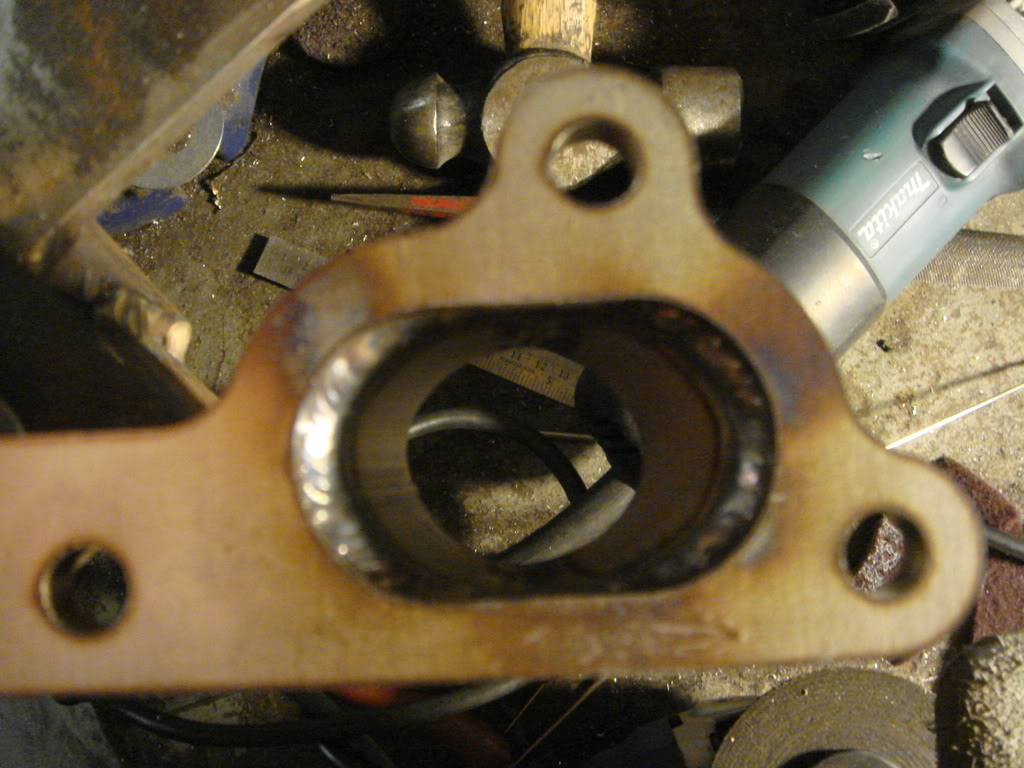
Here are some flange welds, I had to make transitions since the 16v ports are huge and the runner material is only 1.5" OD.
The welds are a bit crusty becuase I welded the inside first and had a bit of burn thru, so then the crust form that floats up into the weld on the other side. No biggie, I am pretty sure the transitions are bombproof (used 1.5" sched 10 for this because I had some and it's roughly the right size.
Into the transitions:
Well that's it for now. It's just mockup up with a standard t3 flange becuase I don't have any divided flanges right now.
They're 1.5" 16gauge runners. Kinda weird but hey I'll try anything once.
The 16v headers are based on their design, the 8v ones will be basically my top mount design.
Anyways I don't have much to say other than that it's challenging working within the constraints of someone else's design, but I thinkI'll get things ironed out ok.
Bits for the collector:
I like this one:
First runner tacked:
Basically I like to try to get the fitups air tight on 16ga. You mostly see sched 10 manifold on the net, and the 16ga stuff you see looks like hell. This is largely due to it being less tolerant of poor/lazy fitups.
Backpurge is a necessity IMO on 16ga and I think a lot of guys skip it, or use solarflux which pretty much blows for headers.
Here are some flange welds, I had to make transitions since the 16v ports are huge and the runner material is only 1.5" OD.
The welds are a bit crusty becuase I welded the inside first and had a bit of burn thru, so then the crust form that floats up into the weld on the other side. No biggie, I am pretty sure the transitions are bombproof (used 1.5" sched 10 for this because I had some and it's roughly the right size.
Into the transitions:
Well that's it for now. It's just mockup up with a standard t3 flange becuase I don't have any divided flanges right now.

 01-04-2009, 03:11 AM
#3
0.5 BAR
Thread Starter
Join Date: Jul 2008
Posts: 132
Just more boring volvo 2.3 stuff. 

Funny 80 some odd views and only one reply. If a post doesn't contain actual welds, nobody gives a ----!

Will post weld pics soon, lol. I have most of the runners done now.
Funny 80 some odd views and only one reply. If a post doesn't contain actual welds, nobody gives a ----!
Will post weld pics soon, lol. I have most of the runners done now.
01-04-2009, 05:59 AM
#4
1.0 BAR

Join Date: Dec 2005
Posts: 397
it looks like it will turn out very nice. just one question. why not just use a tube size reducer or have one made at a local exhaust shop? Then form it to the shape with a vice.
that way the whole manifold is made out of the same material?
I guess i just like if everything if the same and not out of place.
my 2 cents
that way the whole manifold is made out of the same material?
I guess i just like if everything if the same and not out of place.
my 2 cents
01-04-2009, 02:17 PM
#5
0.5 BAR
Thread Starter
Join Date: Jul 2008
Posts: 132
Yeah I know what you mean, actual formed reducers would be way nicer. This run of manifolds have significant cost and timeline restrictions, so I just kinda used what I had "laying around" - but if I end up doing more I will definitely look into that- it'd be cleaner and less work. 
01-05-2009, 12:24 AM
#6
0.5 BAR
Thread Starter
Join Date: Jul 2008
Posts: 132
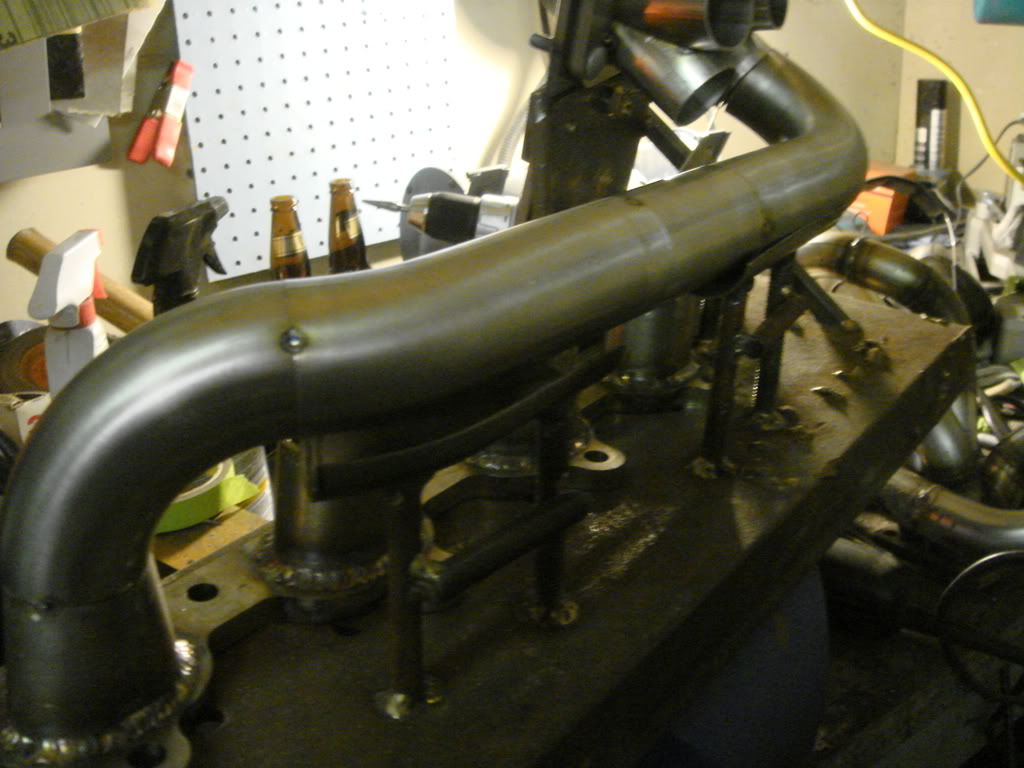
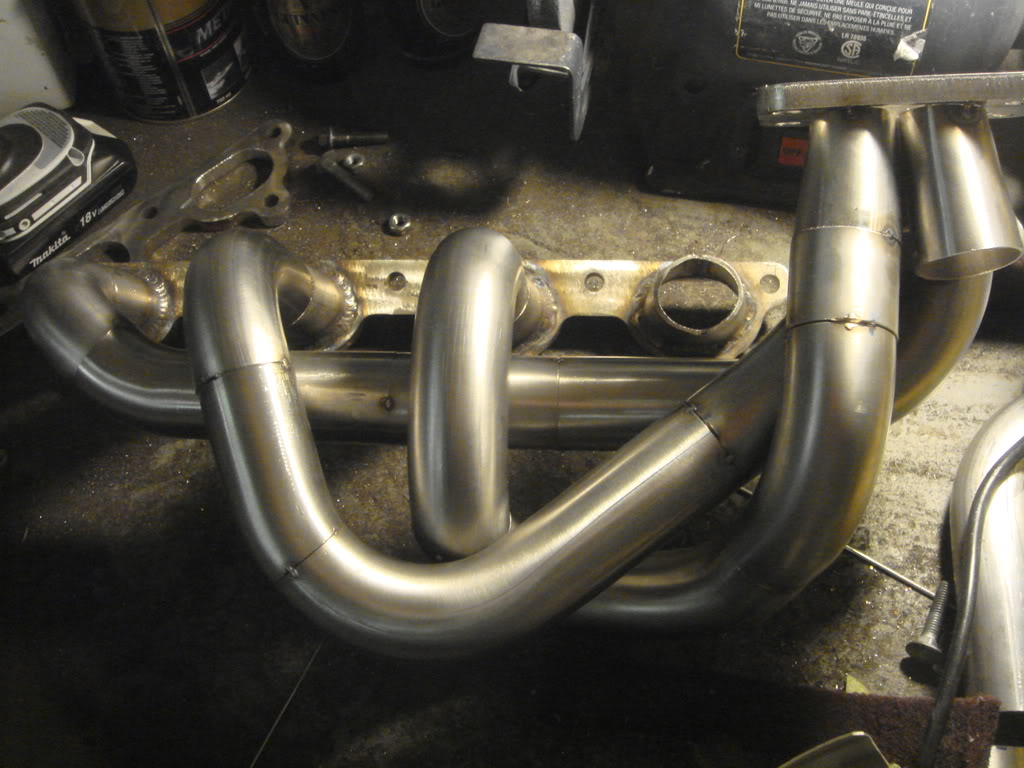
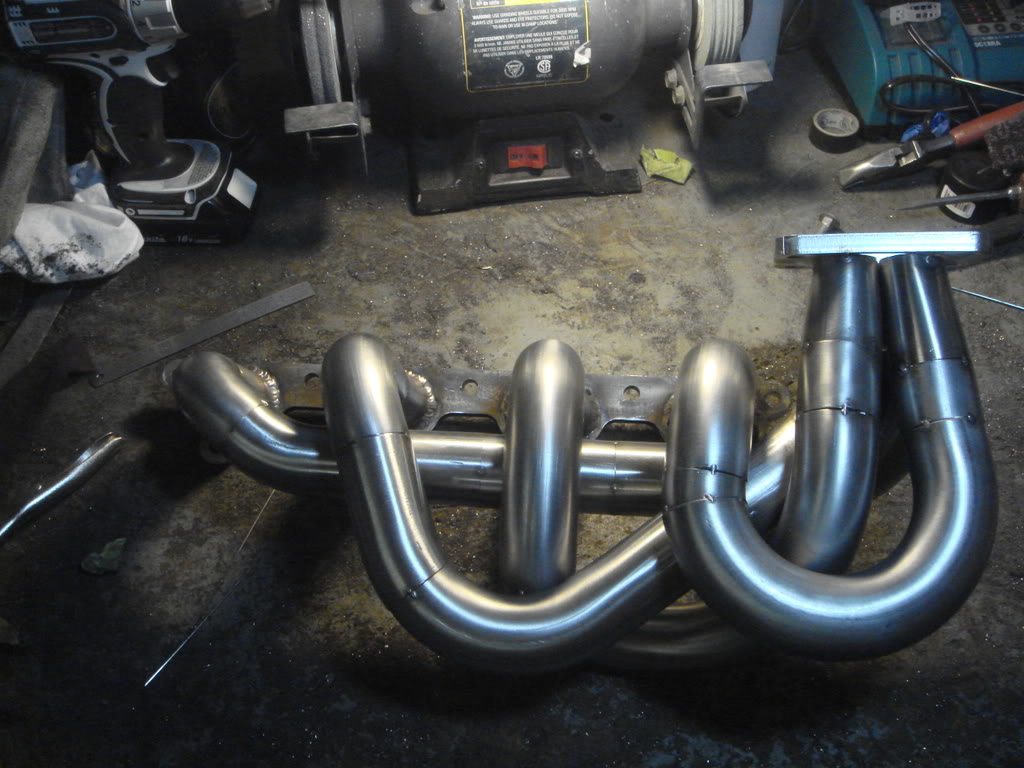
3 runners tacked. Still mulling over #1- I'm not overjoyed with how it is built as per the jig, but i have to make sure any changes to the existing design clear the coachwork so we'll see. I'll think of something.

 01-11-2009, 11:48 PM
#8
0.5 BAR
Thread Starter
Join Date: Jul 2008
Posts: 132
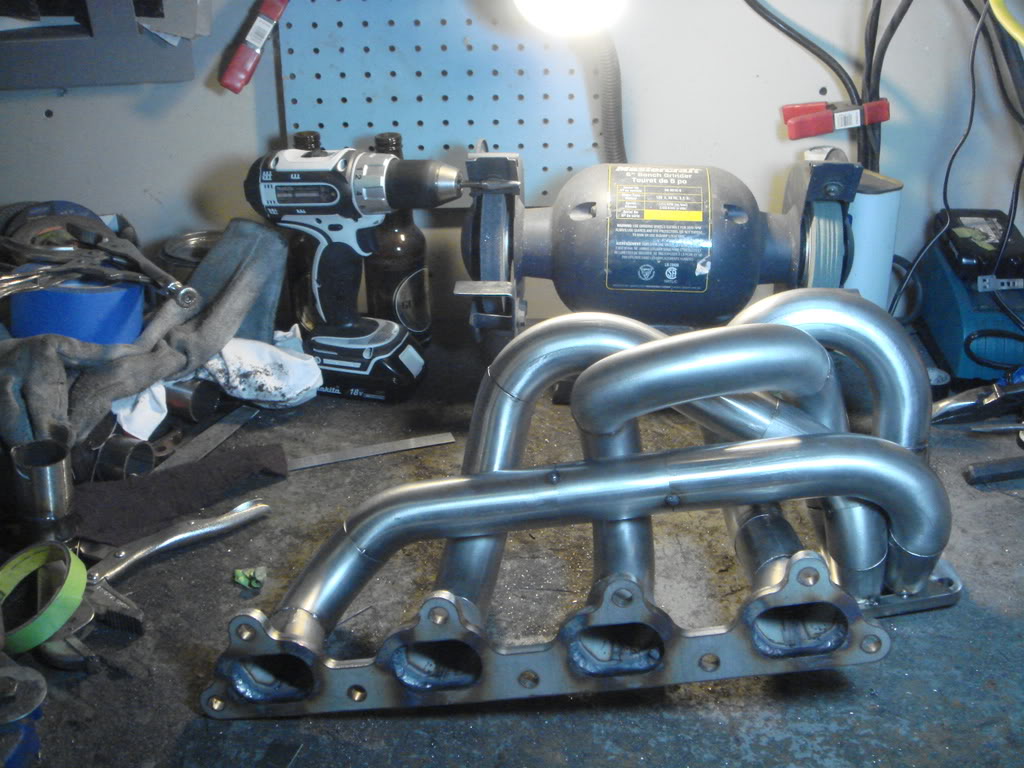
Put the #1 runner on. It's a better design than the "prototype", but I need to do a test fit at RSI to confirm it clears. I'm pretty sure it does, but assumptions like that especially like to bite you in the ***....
Welded up #3 and #4 runners too, since they aren't going anywhere. i won't weld #1 and #4 until after I do the test fit...
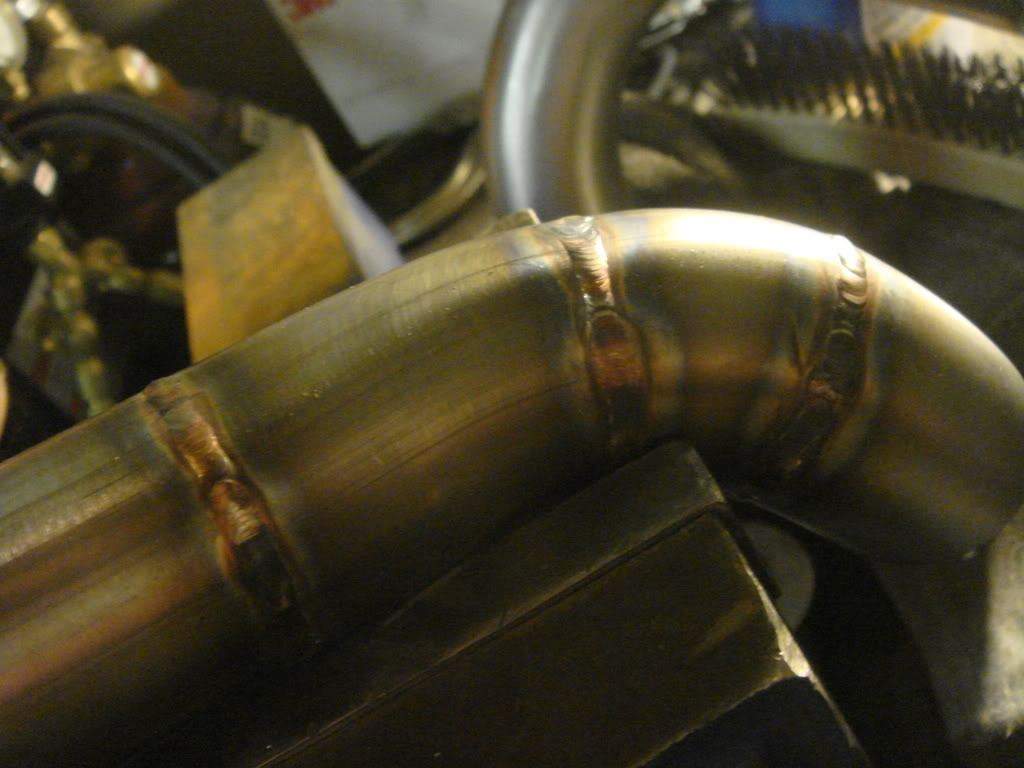
The welds are ok. Backpurging is cool. They're still a little bit grey, but not at all black and bulbbly like if you don't purge. In soe spots they're actually gold like the pipe was welded from the inside (how it's supposed to look I suppose).
So I'm happy with that part. Good gas coverage, pretty solid penetration. Inconsistent as hell though. I was using 1/16" filler- I might try a few more test welds (I did like f'ing 30) and wimp out and use 0.035". I just can't seem to find a good rythym. It's such a fine line between burning the material and getting full pen.
I know they're be way smoother with 0.035".
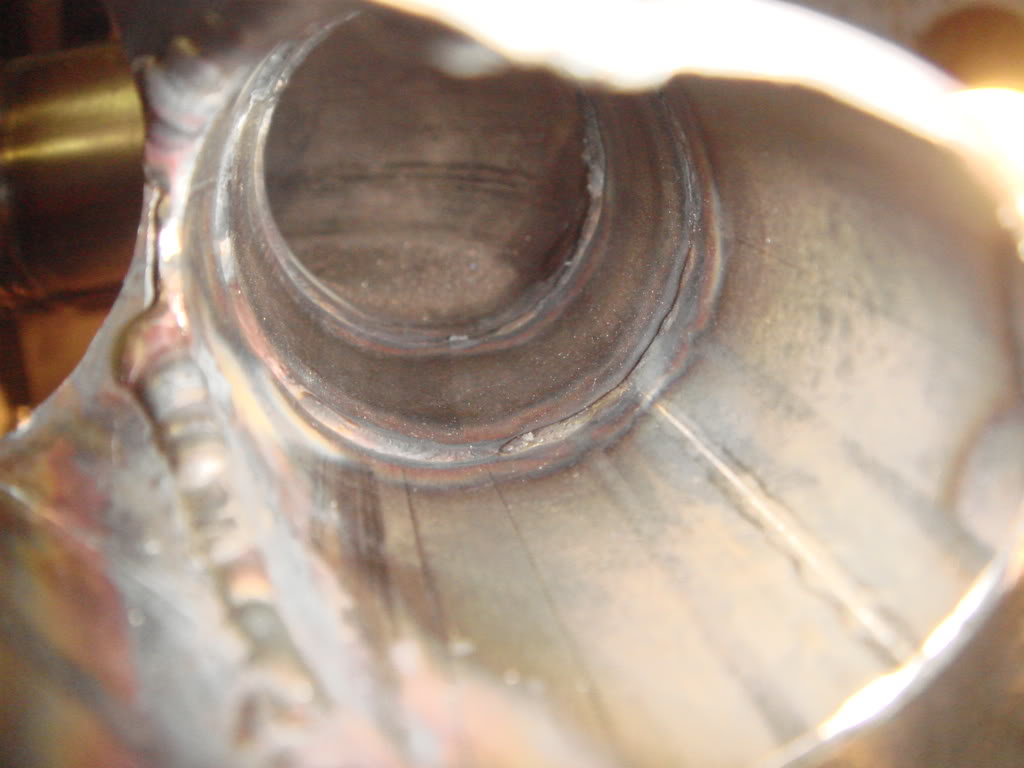
Here you can see if actually looks like the collector was welded on the inside as well *** the outside, but that's actually the bead from the outrside showing through. That is ballertastic, I was happy with that.
You can also see the pen on the inside runner welds, needs just a bit more purge, but it ain't horrible.
If you view it full size from my actual photobucket page and zoom it in, you can see the pen real good, it's cool. (http://s289.photobucket.com/albums/l...t=DSC01611.jpg)
Mediocre:
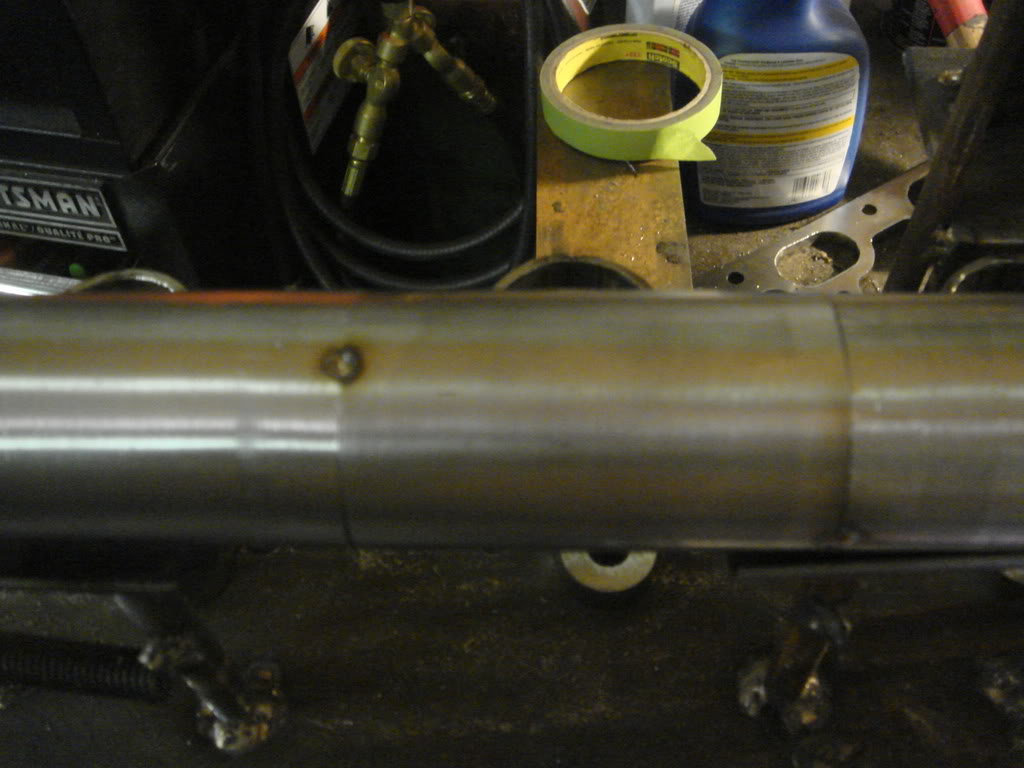
The pair of runners cleaned up, except the last weld i did attaching the one runner to thother:
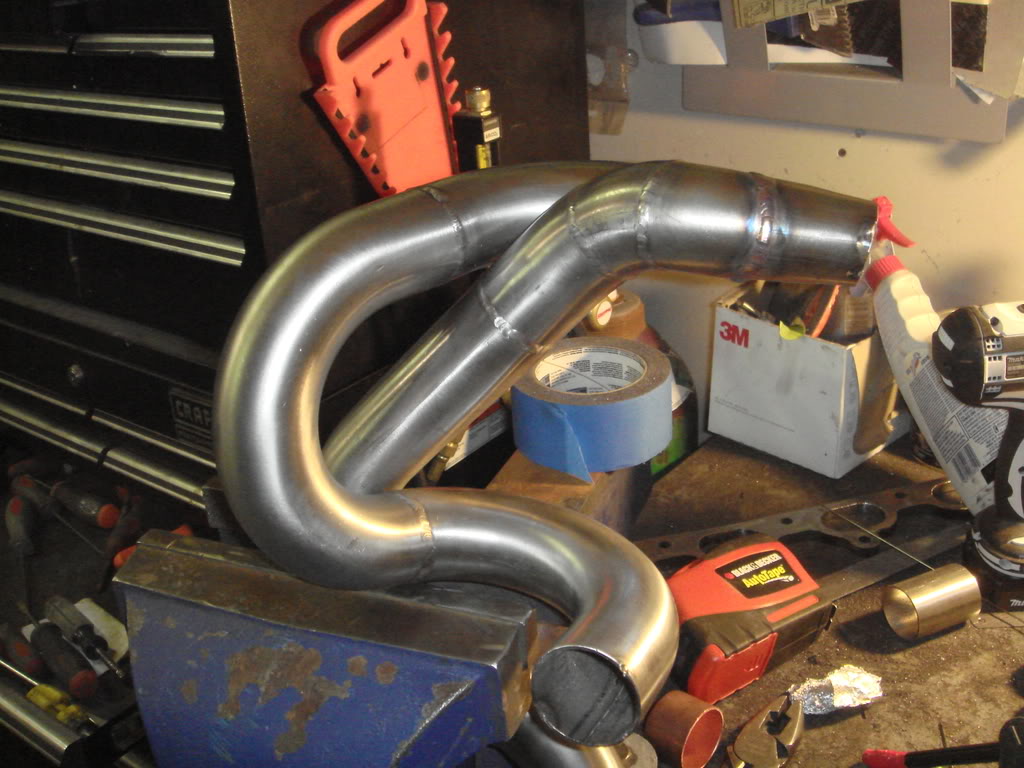
Some riceboys will tell you that cleaning the color off the welds is a way of hiding burnt welds. Maybe, but it's also good practice IMO on 16 gauge, because when you clean it, you can actually SEE the weld, you can see undercut, collap, pinholes, etc much better.
Better to be able to see and correct flaws than leave on the "color" tha is just surface oxidation anyways....
Anyways the verdict is I still really like the 16 gauge. I will get there on the consistency, otherwise it's not too hard to weld and not to hard to set up the purging.
Welded up #3 and #4 runners too, since they aren't going anywhere. i won't weld #1 and #4 until after I do the test fit...
The welds are ok. Backpurging is cool. They're still a little bit grey, but not at all black and bulbbly like if you don't purge. In soe spots they're actually gold like the pipe was welded from the inside (how it's supposed to look I suppose).
So I'm happy with that part. Good gas coverage, pretty solid penetration. Inconsistent as hell though. I was using 1/16" filler- I might try a few more test welds (I did like f'ing 30) and wimp out and use 0.035". I just can't seem to find a good rythym. It's such a fine line between burning the material and getting full pen.
I know they're be way smoother with 0.035".
Here you can see if actually looks like the collector was welded on the inside as well *** the outside, but that's actually the bead from the outrside showing through. That is ballertastic, I was happy with that.
You can also see the pen on the inside runner welds, needs just a bit more purge, but it ain't horrible.
If you view it full size from my actual photobucket page and zoom it in, you can see the pen real good, it's cool. (http://s289.photobucket.com/albums/l...t=DSC01611.jpg)
Mediocre:
The pair of runners cleaned up, except the last weld i did attaching the one runner to thother:
Some riceboys will tell you that cleaning the color off the welds is a way of hiding burnt welds. Maybe, but it's also good practice IMO on 16 gauge, because when you clean it, you can actually SEE the weld, you can see undercut, collap, pinholes, etc much better.
Better to be able to see and correct flaws than leave on the "color" tha is just surface oxidation anyways....
Anyways the verdict is I still really like the 16 gauge. I will get there on the consistency, otherwise it's not too hard to weld and not to hard to set up the purging.
01-12-2009, 02:05 PM
#9
1.0 BAR

Join Date: Jun 2008
Posts: 220
Couple tips on purging,
First, you need perfect fit up, no gaps at all. Reason being is that with a gap your back gas will be exiting the seam you are welding, the gas blowing out of the seam will create turbulence with your shielding gas from your torch, which creates a really unstable arc.
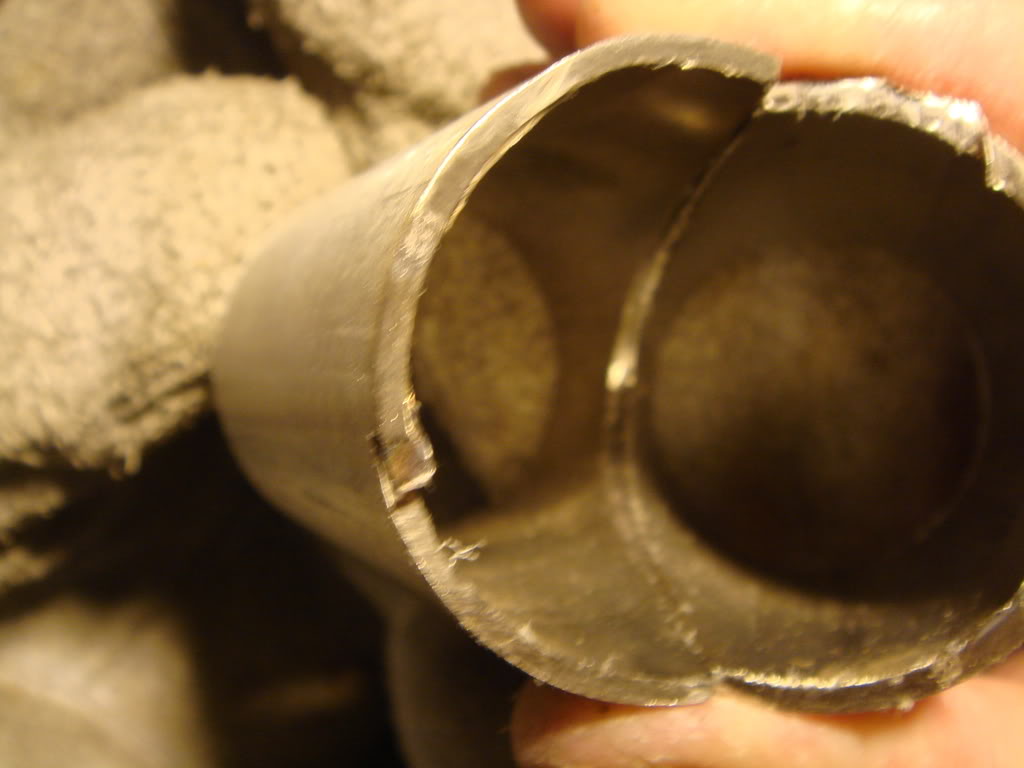
Make your fits like this:
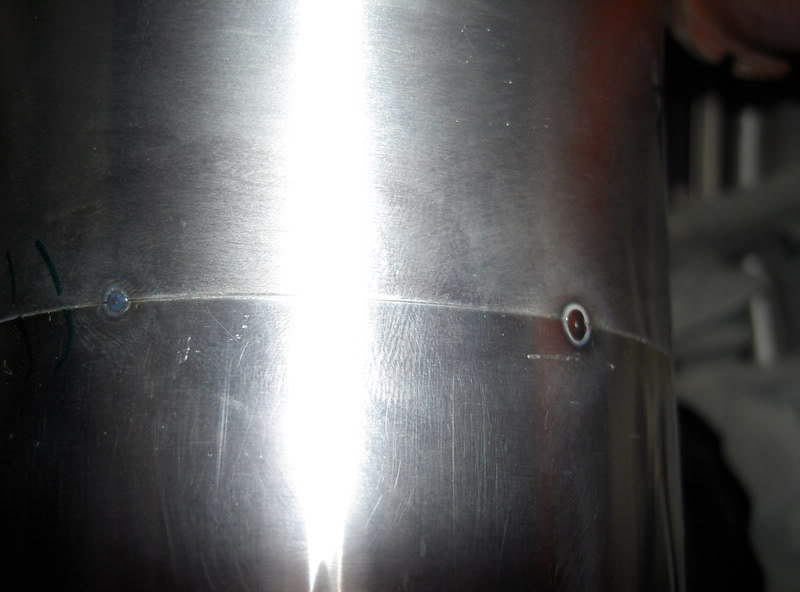
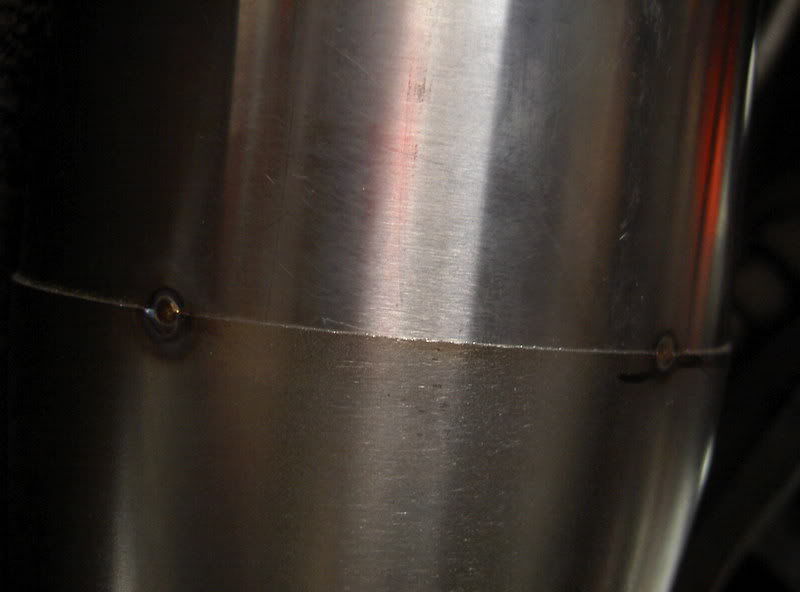
Than the next question is, how do you have your purge setup?
Right now there isn't enough gas. For 2" and smaller .065" tube I run about 10chf. Where you have the hose providing gas for your tube needs to be a tight seal, if it isn't it will be sucking oxygen into the tube. On the outlet have 1/8"-3/16" hole for your back gas to escape.
You really need to have two regulators, "T"ing off one reg is going to give you poor results.
You are bang on about the .035" filler. 1/16" filler is too big for 1/16" material, it shocks the puddle too much and is going to make your puddle really unstable and cause your arc to wander. Set the machine to about 50 amps and go at with the .035" filler
First, you need perfect fit up, no gaps at all. Reason being is that with a gap your back gas will be exiting the seam you are welding, the gas blowing out of the seam will create turbulence with your shielding gas from your torch, which creates a really unstable arc.
Make your fits like this:
Than the next question is, how do you have your purge setup?
Right now there isn't enough gas. For 2" and smaller .065" tube I run about 10chf. Where you have the hose providing gas for your tube needs to be a tight seal, if it isn't it will be sucking oxygen into the tube. On the outlet have 1/8"-3/16" hole for your back gas to escape.
You really need to have two regulators, "T"ing off one reg is going to give you poor results.
You are bang on about the .035" filler. 1/16" filler is too big for 1/16" material, it shocks the puddle too much and is going to make your puddle really unstable and cause your arc to wander. Set the machine to about 50 amps and go at with the .035" filler
01-12-2009, 09:23 PM
#10
0.5 BAR
Thread Starter
Join Date: Jul 2008
Posts: 132
Thanks dude- all of that was exactly what I was thinking.
My fitups are good enough for the most part I think, but the cap I use that fits over the tubing for the purge doesn't always fit perfectly, I bet it's totally drawing air in, that makes perfect sense.
I will make these corrections for the next 2 runners and report back.
Thanks again!
My fitups are good enough for the most part I think, but the cap I use that fits over the tubing for the purge doesn't always fit perfectly, I bet it's totally drawing air in, that makes perfect sense.
I will make these corrections for the next 2 runners and report back.
Thanks again!


